Reasons to Paint Your New Home Before Moving In

Revive Painting • March 19, 2026

Most new homeowners in Saskatoon face a choice after closing: unpack the moving truck or grab a paintbrush first. Professional painters agree that the second option makes more sense. We agree - painting your new home before moving in saves both time and money while delivering results that aren't possible once furniture fills the rooms. The reasons to paint a new house before hauling in your belongings start with pure efficiency. Without couches blocking walls or beds taking up floor space, painting contractors work faster and charge less for labor. According to real estate experts, homes with freshly painted interiors can increase their resale value by up to 5%. Painters can move freely from room to room and complete the job in fewer hours. They protect floors without navigating around your possessions.


Health matters too. Some paints contain VOCs that irritate eyes and throat when breathed in for extended periods. Painting before you move into your new home lets these compounds escape on their own, so you walk into clean air instead of chemical odors. On top of that, there's no risk of paint splatters damaging furniture or appliances that aren't there yet. You won't face the headache of moving items twice or living around tarps and ladders. Should you paint a new construction house? The answer becomes obvious when you think over how much easier it is to personalize an empty space and start fresh in a home that already feels like yours.


Practical Benefits of Painting an Empty Home


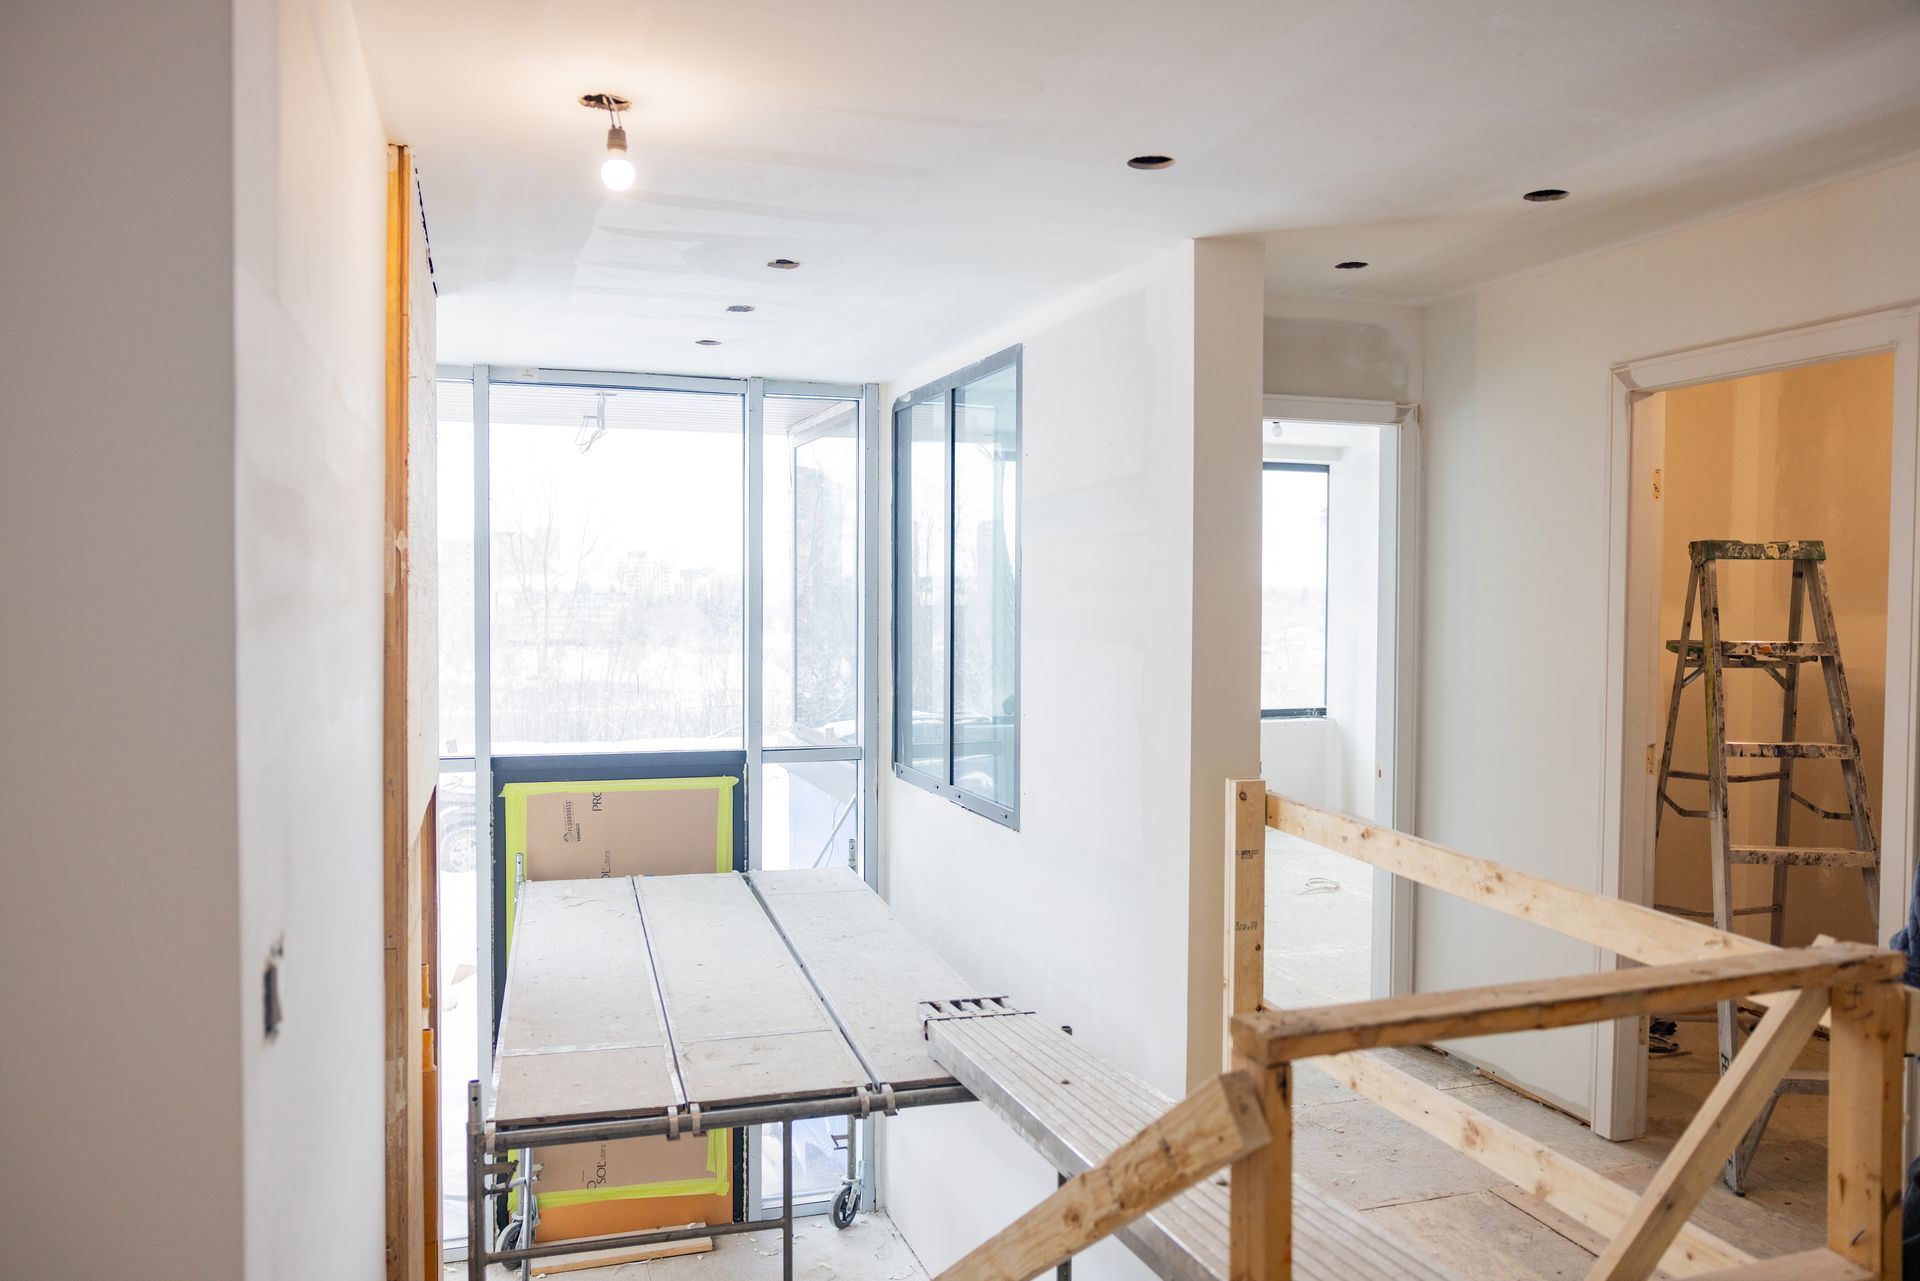
Painting an empty space reveals why professionals complete these jobs 30 to 40 percent faster than furnished ones. Painters follow the proper sequence without obstacles: ceilings first to catch drips, then walls with full roller strokes, and trim to create clean lines. This order produces polished results that look professional rather than rushed.


Preparation work shrinks when rooms sit vacant. Floors need simple covering instead of wrapping every piece of furniture in plastic. Ladders move freely to any spot without navigating around dressers or entertainment centers. Painters achieve even coverage across surfaces rather than skipping sections behind headboards or wardrobes, which happens often in occupied spaces.

The quality difference shows. Paint serves as a protective barrier for walls and shields them from moisture, dust and daily wear. Applied to bare walls, this protection starts from day one in your new home. Painted surfaces also resist allergen buildup better than bare walls and become easier to clean and maintain over time.


Empty house painting eliminates the risk of mistakes that get pricey. One slip with a roller near valuable furniture can erase any savings from delaying the project. Painting before moving in means settling into a space that looks fresh and feels complete, with walls ready to protect themselves for years ahead.


How Painting Creates Your Ideal Living Space


Color choices revolutionize bare walls into spaces that reflect who you are. Painting your new home before unpacking gives you control over every shade and finish. You won't need to work around existing furniture colors or feel rushed. Warm tones like reds and oranges create inviting, energetic atmospheres in social spaces. Cool tones such as blues and greens promote relaxation and calm in bedrooms. Neutral shades offer versatility and make rooms feel larger and more open.


The way paint interacts with light changes how spaces function throughout the day. Lighter shades reflect more sunlight and make small rooms feel airy and spacious. Darker shades create intimacy and warmth in larger areas. This interplay between color and natural light improves ambiance and gives each corner unique character.


A well-planned color scheme starts with paint and produces a unified esthetic in your new home. Complementary colors ensure flow from one room to another. This makes homes feel larger and more harmonious. Professional painting services understand how color choices influence mood. They can guide homeowners to select shades that improve daily living experiences.  Painting before moving in lets you craft an environment suited for each room's purpose. You express your personality while tapping into the full potential of your new home.


Financial and Long-Term Value Considerations


Painting your new home before moving in delivers measurable financial returns that extend well beyond the original investment. Interior painting gets an impressive 107% ROI. A CAD 4876.76 painting project can add CAD 10094.89 to your home's resale value. These numbers make the decision less about esthetics and more about strategic home investment.


The financial advantage starts with lower labor costs. Painters complete empty home projects faster and reduce the hours you pay for. Labor accounts for 75% to 95% of total painting costs, so any efficiency gains translate to substantial savings. High-quality paint requires a larger upfront investment but covers surfaces better and lasts longer. This eliminates the need for frequent repainting and reduces long-term maintenance expenses.


Homes with professional paint jobs see value increases between 2% and 5%. This boost stems from the perception of proper maintenance and move-in readiness that fresh paint creates. Real estate professionals recommend repainting every three to five years to maintain optimal condition. Painting before moving in gives you a head start on that timeline. Interior painting done right can increase home value by up to 10% in some cases, especially when neutral colors appeal to future buyers and showcase your home's best features.


A Fresh Start


Walking into your newly painted Saskatoon home for the first time carries a distinct feeling that sets the tone for everything that follows. The previous owners' memories and daily routines were embedded in those walls, but a fresh coat of paint erases those remnants. Your new home transforms from someone else's former space into a blank canvas that belongs to you.


Paint serves as more than decoration in this context. Studies show that newly painted properties boost optimism, inspiration, and creativity among occupants. The psychological effect runs deeper than esthetics alone. A renewed sense of space provides a mental lift right away and helps you shed the stress of moving. You can adopt your new chapter with clarity.


Color psychology plays a role here too. Earth tones create grounding and calming effects, while naturals offer peace. Vibrant, saturated colors energize spaces and promote warm social atmospheres. When you choose these shades before moving in, your home reflects your goals and personality from day one rather than evolving over months of delayed projects.


When you paint before unpacking, you create that move-in-ready vibe real estate professionals emphasize. You settle into a space that already feels finished, complete, and yours. This psychological foundation makes the transition smoother and helps reduce the feeling of being unsettled that often accompanies major life changes.  Contact us to get started!


newly purchased Saskatoon home
Saskatoon house with heavy snow causing paint damage
By Revive Painting April 20, 2026
How Saskatoon's Freeze-Thaw Cycle Damages Exterior Surfaces Saskatoon 's climate subjects painted surfaces to repeated expansion and contraction as temperatures swing above and below freezing, while moisture infiltration during thaw periods creates internal pressure that compromises paint adhesion and substrate integrity. Ice damming and poorly insulated attics compound these issues by creating uneven temperature zones that accelerate paint breakdown. Understanding the Freeze-Thaw Process in Saskatchewan Saskatchewan's continental prairie climate creates intense freeze-thaw conditions throughout late winter and early spring. When daytime temperatures rise above 0°C, snow melts and water penetrates into microscopic cracks in paint and siding materials. At night, temperatures frequently drop well below freezing, causing this trapped moisture to freeze and expand. This expansion exerts significant force on painted surfaces. Water expands by approximately 9% when it freezes, creating pressure that widens existing cracks and loosens paint from the substrate. The cycle repeats dozens of times each season in Saskatoon, progressively degrading exterior finishes . We see the most severe damage on south and west-facing walls where solar heating accelerates daytime thaw while overnight temperatures still plummet. North-facing surfaces experience less dramatic temperature swings but often retain moisture longer, creating different deterioration patterns. Physics of Snow Melt and Daily Temperature Swings Temperature fluctuations in Saskatoon during spring can exceed 20°C within a 24-hour period. These rapid swings cause painted surfaces to expand when warm and contract when cold. Paint films that have lost flexibility through aging cannot accommodate this movement and develop stress fractures. Snow melt introduces substantial moisture loads to building exteriors. As accumulated snow on roofs and against walls melts, water runs down surfaces and seeks entry points through compromised paint or caulking. Dark-colored paint absorbs more solar radiation, creating localized warm spots that accelerate melt rates and increase moisture exposure. The combination of thermal stress and moisture creates ideal conditions for paint failure . Substrates like wood absorb water during thaw periods and then contract as temperatures drop, creating a mechanical pumping action that forces paint away from the surface. Common Exterior Paint Failures During Thaw Cycles Peeling and blistering are the most visible signs of freeze-thaw damage. Moisture trapped beneath the paint film expands when frozen, breaking the bond between paint and substrate. We observe peeling starting at edges, seams, and areas where water naturally collects. Cracking and alligatoring develop when paint loses elasticity and cannot flex with temperature changes. These patterns create a network of fissures that allow more moisture penetration, accelerating deterioration. Chalking and fading occur as freeze-thaw cycles break down paint binders. The surface becomes powdery and color pigments degrade, particularly on surfaces with maximum sun exposure. Wood substrates show rot and decay when compromised paint allows sustained moisture contact. We identify this by soft spots, discoloration, or visible fungal growth beneath failing paint. Impact of Poorly Insulated Attics and Ice Damming Poorly insulated attics create temperature differentials that contribute to ice damming on roof edges. Heat escaping through inadequate insulation warms roof surfaces, melting snow that then refreezes at cooler eaves. This ice buildup forces water under shingles and behind fascia boards, saturating painted trim and soffits. Ice damming causes water to pool against exterior surfaces for extended periods. This prolonged exposure allows deep moisture penetration into paint and substrate materials. We find that homes with ice damming consistently show accelerated paint failure on eaves, fascia, and upper wall sections. The freeze-thaw damage from ice damming extends beyond roof lines. Overflowing gutters and ice buildup direct water onto wall surfaces not designed for heavy moisture exposure, creating premature paint breakdown and potential structural damage to underlying materials. Warning Signs You Need to Repaint After a Freeze-Thaw Season Saskatoon's freeze-thaw cycles leave visible marks on exterior paint that signal when protection has failed. We can spot these issues by examining paint surfaces, tracking moisture patterns after snow melt, and checking how water moves away from our homes. Cracking, Peeling, and Bubbling Paint Cracking appears when paint loses flexibility during repeated expansion and contraction. We see hairline cracks that run horizontally along siding or larger splits that expose bare wood or substrate underneath. Peeling starts at edges where moisture works behind the film. South and west walls show this first because UV weakens the bond before winter stress arrives. When we spot paint lifting in sheets or curling at seams, the coating no longer protects what's beneath. Bubbling forms when trapped moisture turns to vapor or ice crystals push the film outward. These blisters feel soft when pressed and often cluster near joints, bottom courses of siding, or areas where snow piles against walls. Once bubbles break open, water enters freely and accelerates decay. Discoloration, Stains, or Fading After Snow Melt Vertical streaks and rust-colored stains appear when snow melt carries dirt, salts, and oxidized metals down painted surfaces. We notice these marks most clearly in spring when snow banks recede and reveal what winter left behind. Fading shows up as uneven color, especially on south-facing walls that take the most sun. Chalky residue on our fingers when we touch the surface means the binder has broken down. This powder no longer holds pigment in place or sheds water effectively. Water stains near the foundation or around windows indicate where moisture sat too long during thaw cycles. Dark patches on stucco or wood signal that the substrate stayed wet and the paint barrier failed. Moisture Intrusion and Its Effects on Exterior Paint Moisture travels into gaps opened by freeze-thaw movement. We find it behind paint at caulk lines that have pulled away, at the bottom of siding where end grain absorbed meltwater, and where flashing no longer diverts rain. Paint blisters, softens, or loses adhesion when water sits between the coating and substrate. Wood begins to rot, stucco develops efflorescence, and metal corrodes. These problems spread quickly once moisture breaches the film. We check shaded elevations and north walls that dry slowly after snow melt. Damp spots that remain visible days after rain or thaw tell us water is trapped and moving through the wall assembly. Addressing Drainage Issues: Downspouts, Sump Pumps, and Floor Drains Downspouts must carry water at least 1.8 meters away from the foundation. When they dump near walls, splash-back soaks lower siding and paint fails at the bottom courses. We inspect extensions after spring thaw to ensure they remain connected and grade properly. Properly functioning sump pumps and floor drains keep basements dry, which protects interior conditions that affect exterior paint performance. High indoor humidity from a failing sump pump migrates outward through walls and pushes paint off from behind. Snow melt pooling near the house signals grading problems or clogged drains. We look for: Ice dams at eaves that force water under paint Standing water against foundation walls Downspout discharge frozen or blocked Grade sloping toward the building instead of away When drainage fails, paint takes on more moisture than it was designed to handle and deteriorates within one or two freeze-thaw seasons. Is this your home? Let us know! Contact us today to help.
repainting team in Saskatoon
By Revive Painting April 10, 2026
Defining a Full Repaint vs. Touch-Ups: What's the Right Approach? A full repaint covers your entire exterior with fresh coats of paint, while touch-ups address specific areas of damage or wear. The right choice depends on the extent of damage, your budget, and how long you expect the results to last. What a Full Repaint Involves A full repaint means applying a fresh coat of paint to your entire exterior surface. This process typically starts with thorough surface preparation, including power washing, scraping off loose or peeling paint , and sanding rough areas. Your painter will prime any bare wood or damaged areas before applying two coats of high-quality exterior paint . For commercial painting projects, this might also include coordinating colors across multiple buildings or sections. The process takes significantly more time than touch-ups. Expect anywhere from several days to a few weeks depending on your home's size and the weather conditions. Full repainting delivers uniform color and sheen across all surfaces. You won't see any mismatched areas or color variations that often occur with touch-ups. This approach also provides maximum protection against weather, moisture, and UV damage. Understanding Touch-Up Painting Touch-up painting targets isolated areas where damage has occurred. This includes small sections with chipping, peeling, or fading paint. The process involves cleaning the damaged area, scraping away loose paint, and feathering the edges. You then apply primer to any bare spots and carefully paint over the repair with matching paint. The biggest challenge with touch-ups is color matching. Even if you have leftover paint from your original job, weathering and UV exposure cause exterior paint to fade over time. Your touch-up may stand out against the surrounding surface. Touch-ups work best when your overall paint job is less than five years old and damage is limited to a few small areas. They make sense for minor scrapes, small chips from hail or debris, or isolated peeling around specific trim pieces. Cost Comparison: Full Repaint vs. Touch-Ups Touch-ups cost substantially less than full repainting in the short term. Small repair jobs might run a few hundred dollars, while a complete exterior repaint can cost several thousand depending on your home's size. However, cost comparison becomes more complex when you factor in longevity. Touch-ups on aging paint often fail within a year or two, requiring repeated repairs. You might end up spending more on multiple touch-up sessions than you would have on one complete repaint. Full repainting delivers better value for your investment in these situations: Paint is over 8-10 years old Damage covers more than 20% of surfaces You're planning to sell and need to maximize curb appeal Color has faded unevenly across different exposures Touch-ups make financial sense when paint is relatively new, damage is minimal, and you don't need perfect color consistency for first impressions. Key Signs Your Exterior Needs a Complete Repaint When paint starts to fail across multiple areas of your home, touch-ups won't solve the underlying problem. Widespread fading, peeling that exposes bare substrate, or moisture damage indicate your exterior has reached the end of its protective lifespan and needs full attention. Fading, Chalky, and Uneven Colour Paint fade happens when UV rays break down the pigments and binders in your exterior coating. You'll notice this most on south and west-facing walls that receive the heaviest sun exposure throughout the day. Chalking occurs when the paint's surface deteriorates into a powdery residue. Run your hand along the siding—if you see a dusty film on your palm, the protective layer has degraded. This is a clear sign the coating can no longer shield your home from the elements. Color inconsistency across different elevations tells you that some sections have aged faster than others. When touch-ups can't blend properly because the existing paint has faded too much, you're looking at a full repaint. Trying to match new paint to severely weathered surfaces creates a patchy appearance that draws attention rather than fixes it. Peeling Paint, Flaking, and Paint Failure Peeling paint is the most obvious indicator of complete paint failure. When paint loses adhesion and lifts away from the surface in curls or sheets, moisture has gotten behind the coating. This exposes your siding or trim to direct weather damage. Flaking paint appears as small chips breaking off the surface. Unlike minor cracking, flaking indicates the bond between paint layers or between paint and primer has broken down. This type of failure spreads quickly once it starts. When you see bare substrate showing through in multiple locations, your paint system has stopped protecting your home. Wood, fiber cement, or other materials left exposed will deteriorate rapidly. A full repaint with proper primer application is necessary to restore the protective barrier your exterior needs. Moisture Problems: Mildew, Wood Rot, and Biological Growth Mildew and biological growth appear as dark stains or fuzzy patches on painted surfaces. These organisms thrive where moisture intrusion has compromised the paint's ability to shed water. The growth itself can eat through paint and damage the surface beneath. Wood rot develops when moisture reaches bare or poorly protected wood. You'll notice soft spots, crumbling edges, or areas that feel spongy when pressed. Once rot sets in, siding repair becomes necessary before any painting begins. Moisture problems reveal themselves through bubbling paint, water stains, or persistent dampness after rain. These issues require an honest assessment of both the paint system and the underlying materials. Surface prep must address all moisture damage, or new paint will fail just as quickly. When Surface Prep and Repairs Matter Most Paint age determines how much scraping and prep work your exterior needs. Paint older than 10-12 years typically requires extensive preparation across the entire surface, not just problem spots. The coating has weathered to the point where partial fixes won't hold. Surface prep becomes critical when you're dealing with multiple layers of old paint, especially if previous coats are peeling or incompatible. Proper scraping removes all loose material down to a sound surface. Skipping this step means new paint has nothing stable to grip. Siding repair must happen before painting begins. Rotted boards, damaged trim, or failing caulk joints need replacement or restoration. Painting over these issues only hides them temporarily while the damage continues underneath. When Touch-Ups or Partial Repaints Are Enough Touch-up painting and partial repaints make sense when damage is isolated and your existing paint film remains in good condition. The key is knowing which situations call for spot repairs versus a complete exterior overhaul. Dealing with Localized Damage Touch-ups work best for small areas of damage that haven't spread across your siding. Look for isolated chips from hail, scratches from branches, or minor blistering in contained spots. These repairs typically cover less than 10% of a single wall surface. You can address localized damage effectively when the surrounding paint shows no signs of chalking, cracking, or severe fading. The existing coating should feel smooth and intact, not brittle or flaking. Check that the damage hasn't penetrated through multiple paint layers to bare substrate. Impact damage from lawn equipment, bike handles, or sports equipment represents ideal candidates for touch-ups. Similarly, areas around recently replaced trim boards or patched siding sections need only spot treatment when the rest of the wall remains sound. Color Matching and Partial Wall Repairs Color matching becomes challenging once exterior paint ages beyond two to three years. UV exposure causes gradual fading that you might not notice until you apply fresh paint next to it. West-facing walls experience the most severe fading due to intense afternoon sun exposure. Factors affecting color matching success: Paint age : Paint less than 2 years old matches more reliably Sheen level : Flat finishes blend better than satin or semi-gloss Sun exposure : North-facing walls retain color better than southern or west-facing walls Original paint quality : Premium paints fade more uniformly You should consider repainting entire walls rather than spot-treating when repairs exceed a few square feet. Paint stores can color-match aged paint, but the fresh coating will still have different reflective properties than weathered surfaces. This creates noticeable patches even when the color appears identical in the can. Material Considerations: Siding Types and Paint Longevity Different siding materials hold paint for varying lengths of time, affecting whether touch-ups remain viable. Fiber cement siding typically holds paint 12-15 years and accepts touch-ups well throughout its lifespan. Wood siding requires more frequent attention but responds favorably to partial repairs when properly prepared. Vinyl siding doesn't need paint but can be painted. Once painted, it tends to peel in sheets rather than isolated spots, making touch-ups ineffective. Aluminum siding holds paint 8-10 years and can be touched up successfully if the underlying metal hasn't corroded. Wood siding shows the most variation. Cedar and redwood contain natural oils that can bleed through touch-ups if you don't apply proper primer. Pine and fir accept touch-ups more readily but may show texture differences between old and new paint layers. Risks of Delaying or Skipping a Full Repaint Choosing touch-ups when you need full repainting accelerates overall deterioration. Unprotected areas continue degrading while you maintain small sections, leading to substrate damage that increases future repair costs. Wood rot, moisture intrusion, and insect damage spread from exposed areas. You risk doubling your expenses when inadequate touch-ups fail within 1-2 years. The paint film surrounding your repairs continues aging, creating new problem areas that require attention. This cycle of repeated partial fixes costs more than addressing the entire surface at once. Failed touch-ups also create adhesion problems for future coatings. Multiple paint layers of different ages bond differently to the substrate, causing premature peeling when you eventually repaint. Your contractor must then spend additional time sanding and scraping these problematic transitions. Let us help! Contact us today to tell us the scenario of your home.