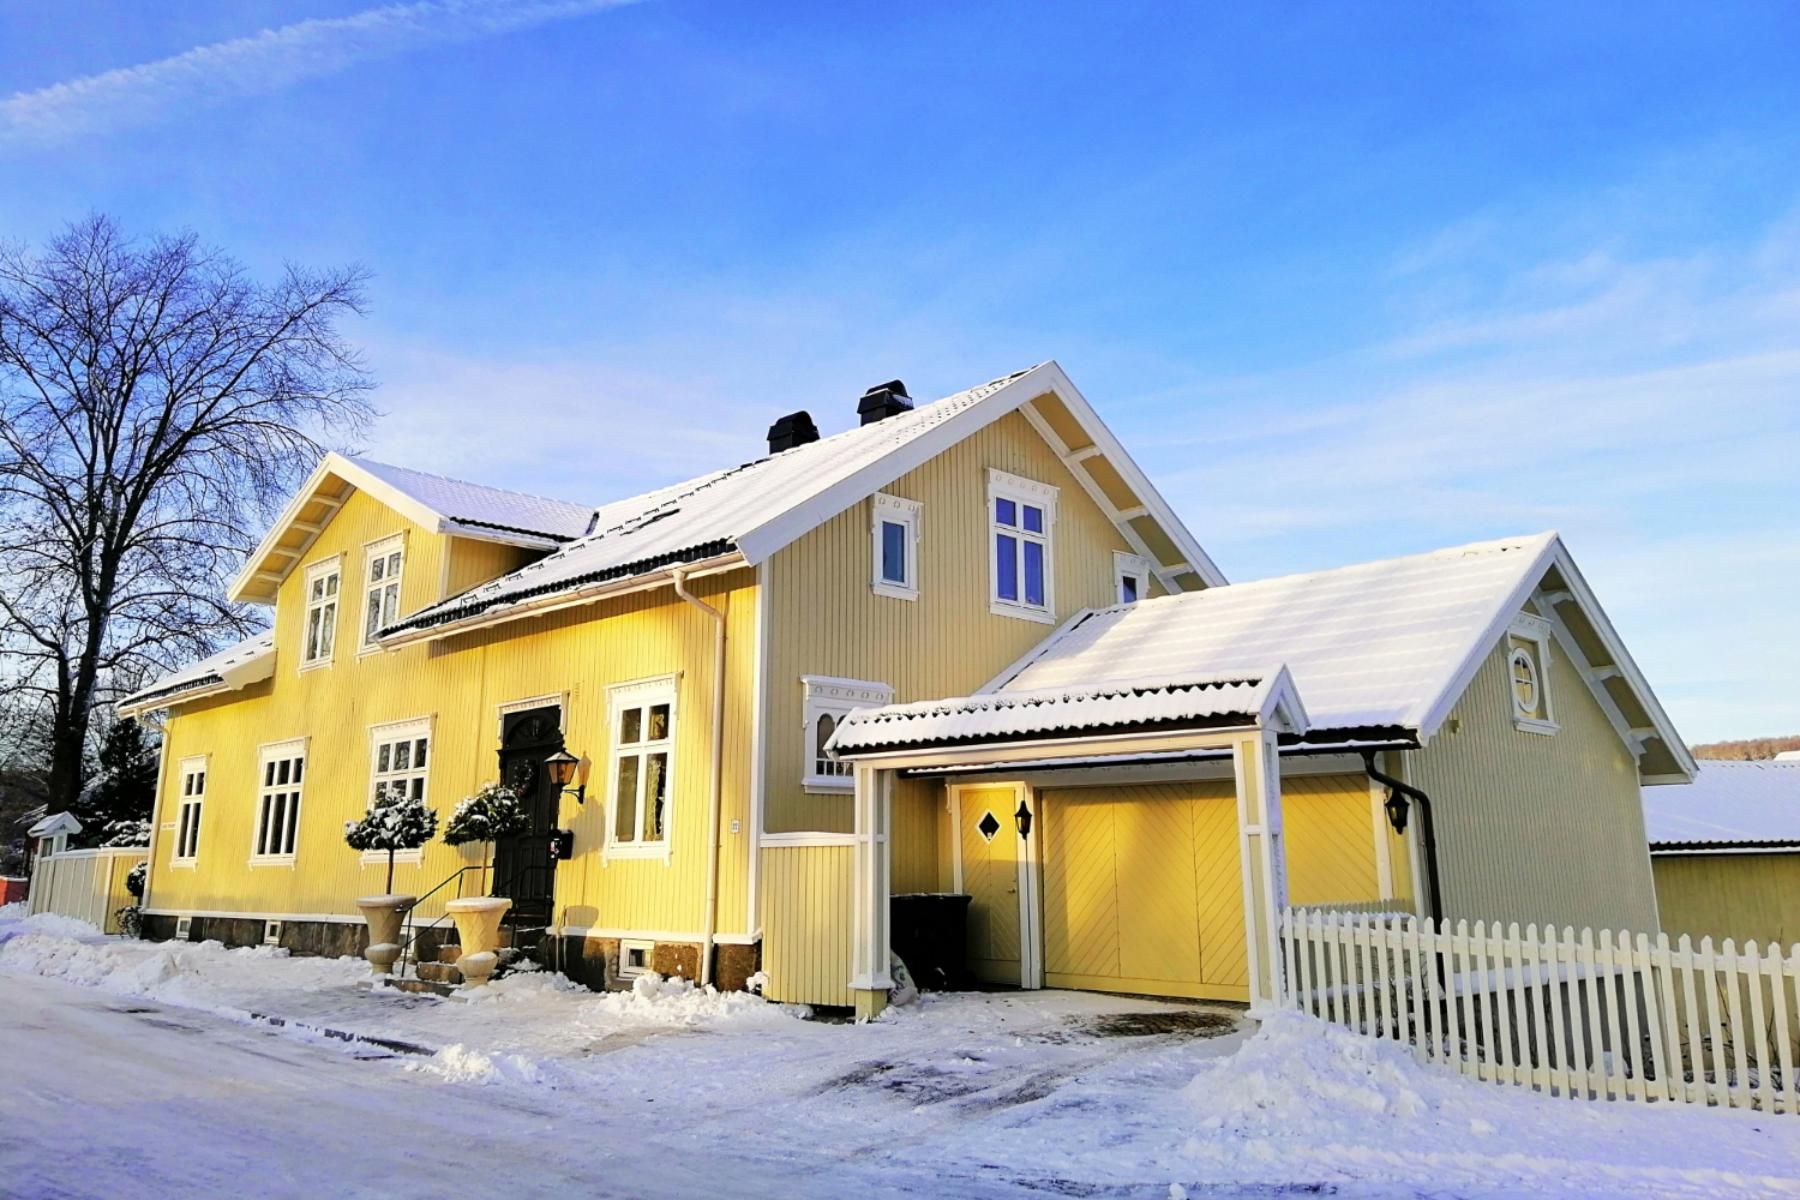
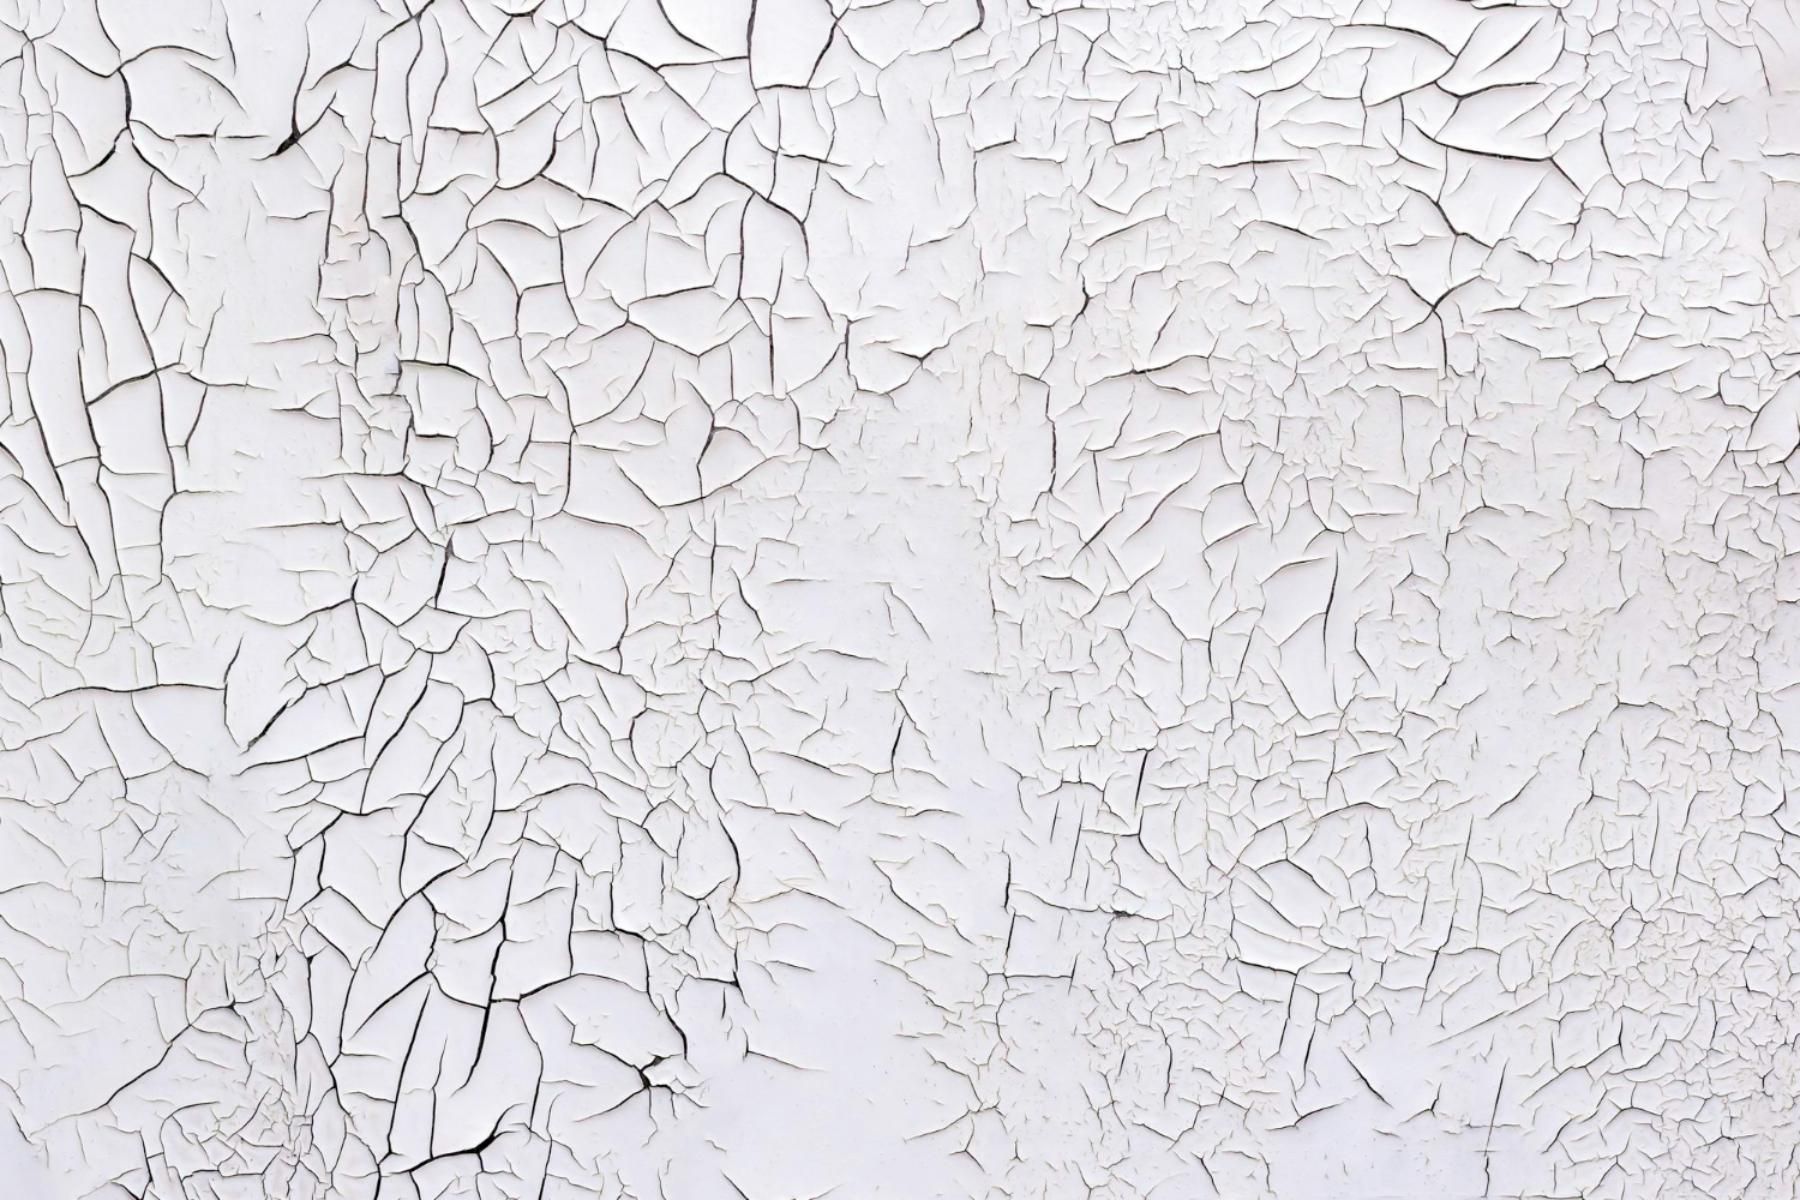
How Saskatoon's Freeze-Thaw Cycle Damages Exterior Surfaces Saskatoon 's climate subjects painted surfaces to repeated expansion and contraction as temperatures swing above and below freezing, while moisture infiltration during thaw periods creates internal pressure that compromises paint adhesion and substrate integrity. Ice damming and poorly insulated attics compound these issues by creating uneven temperature zones that accelerate paint breakdown. Understanding the Freeze-Thaw Process in Saskatchewan Saskatchewan's continental prairie climate creates intense freeze-thaw conditions throughout late winter and early spring. When daytime temperatures rise above 0°C, snow melts and water penetrates into microscopic cracks in paint and siding materials. At night, temperatures frequently drop well below freezing, causing this trapped moisture to freeze and expand. This expansion exerts significant force on painted surfaces. Water expands by approximately 9% when it freezes, creating pressure that widens existing cracks and loosens paint from the substrate. The cycle repeats dozens of times each season in Saskatoon, progressively degrading exterior finishes . We see the most severe damage on south and west-facing walls where solar heating accelerates daytime thaw while overnight temperatures still plummet. North-facing surfaces experience less dramatic temperature swings but often retain moisture longer, creating different deterioration patterns. Physics of Snow Melt and Daily Temperature Swings Temperature fluctuations in Saskatoon during spring can exceed 20°C within a 24-hour period. These rapid swings cause painted surfaces to expand when warm and contract when cold. Paint films that have lost flexibility through aging cannot accommodate this movement and develop stress fractures. Snow melt introduces substantial moisture loads to building exteriors. As accumulated snow on roofs and against walls melts, water runs down surfaces and seeks entry points through compromised paint or caulking. Dark-colored paint absorbs more solar radiation, creating localized warm spots that accelerate melt rates and increase moisture exposure. The combination of thermal stress and moisture creates ideal conditions for paint failure . Substrates like wood absorb water during thaw periods and then contract as temperatures drop, creating a mechanical pumping action that forces paint away from the surface. Common Exterior Paint Failures During Thaw Cycles Peeling and blistering are the most visible signs of freeze-thaw damage. Moisture trapped beneath the paint film expands when frozen, breaking the bond between paint and substrate. We observe peeling starting at edges, seams, and areas where water naturally collects. Cracking and alligatoring develop when paint loses elasticity and cannot flex with temperature changes. These patterns create a network of fissures that allow more moisture penetration, accelerating deterioration. Chalking and fading occur as freeze-thaw cycles break down paint binders. The surface becomes powdery and color pigments degrade, particularly on surfaces with maximum sun exposure. Wood substrates show rot and decay when compromised paint allows sustained moisture contact. We identify this by soft spots, discoloration, or visible fungal growth beneath failing paint. Impact of Poorly Insulated Attics and Ice Damming Poorly insulated attics create temperature differentials that contribute to ice damming on roof edges. Heat escaping through inadequate insulation warms roof surfaces, melting snow that then refreezes at cooler eaves. This ice buildup forces water under shingles and behind fascia boards, saturating painted trim and soffits. Ice damming causes water to pool against exterior surfaces for extended periods. This prolonged exposure allows deep moisture penetration into paint and substrate materials. We find that homes with ice damming consistently show accelerated paint failure on eaves, fascia, and upper wall sections. The freeze-thaw damage from ice damming extends beyond roof lines. Overflowing gutters and ice buildup direct water onto wall surfaces not designed for heavy moisture exposure, creating premature paint breakdown and potential structural damage to underlying materials. Warning Signs You Need to Repaint After a Freeze-Thaw Season Saskatoon's freeze-thaw cycles leave visible marks on exterior paint that signal when protection has failed. We can spot these issues by examining paint surfaces, tracking moisture patterns after snow melt, and checking how water moves away from our homes. Cracking, Peeling, and Bubbling Paint Cracking appears when paint loses flexibility during repeated expansion and contraction. We see hairline cracks that run horizontally along siding or larger splits that expose bare wood or substrate underneath. Peeling starts at edges where moisture works behind the film. South and west walls show this first because UV weakens the bond before winter stress arrives. When we spot paint lifting in sheets or curling at seams, the coating no longer protects what's beneath. Bubbling forms when trapped moisture turns to vapor or ice crystals push the film outward. These blisters feel soft when pressed and often cluster near joints, bottom courses of siding, or areas where snow piles against walls. Once bubbles break open, water enters freely and accelerates decay. Discoloration, Stains, or Fading After Snow Melt Vertical streaks and rust-colored stains appear when snow melt carries dirt, salts, and oxidized metals down painted surfaces. We notice these marks most clearly in spring when snow banks recede and reveal what winter left behind. Fading shows up as uneven color, especially on south-facing walls that take the most sun. Chalky residue on our fingers when we touch the surface means the binder has broken down. This powder no longer holds pigment in place or sheds water effectively. Water stains near the foundation or around windows indicate where moisture sat too long during thaw cycles. Dark patches on stucco or wood signal that the substrate stayed wet and the paint barrier failed. Moisture Intrusion and Its Effects on Exterior Paint Moisture travels into gaps opened by freeze-thaw movement. We find it behind paint at caulk lines that have pulled away, at the bottom of siding where end grain absorbed meltwater, and where flashing no longer diverts rain. Paint blisters, softens, or loses adhesion when water sits between the coating and substrate. Wood begins to rot, stucco develops efflorescence, and metal corrodes. These problems spread quickly once moisture breaches the film. We check shaded elevations and north walls that dry slowly after snow melt. Damp spots that remain visible days after rain or thaw tell us water is trapped and moving through the wall assembly. Addressing Drainage Issues: Downspouts, Sump Pumps, and Floor Drains Downspouts must carry water at least 1.8 meters away from the foundation. When they dump near walls, splash-back soaks lower siding and paint fails at the bottom courses. We inspect extensions after spring thaw to ensure they remain connected and grade properly. Properly functioning sump pumps and floor drains keep basements dry, which protects interior conditions that affect exterior paint performance. High indoor humidity from a failing sump pump migrates outward through walls and pushes paint off from behind. Snow melt pooling near the house signals grading problems or clogged drains. We look for: Ice dams at eaves that force water under paint Standing water against foundation walls Downspout discharge frozen or blocked Grade sloping toward the building instead of away When drainage fails, paint takes on more moisture than it was designed to handle and deteriorates within one or two freeze-thaw seasons. Is this your home? Let us know! Contact us today to help.
Defining a Full Repaint vs. Touch-Ups: What's the Right Approach? A full repaint covers your entire exterior with fresh coats of paint, while touch-ups address specific areas of damage or wear. The right choice depends on the extent of damage, your budget, and how long you expect the results to last. What a Full Repaint Involves A full repaint means applying a fresh coat of paint to your entire exterior surface. This process typically starts with thorough surface preparation, including power washing, scraping off loose or peeling paint , and sanding rough areas. Your painter will prime any bare wood or damaged areas before applying two coats of high-quality exterior paint . For commercial painting projects, this might also include coordinating colors across multiple buildings or sections. The process takes significantly more time than touch-ups. Expect anywhere from several days to a few weeks depending on your home's size and the weather conditions. Full repainting delivers uniform color and sheen across all surfaces. You won't see any mismatched areas or color variations that often occur with touch-ups. This approach also provides maximum protection against weather, moisture, and UV damage. Understanding Touch-Up Painting Touch-up painting targets isolated areas where damage has occurred. This includes small sections with chipping, peeling, or fading paint. The process involves cleaning the damaged area, scraping away loose paint, and feathering the edges. You then apply primer to any bare spots and carefully paint over the repair with matching paint. The biggest challenge with touch-ups is color matching. Even if you have leftover paint from your original job, weathering and UV exposure cause exterior paint to fade over time. Your touch-up may stand out against the surrounding surface. Touch-ups work best when your overall paint job is less than five years old and damage is limited to a few small areas. They make sense for minor scrapes, small chips from hail or debris, or isolated peeling around specific trim pieces. Cost Comparison: Full Repaint vs. Touch-Ups Touch-ups cost substantially less than full repainting in the short term. Small repair jobs might run a few hundred dollars, while a complete exterior repaint can cost several thousand depending on your home's size. However, cost comparison becomes more complex when you factor in longevity. Touch-ups on aging paint often fail within a year or two, requiring repeated repairs. You might end up spending more on multiple touch-up sessions than you would have on one complete repaint. Full repainting delivers better value for your investment in these situations: Paint is over 8-10 years old Damage covers more than 20% of surfaces You're planning to sell and need to maximize curb appeal Color has faded unevenly across different exposures Touch-ups make financial sense when paint is relatively new, damage is minimal, and you don't need perfect color consistency for first impressions. Key Signs Your Exterior Needs a Complete Repaint When paint starts to fail across multiple areas of your home, touch-ups won't solve the underlying problem. Widespread fading, peeling that exposes bare substrate, or moisture damage indicate your exterior has reached the end of its protective lifespan and needs full attention. Fading, Chalky, and Uneven Colour Paint fade happens when UV rays break down the pigments and binders in your exterior coating. You'll notice this most on south and west-facing walls that receive the heaviest sun exposure throughout the day. Chalking occurs when the paint's surface deteriorates into a powdery residue. Run your hand along the siding—if you see a dusty film on your palm, the protective layer has degraded. This is a clear sign the coating can no longer shield your home from the elements. Color inconsistency across different elevations tells you that some sections have aged faster than others. When touch-ups can't blend properly because the existing paint has faded too much, you're looking at a full repaint. Trying to match new paint to severely weathered surfaces creates a patchy appearance that draws attention rather than fixes it. Peeling Paint, Flaking, and Paint Failure Peeling paint is the most obvious indicator of complete paint failure. When paint loses adhesion and lifts away from the surface in curls or sheets, moisture has gotten behind the coating. This exposes your siding or trim to direct weather damage. Flaking paint appears as small chips breaking off the surface. Unlike minor cracking, flaking indicates the bond between paint layers or between paint and primer has broken down. This type of failure spreads quickly once it starts. When you see bare substrate showing through in multiple locations, your paint system has stopped protecting your home. Wood, fiber cement, or other materials left exposed will deteriorate rapidly. A full repaint with proper primer application is necessary to restore the protective barrier your exterior needs. Moisture Problems: Mildew, Wood Rot, and Biological Growth Mildew and biological growth appear as dark stains or fuzzy patches on painted surfaces. These organisms thrive where moisture intrusion has compromised the paint's ability to shed water. The growth itself can eat through paint and damage the surface beneath. Wood rot develops when moisture reaches bare or poorly protected wood. You'll notice soft spots, crumbling edges, or areas that feel spongy when pressed. Once rot sets in, siding repair becomes necessary before any painting begins. Moisture problems reveal themselves through bubbling paint, water stains, or persistent dampness after rain. These issues require an honest assessment of both the paint system and the underlying materials. Surface prep must address all moisture damage, or new paint will fail just as quickly. When Surface Prep and Repairs Matter Most Paint age determines how much scraping and prep work your exterior needs. Paint older than 10-12 years typically requires extensive preparation across the entire surface, not just problem spots. The coating has weathered to the point where partial fixes won't hold. Surface prep becomes critical when you're dealing with multiple layers of old paint, especially if previous coats are peeling or incompatible. Proper scraping removes all loose material down to a sound surface. Skipping this step means new paint has nothing stable to grip. Siding repair must happen before painting begins. Rotted boards, damaged trim, or failing caulk joints need replacement or restoration. Painting over these issues only hides them temporarily while the damage continues underneath. When Touch-Ups or Partial Repaints Are Enough Touch-up painting and partial repaints make sense when damage is isolated and your existing paint film remains in good condition. The key is knowing which situations call for spot repairs versus a complete exterior overhaul. Dealing with Localized Damage Touch-ups work best for small areas of damage that haven't spread across your siding. Look for isolated chips from hail, scratches from branches, or minor blistering in contained spots. These repairs typically cover less than 10% of a single wall surface. You can address localized damage effectively when the surrounding paint shows no signs of chalking, cracking, or severe fading. The existing coating should feel smooth and intact, not brittle or flaking. Check that the damage hasn't penetrated through multiple paint layers to bare substrate. Impact damage from lawn equipment, bike handles, or sports equipment represents ideal candidates for touch-ups. Similarly, areas around recently replaced trim boards or patched siding sections need only spot treatment when the rest of the wall remains sound. Color Matching and Partial Wall Repairs Color matching becomes challenging once exterior paint ages beyond two to three years. UV exposure causes gradual fading that you might not notice until you apply fresh paint next to it. West-facing walls experience the most severe fading due to intense afternoon sun exposure. Factors affecting color matching success: Paint age : Paint less than 2 years old matches more reliably Sheen level : Flat finishes blend better than satin or semi-gloss Sun exposure : North-facing walls retain color better than southern or west-facing walls Original paint quality : Premium paints fade more uniformly You should consider repainting entire walls rather than spot-treating when repairs exceed a few square feet. Paint stores can color-match aged paint, but the fresh coating will still have different reflective properties than weathered surfaces. This creates noticeable patches even when the color appears identical in the can. Material Considerations: Siding Types and Paint Longevity Different siding materials hold paint for varying lengths of time, affecting whether touch-ups remain viable. Fiber cement siding typically holds paint 12-15 years and accepts touch-ups well throughout its lifespan. Wood siding requires more frequent attention but responds favorably to partial repairs when properly prepared. Vinyl siding doesn't need paint but can be painted. Once painted, it tends to peel in sheets rather than isolated spots, making touch-ups ineffective. Aluminum siding holds paint 8-10 years and can be touched up successfully if the underlying metal hasn't corroded. Wood siding shows the most variation. Cedar and redwood contain natural oils that can bleed through touch-ups if you don't apply proper primer. Pine and fir accept touch-ups more readily but may show texture differences between old and new paint layers. Risks of Delaying or Skipping a Full Repaint Choosing touch-ups when you need full repainting accelerates overall deterioration. Unprotected areas continue degrading while you maintain small sections, leading to substrate damage that increases future repair costs. Wood rot, moisture intrusion, and insect damage spread from exposed areas. You risk doubling your expenses when inadequate touch-ups fail within 1-2 years. The paint film surrounding your repairs continues aging, creating new problem areas that require attention. This cycle of repeated partial fixes costs more than addressing the entire surface at once. Failed touch-ups also create adhesion problems for future coatings. Multiple paint layers of different ages bond differently to the substrate, causing premature peeling when you eventually repaint. Your contractor must then spend additional time sanding and scraping these problematic transitions. Let us help! Contact us today to tell us the scenario of your home.
Core Advantages of High Performance Coating in Painting High-performance coatings deliver measurable improvements over standard paint through engineered formulations that resist degradation from environmental stressors, mechanical wear, and chemical exposure. These coating systems extend surface lifespans while reducing maintenance frequency and associated costs. Superior Durability and Longevity High-performance coating systems provide extended service life that significantly outlasts conventional paint products. Where traditional paints require reapplication every 5-7 years, these advanced coatings maintain protective properties for 15-25 years or longer under comparable conditions. The enhanced longevity stems from specialized polymer structures and cross-linking mechanisms that resist cracking, peeling, and blistering. These coatings maintain adhesion to substrates even when exposed to temperature fluctuations, moisture cycling, and UV radiation. You gain reduced downtime for recoating projects when using high-performance coatings on industrial equipment and infrastructure. The formulations create denser, more uniform film layers that prevent moisture penetration and substrate degradation. This structural integrity means your painted surfaces retain both protective function and appearance throughout the coating's extended lifecycle. Corrosion and Chemical Resistance Performance coatings create barriers that protect metal substrates from oxidation and chemical attack in harsh environments. The molecular structure of these formulations prevents corrosive agents from reaching underlying surfaces, which is critical for equipment exposed to salts, acids, alkalis, and industrial chemicals. Your investment in corrosion-resistant coating systems prevents costly equipment failures and structural damage. Industrial facilities benefit particularly from these properties when processing or storing reactive substances. The chemical resistance allows surfaces to withstand repeated cleaning with aggressive solvents and maintain integrity during chemical spills. High-performance coating formulations incorporate corrosion inhibitors and create low-permeability films. These characteristics make them suitable for marine applications, chemical processing plants, and infrastructure exposed to de-icing salts. The protective layer remains stable even when substrate temperatures vary, preventing thermal stress that would compromise standard paint systems. Abrasion Resistance and Weather Protection These specialized coatings resist mechanical wear from particle impact, friction, and surface contact that would degrade conventional paint. The formulations contain hard ceramic particles or cross-linked polymer networks that deflect abrasive forces without film damage. Your surfaces maintain appearance and protection in high-traffic areas, manufacturing environments, and locations with airborne particulates. The abrasion resistance prevents coating thinning that exposes substrates to environmental damage. Weather protection extends beyond basic UV stability. High-performance coatings withstand extreme temperature ranges, rapid thermal cycling, and prolonged moisture exposure without losing adhesion or developing surface defects. They resist chalking and color fading that plague standard paints in outdoor applications. The coating systems maintain flexibility across temperature ranges, preventing the brittleness that leads to cracking in cold conditions while avoiding softening in high heat. Cost-Effectiveness for Long-Term Use The initial investment in high-performance coatings exceeds standard paint costs, but lifecycle analysis reveals substantial savings. You reduce recoating frequency, labor costs, and production interruptions over the coating's service life. Maintenance budgets decrease when coating systems require minimal touch-ups and deliver decades of protection. The reduction in substrate replacement costs—particularly for metal components protected from corrosion—adds significant value. Industrial operations benefit from decreased downtime since equipment remains in service longer between coating renewals. Your total cost of ownership drops when factoring reduced material consumption, fewer application cycles, and extended asset lifespans. The durability of these coating systems means less waste generation and lower environmental impact from repainting projects. Key Components and Types of High Performance Coatings High-performance coating systems consist of carefully selected components that work together to protect surfaces from corrosion, weathering, and chemical exposure. The primary elements include primers for adhesion and corrosion resistance , finish coats designed for specific environmental challenges, and specialized formulations like epoxies, polyurethanes, and fluoropolymers that deliver superior protection. Role of Primers in Modern Coating Systems Primers form the foundation of your coating system by creating a strong bond between the substrate and subsequent layers. They serve as the first line of defense against corrosion and ensure the entire system adheres properly to the surface. Key Functions of Primers: Promote adhesion to metal, concrete, or other substrates Provide corrosion resistance to extend maintenance cycles Create a uniform surface for intermediate and finish coats Zinc-rich primers offer exceptional corrosion protection for steel structures by providing cathodic protection. These primers contain high concentrations of zinc particles that sacrifice themselves to protect the underlying metal. Epoxy primers deliver outstanding adhesion and chemical resistance, making them ideal for industrial environments. Alkyd primers provide a simpler, more economical option for less demanding applications where ease of use is a priority. Finish Coats and High-Performance Finishes Your finish coat determines how well the coating system withstands specific environmental conditions over time. This top layer protects the primer and intermediate coats from direct exposure to sun, rain, chemicals, and physical wear. High-performance finishes are formulated to address particular challenges in your application environment. Aliphatic polyurethane finish coats maintain color stability and gloss retention under UV exposure. Fluoropolymer-based finishes resist extreme temperatures and chemical attack while requiring minimal maintenance. The finish coat must align with your exposure conditions to maximize system performance. Chemical-resistant finishes protect against acids, solvents, and harsh cleaning agents. Abrasion-resistant finishes withstand foot traffic and mechanical wear. Weather-resistant formulations endure the combined effects of moisture, temperature fluctuations, and UV radiation without degrading. Overview of Epoxy, Polyurethane, and Fluoropolymer Coatings Epoxy Coatings provide excellent adhesion, chemical resistance, and moisture barrier properties. You'll find them used extensively as primers, intermediate coats, and in some cases, finish coats for interior or immersion service. They offer outstanding protection against corrosion and chemical exposure but have limited UV resistance, which causes chalking and color fading in outdoor applications. Polyurethane Coatings excel in exterior environments where UV stability and color retention matter. Urethane coatings combine toughness with flexibility, allowing them to expand and contract with temperature changes without cracking. They resist abrasion better than many other coating types and maintain their appearance for extended periods. Fluoropolymer Coatings represent the premium option for extreme environments requiring maximum durability. These coatings withstand temperatures from -400°F to 500°F while providing exceptional chemical resistance and low-friction properties. Fluoropolymers require minimal maintenance and last significantly longer than conventional coatings, though they command higher initial costs. Best Practices and Applications for High Performance Coatings Proper surface preparation and strategic application methods determine coating performance more than any other factors. Industrial maintenance programs across sectors from marine to manufacturing rely on these specialized coatings to protect critical assets against corrosion, chemicals, and mechanical wear. Surface Preparation and Application Methods Surface preparation is the foundation of coating performance. You should remove all contaminants, rust, mill scale, and previous coatings before application. Abrasive blasting to SSPC-SP10 or ISO Sa 2.5 standards provides the optimal surface profile for maximum adhesion. The application method you select depends on the coating type and project requirements. Spray application offers fast coverage for large industrial surfaces. Brush and roller methods work better for smaller areas or touch-up work. You need to maintain proper film thickness throughout application, typically verified with wet film thickness gauges. Environmental conditions during application directly impact curing and final performance. You should apply most high performance coatings when surface temperatures are between 40°F and 100°F with relative humidity below 85%. Surface temperature must remain at least 5°F above the dew point to prevent moisture contamination during cure. Critical Application Parameters: Mixing ratios must follow manufacturer specifications exactly for multi-component systems Induction times allow proper chemical interaction before application begins Pot life determines how long mixed material remains usable Recoat windows specify timing between successive coats Industry-Specific Uses and Case Examples Marine environments demand coatings that resist saltwater corrosion and biological fouling. Ship hulls use specialized anti-fouling formulations that prevent marine organism attachment while maintaining structural integrity. Offshore platforms require coatings that withstand continuous saltwater spray and extreme temperature fluctuations. Chemical processing facilities need coatings with exceptional chemical resistance. Epoxy phenolic and vinyl ester systems protect tanks, piping, and containment structures from aggressive acids, solvents, and caustic materials. These coatings maintain barrier properties even under constant chemical exposure. Infrastructure projects including bridges and water treatment facilities use high performance coatings to extend service life by decades. The industry standard for bridge coating systems often involves zinc-rich primers, epoxy intermediates, and polyurethane topcoats. This three-coat system provides layered protection against moisture penetration and UV degradation. Power generation facilities apply thermal-resistant coatings to equipment operating at elevated temperatures. Stack linings and boiler components require formulations that maintain protective properties above 400°F. Sustainability and Environmental Considerations Modern high performance coatings increasingly use water-based formulations that reduce volatile organic compound emissions. These systems deliver equivalent protection while meeting stringent environmental regulations. You achieve both compliance and performance without compromise. The sustainability impact extends beyond initial application. By preventing premature asset replacement, these coatings reduce raw material consumption and manufacturing energy. A bridge coating system lasting 25 years eliminates multiple repainting cycles and their associated environmental costs. Low-VOC and zero-VOC options now exist for most industrial maintenance applications. You can specify compliant products without sacrificing corrosion resistance or durability. Many water-based epoxies and urethanes meet or exceed solvent-based predecessors in laboratory testing. Proper coating selection reduces waste through extended maintenance intervals. Ships with advanced anti-fouling coatings operate more efficiently, consuming less fuel per voyage. Industrial equipment protected by appropriate coatings requires fewer shutdowns for repair or replacement, improving operational efficiency while reducing environmental impact from manufacturing replacement components. Frequently Asked Questions High-performance coatings offer distinct protective qualities that address specific challenges in demanding environments. Understanding their advantages, application requirements, and selection criteria helps you make informed decisions for your projects. What are the main advantages of using high-performance coatings compared to standard paints? High-performance coatings are engineered with specialized formulations that provide superior protection against environmental stressors that would quickly degrade standard paints. They create robust barriers against moisture, chemicals, UV radiation, and temperature extremes. Standard paints are designed primarily for aesthetic purposes and offer minimal protection against corrosive elements or mechanical stress. High-performance coatings, by contrast, are formulated to maintain their protective properties for extended periods under challenging conditions. The durability of these advanced coatings reduces the frequency of reapplication and maintenance. This translates to lower long-term costs despite higher initial investment compared to conventional paint products. How do high-performance coatings improve durability against abrasion, impact, and everyday wear? These coatings incorporate specialized resins and additives that create harder, more resilient surface films. The molecular structure of high-performance formulations provides enhanced resistance to physical damage from machinery, foot traffic, and material handling equipment. Abrasion-resistant coatings maintain their integrity in high-traffic industrial environments where standard paints would wear through quickly. They protect substrates from scratching, chipping, and surface degradation that occurs from repeated contact and friction. Impact resistance is achieved through flexible yet tough coating systems that absorb and distribute mechanical stress. This prevents cracking, flaking, and delamination that typically results from dropped tools, equipment collisions, or heavy vibration. Which environments or applications benefit most from advanced protective coating systems? Manufacturing facilities, chemical processing plants, and refineries require coatings that withstand exposure to aggressive chemicals and extreme temperatures. These environments subject surfaces to corrosive substances, thermal cycling, and mechanical stress that quickly compromise standard paints. Marine and coastal structures face constant moisture exposure, salt spray, and UV radiation that accelerate corrosion. High-performance coatings designed for these conditions provide essential protection for metal and concrete surfaces. Warehouses, distribution centers, and commercial kitchens benefit from floor coatings that resist abrasion, chemical spills, and frequent cleaning with industrial-grade detergents. Transportation infrastructure, including bridges and parking structures, requires coatings that protect against weathering, freeze-thaw cycles, and chemical deicers. How do high-performance coatings enhance resistance to corrosion, chemicals, and moisture exposure? These coatings form impermeable barriers that prevent water, oxygen, and corrosive agents from reaching the substrate surface. The molecular density of properly applied high-performance coatings blocks moisture penetration that would otherwise initiate corrosion processes. Chemical-resistant formulations are engineered with specific resin systems that do not react with acids, alkalis, solvents, or other aggressive substances. Epoxy and polyurethane coatings offer excellent chemical resistance across a broad pH range. Moisture barrier properties are achieved through low permeability and strong adhesion to substrates. This prevents water from accumulating at the coating-substrate interface where corrosion typically initiates on metal surfaces. What factors should be considered when selecting a high-performance coating for a specific surface or substrate? Your substrate type determines the coating chemistry and primer requirements. Metal surfaces require different coating systems than concrete, wood, or composite materials due to varying surface energies and expansion characteristics. Environmental exposure conditions directly influence coating selection. You need to evaluate temperature ranges, chemical contact, UV exposure, humidity levels, and mechanical stress your coated surfaces will encounter. Performance requirements such as cure time, film thickness, and expected service life must align with your operational needs. Consider whether you require specific properties like fire resistance, antimicrobial protection, or static dissipation. Budget constraints and maintenance schedules affect your coating choice. Higher-performing systems with greater longevity may justify increased initial costs through reduced maintenance frequency and extended protection periods. What are the typical preparation, application, and curing requirements for long-lasting coating performance? Surface preparation is the most critical factor in coating performance. You must remove all contaminants, rust, previous coatings, and loose material through methods like abrasive blasting, grinding, or chemical cleaning appropriate to your substrate. Clean, dry surfaces with proper profile ensure mechanical adhesion of the coating system. Metal surfaces typically require surface roughness between 1.5 to 3.0 mils, while porous substrates like concrete may need filling or grinding to achieve uniform texture. Application conditions require controlled temperature and humidity ranges specified by the coating manufacturer. Most high-performance coatings perform best when applied between 50°F and 90°F with relative humidity below 85 percent. Film thickness must meet manufacturer specifications through proper application techniques. You achieve this through spray, roller, or brush application depending on the coating type and surface configuration. Curing time varies based on coating chemistry, environmental conditions, and film thickness. Epoxy coatings may require 24 to 72 hours before light traffic, while full chemical resistance often develops over 7 to 14 days. Moisture-cure urethanes and other specialized systems have different curing profiles that you must follow for optimal performance.
Most new homeowners in Saskatoon face a choice after closing: unpack the moving truck or grab a paintbrush first. Professional painters agree that the second option makes more sense. We agree - painting your new home before moving in saves both time and money while delivering results that aren't possible once furniture fills the rooms. The reasons to paint a new house before hauling in your belongings start with pure efficiency. Without couches blocking walls or beds taking up floor space, painting contractors work faster and charge less for labor. According to real estate experts, homes with freshly painted interiors can increase their resale value by up to 5%. Painters can move freely from room to room and complete the job in fewer hours. They protect floors without navigating around your possessions. Health matters too. Some paints contain VOCs that irritate eyes and throat when breathed in for extended periods. Painting before you move into your new home lets these compounds escape on their own, so you walk into clean air instead of chemical odors. On top of that, there's no risk of paint splatters damaging furniture or appliances that aren't there yet. You won't face the headache of moving items twice or living around tarps and ladders. Should you paint a new construction house? The answer becomes obvious when you think over how much easier it is to personalize an empty space and start fresh in a home that already feels like yours. Practical Benefits of Painting an Empty Home Painting an empty space reveals why professionals complete these jobs 30 to 40 percent faster than furnished ones. Painters follow the proper sequence without obstacles: ceilings first to catch drips, then walls with full roller strokes, and trim to create clean lines. This order produces polished results that look professional rather than rushed. Preparation work shrinks when rooms sit vacant. Floors need simple covering instead of wrapping every piece of furniture in plastic. Ladders move freely to any spot without navigating around dressers or entertainment centers. Painters achieve even coverage across surfaces rather than skipping sections behind headboards or wardrobes, which happens often in occupied spaces. The quality difference shows. Paint serves as a protective barrier for walls and shields them from moisture, dust and daily wear. Applied to bare walls, this protection starts from day one in your new home. Painted surfaces also resist allergen buildup better than bare walls and become easier to clean and maintain over time. Empty house painting eliminates the risk of mistakes that get pricey. One slip with a roller near valuable furniture can erase any savings from delaying the project. Painting before moving in means settling into a space that looks fresh and feels complete, with walls ready to protect themselves for years ahead. How Painting Creates Your Ideal Living Space Color choices revolutionize bare walls into spaces that reflect who you are. Painting your new home before unpacking gives you control over every shade and finish. You won't need to work around existing furniture colors or feel rushed. Warm tones like reds and oranges create inviting, energetic atmospheres in social spaces. Cool tones such as blues and greens promote relaxation and calm in bedrooms. Neutral shades offer versatility and make rooms feel larger and more open. The way paint interacts with light changes how spaces function throughout the day. Lighter shades reflect more sunlight and make small rooms feel airy and spacious. Darker shades create intimacy and warmth in larger areas. This interplay between color and natural light improves ambiance and gives each corner unique character. A well-planned color scheme starts with paint and produces a unified esthetic in your new home. Complementary colors ensure flow from one room to another. This makes homes feel larger and more harmonious. Professional painting services understand how color choices influence mood. They can guide homeowners to select shades that improve daily living experiences. Painting before moving in lets you craft an environment suited for each room's purpose. You express your personality while tapping into the full potential of your new home. Financial and Long-Term Value Considerations Painting your new home before moving in delivers measurable financial returns that extend well beyond the original investment. Interior painting gets an impressive 107% ROI. A CAD 4876.76 painting project can add CAD 10094.89 to your home's resale value. These numbers make the decision less about esthetics and more about strategic home investment. The financial advantage starts with lower labor costs. Painters complete empty home projects faster and reduce the hours you pay for. Labor accounts for 75% to 95% of total painting costs, so any efficiency gains translate to substantial savings. High-quality paint requires a larger upfront investment but covers surfaces better and lasts longer. This eliminates the need for frequent repainting and reduces long-term maintenance expenses. Homes with professional paint jobs see value increases between 2% and 5%. This boost stems from the perception of proper maintenance and move-in readiness that fresh paint creates. Real estate professionals recommend repainting every three to five years to maintain optimal condition. Painting before moving in gives you a head start on that timeline. Interior painting done right can increase home value by up to 10% in some cases, especially when neutral colors appeal to future buyers and showcase your home's best features. A Fresh Start Walking into your newly painted Saskatoon home for the first time carries a distinct feeling that sets the tone for everything that follows. The previous owners' memories and daily routines were embedded in those walls, but a fresh coat of paint erases those remnants. Your new home transforms from someone else's former space into a blank canvas that belongs to you. Paint serves as more than decoration in this context. Studies show that newly painted properties boost optimism, inspiration, and creativity among occupants. The psychological effect runs deeper than esthetics alone. A renewed sense of space provides a mental lift right away and helps you shed the stress of moving. You can adopt your new chapter with clarity. Color psychology plays a role here too. Earth tones create grounding and calming effects, while naturals offer peace. Vibrant, saturated colors energize spaces and promote warm social atmospheres. When you choose these shades before moving in, your home reflects your goals and personality from day one rather than evolving over months of delayed projects. When you paint before unpacking, you create that move-in-ready vibe real estate professionals emphasize. You settle into a space that already feels finished, complete, and yours. This psychological foundation makes the transition smoother and helps reduce the feeling of being unsettled that often accompanies major life changes. Contact us to get started!
We hear this question often from Saskatoon homeowners who find unsightly patches on their walls and hope for a quick fix. The short answer is no, and we're here to explain why. Mold and mildew are common household problems in damp or poorly ventilated areas like bathrooms and basements. Painting over mold offers only a temporary cover-up, not a genuine solution. The mold continues to grow beneath the paint and may show through or cause the finish to peel. We'll walk you through the risks of painting over mold, how to remove mold from painted walls, and the right products to use for lasting protection in your home. Understanding the Risks: What Happens When You Paint Over Mold Painting over mold creates a chain reaction of problems that worsen over time. Mold is a living organism that requires moisture to thrive, and applying paint or primer does nothing to kill it. The mold continues growing beneath the paint surface and breaks through as the colony expands eventually. Paint applied over moldy surfaces is likely to peel, and mold can cause bubbling in your paint as moisture accumulates underneath. The health consequences are concerning. Mold produces allergens, irritants, and potentially toxic substances called mycotoxins. Allergic reactions may occur if you inhale or touch mold spores. These include sneezing, runny nose, red eyes, and skin rash. People with asthma can experience triggered attacks from mold exposure. Mold also irritates the eyes, skin, nose, throat, and lungs of both allergic and non-allergic individuals. This fact is often overlooked. Mold's destructive nature means it destroys whatever it grows on. The drywall will need removal and replacement if the mold is underneath the paint. Mold feeding on wet wood can weaken floors and walls and cause structural damage. The root system, called hyphae, must be removed from the surface to stop growth. Painting over contamination only provides temporary cosmetic relief while real damage accumulates behind your walls. How to Remove Mold from Painted Walls Before Repainting Removing mold from painted walls starts with addressing the moisture problem that caused it. You must identify and fix the water source before you touch a single spore. The source could be a plumbing leak, poor ventilation or foundation crack. Mold will begin to grow within 48 hours, so speed matters at the time water damage occurs. You need protective equipment before starting. Gloves extending to your forearm and an N-95 respirator mask will protect you from inhaling spores. Goggles without ventilation holes are also necessary. Windows should be opened and fans used to ventilate the space while working. A damp cloth with baking soda or a small amount of unscented soap solution works well to clean painted walls. The critical rule here is not to oversaturate the drywall. Too much water adds moisture and can damage the surface. Scrub the affected area gently and then dry it complete and quick using fans or dehumidifiers. Do not use bleach to clean up mold. Surface cleaning won't solve the problem if mold has penetrated beneath the paint layer. The drywall will need to be removed and replaced. We recommend contacting professionals like Revive Painting and Wallpaper at the time you deal with extensive contamination or recurring growth after cleaning. They can assess whether replacement is necessary and ensure proper treatment before any repainting begins. Choosing the Right Products and Preventing Future Mold Growth Protecting your walls after mold removal requires the right products. Add mold inhibitors to paints before painting. Mold-resistant primers create a protective barrier on surfaces prone to moisture. KILZ MOLD & MILDEW Primer is a water-based primer-sealer designed for high humidity environments like kitchens, bathrooms, and laundry rooms, with an EPA registered active ingredient that creates a mold and mildew-resistant film protecting the primer from growth. Similarly, Zinsser Perma-White Mold & Mildew Interior Paint provides guaranteed protection for 5 years when 2 coats are applied according to label directions. Choose mold-resistant drywall, paints, and insulation designed to withstand moisture when selecting products. Prevention matters just as much as the products you choose. Keep indoor humidity below 50%. You can measure relative humidity with a moisture or humidity meter. Install exhaust fans in high-moisture areas and run them during and after activities like showering or cooking. Make sure vents direct air outside. Schedule seasonal maintenance to check for leaks in plumbing, roofing, and windows. A small leak can introduce up to 20 gallons of water per day. Revive Painting & Wallpaper can help you choose the right mold-resistant solutions for your Saskatoon home if you're uncertain about product selection or application techniques. We ensure proper application to provide lasting protection. Protecting Your Home with Proper Mold Treatment Painting over mold offers no real solution. It provides temporary cosmetic relief while damage spreads behind your walls. So the right approach involves eliminating the moisture source and removing all contamination. Apply mold-resistant products designed for lasting protection. At the time you spot mold in your Saskatoon home, address it rather than covering it up. We're here to help you tackle mold the right way and protect your investment for years to come.
Noticing peeling or blistering paint on your Saskatoon home can be frustrating, especially after investing in what you thought would be a lasting exterior finish. Exterior paint peeling and blistering in Saskatoon typically results from moisture infiltration, extreme temperature swings between seasons, and inadequate surface preparation before painting. Saskatoon's unique climate, with its harsh winters and humid summers, creates conditions that challenge even quality paint jobs. Understanding why your paint is failing is the first step toward protecting your home's exterior and curb appeal . The freeze-thaw cycles common in Saskatchewan, combined with moisture from snow, rain, and humidity, can compromise paint adhesion and lead to premature deterioration. This article examines the specific factors causing paint failure in Saskatoon's climate and provides practical solutions to restore and protect your home's exterior. You'll learn how to identify the root causes of your paint problems and when professional intervention makes sense for long-term results. Core Causes of Peeling and Blistering Exterior Paint in Saskatoon Saskatoon's continental climate creates specific challenges for exterior painting that homeowners must understand to protect their investment. The combination of extreme temperature swings, moisture intrusion from multiple sources, and demanding weather conditions makes proper surface preparation and paint selection critical. Impact of Weather Conditions in Saskatoon on Exterior Paint Saskatoon experiences some of Canada's most challenging weather conditions for exterior paint. Summer temperatures can reach 30°C or higher, while winter temperatures plunge to -40°C or below. This creates a unique stress on your paint film. Direct sunlight heats painted surfaces well above air temperature, especially on south and west-facing walls. When you paint a warm surface in direct sunlight, the paint can dry too quickly and fail to bond properly. Prairie winds intensify these effects by accelerating moisture evaporation during application. Your paint needs adequate time to cure, but Saskatoon's low humidity and wind can cause water-based paints to dry before they properly adhere to the surface. UV radiation is particularly intense during long summer days. This breaks down paint binders over time, leading to chalking and eventual loss of adhesion. Dark colors absorb more heat and suffer faster degradation than lighter shades. Moisture and Humidity Intrusion Moisture is the primary culprit behind peeling and blistering in Saskatoon homes. Water infiltration occurs through multiple pathways that compromise your paint's adhesion. Common moisture sources include: Leaking or overflowing gutters directing water onto siding Missing or deteriorated caulking around windows and doors Ice dam formation during spring thaw cycles Ground water splash-back from poor grading Interior moisture escaping through walls When moisture becomes trapped between your substrate and paint film, it causes the paint to lift and form blisters. This is especially problematic with oil-based paints, which create a less breathable barrier than latex alternatives. Painting over damp surfaces is a frequent mistake. Even if the surface appears dry, residual moisture from morning dew, rain, or melting snow can prevent proper adhesion. You need to ensure surfaces are completely dry before applying primer or topcoat. Temperature Fluctuations and Seasonal Extremes Saskatoon's temperature range exceeds 70°C annually, creating constant expansion and contraction cycles in your home's exterior materials. Wood, vinyl, and other substrates expand in heat and contract in cold, stressing the paint film. These movements cause rigid coatings to crack and lose elasticity over time. Oil-based paints become brittle as they age, making them vulnerable to splitting during cold snaps. The constant freeze-thaw cycles in spring and fall accelerate this deterioration. Applying paint outside the manufacturer's recommended temperature range leads to adhesion failure. Most exterior paints require temperatures above 10°C during application and curing. Cold weather painting causes improper film formation that appears fine initially but fails within months. Rapid temperature changes are particularly damaging. A hot summer day followed by a cool evening with dew formation can cause blistering if the paint hasn't fully cured. Inadequate Surface Preparation Techniques Poor surface preparation causes more paint failures than any other factor. Your exterior painting project depends on proper cleaning, scraping, and priming of all surfaces. Critical preparation steps include: Removing all loose, flaking, and cracked paint Cleaning surfaces of dirt, chalk, and mildew Sanding glossy surfaces to improve mechanical adhesion Filling cracks and gaps with appropriate caulking Priming bare wood and metal before topcoating Skipping primer on bare wood is a common error. Wood contains natural oils and tannins that prevent paint adhesion and can bleed through topcoats. You must use a high-quality stain-blocking primer to seal the substrate. Painting over chalky surfaces without proper cleaning causes the new paint to bond with loose chalk particles rather than the substrate. Power washing removes surface contamination, but you must allow adequate drying time before painting. Effective Solutions and Professional Guidance Addressing peeling and blistering paint requires proper diagnosis, systematic repairs, quality materials, and often professional expertise to achieve lasting results in Saskatoon's challenging climate. Diagnosing Peeling and Blistering Paint Issues Accurate identification of the root cause determines the success of your repair efforts. Check for moisture sources by examining caulking around windows, doors, and joints for cracks or gaps. Inspect your gutters for clogs or ice buildup that could force water behind your siding. Look for signs of interior moisture migrating through walls, particularly near bathrooms, kitchens, and laundry areas. Verify that painted surfaces maintain proper clearance from ground level. Examine the paint itself for patterns that reveal specific issues—blistering typically indicates moisture trapped beneath the surface, while widespread peeling suggests poor adhesion or surface preparation. Test the remaining paint by pressing firmly with your thumb. If it feels spongy or moves, moisture is present underneath. Document problem areas and note whether they face prevailing winds or receive excessive sun exposure, as Saskatoon's weather patterns significantly impact paint performance. Essential Steps to Repair and Prevent Paint Failure Remove all loose, cracked, or peeling paint using scrapers and wire brushes until you reach solid, well-adhered surfaces. Sand the edges of remaining paint to create smooth transitions. Clean the surface thoroughly to remove dirt, chalk, and mildew using appropriate cleaners. Address moisture sources before repainting. Replace damaged caulking with quality exterior-grade products . Repair or clean gutters so they channel water properly away from your home. Install or improve ventilation in moisture-prone areas through vents, louvers, or dehumidifiers. Allow surfaces to dry completely before proceeding. Prime bare wood or exposed areas with a premium exterior primer designed for moisture resistance . This step is critical in Saskatoon's climate where temperature fluctuations and humidity create challenging conditions. Key preparation requirements: Remove all failing paint to stable substrate Eliminate moisture sources and improve drainage Sand and clean surfaces thoroughly Apply appropriate primer to exposed areas Ensure complete drying before topcoat application Selecting High-Quality Paint and Proper Application Methods Choose exterior paint specifically formulated for Canadian prairie conditions that can withstand Saskatoon's temperature extremes and UV exposure. Premium acrylic latex paints offer superior flexibility, breathability, and adhesion compared to lower-grade options. Verify that the paint you select provides moisture resistance while allowing water vapor to escape from within the wall structure. This breathability prevents trapped moisture from causing future peeling. Apply paint only when surface and air temperatures fall within the manufacturer's specified range, typically between 10°C and 30°C. Use proper application techniques with quality brushes or rollers. Apply thin, even coats rather than one thick application. Allow adequate drying time between coats as specified by the manufacturer. Avoid painting surfaces that are damp from rain, dew, or condensation. Benefits of Hiring an Exterior Painting Company in Saskatoon Professional painters possess specialized knowledge of local climate challenges and proper surface preparation techniques. We are a painting company in Saskatoon, SK, equipped to diagnose underlying moisture issues that homeowners often miss. Experienced contractors have access to commercial-grade materials and equipment that produce superior results. They understand which primers and paints perform best in prairie conditions with extreme temperature swings and intense summer sun. Professional services include proper insurance coverage, warranty protection, and efficient project completion. Hiring an exterior painting company is the solution when dealing with extensive damage, hard-to-reach areas, or recurring paint failure. Experts can identify structural issues contributing to paint problems and recommend comprehensive solutions that prevent future damage, ultimately saving you time and money on repeated repairs. Frequently Asked Questions Homeowners in Saskatoon face unique challenges when it comes to maintaining exterior paint due to the city's harsh climate conditions. Understanding the causes, prevention methods, and solutions for paint deterioration helps you protect your home's appearance and structural integrity. What are the common causes of peeling and blistering in exterior home paint? Moisture infiltration stands as the primary cause of paint peeling and blistering on your home's exterior. When water penetrates through cracks or poorly sealed surfaces, it becomes trapped between the paint layer and the substrate, creating pressure that pushes the paint away from the surface. Poor surface preparation before painting leads to adhesion failure. If you paint over dirty, oily, or loose materials without proper cleaning and priming, the paint cannot form a strong bond with the underlying surface. Temperature fluctuations cause paint to expand and contract repeatedly. This constant movement weakens the paint's grip on your home's exterior, eventually resulting in cracks and peeling. Humidity affects paint adhesion significantly. When you apply paint during high humidity conditions or when moisture levels in the substrate are elevated, the paint cannot cure properly and may fail prematurely. How does the climate of Saskatoon, SK contribute to exterior paint degradation? Saskatoon experiences extreme temperature swings between seasons, with winter temperatures often dropping below -30°C and summer temperatures rising above 30°C. These dramatic shifts cause your exterior paint to expand in heat and contract in cold, creating stress that leads to cracking and peeling. The city receives significant moisture from snow accumulation during long winters. As snow melts in spring, water can seep into small cracks and imperfections in your paint, then freeze and expand, causing blistering and paint separation. Intense UV radiation during summer months breaks down the binding agents in paint. This degradation appears as chalking, fading, and eventually leads to peeling as the paint loses its protective qualities. Freeze-thaw cycles occur frequently in Saskatoon during spring and fall. Water that enters behind paint films freezes, expands, and forces the paint away from the surface, accelerating deterioration. Which exterior paint types are most resistant to peeling and blistering in extreme weather conditions? 100% acrylic latex paints offer superior flexibility and moisture resistance compared to other paint types. These paints expand and contract with temperature changes without cracking, making them ideal for Saskatoon's climate extremes. Elastomeric coatings provide exceptional durability in harsh climates. These thick, rubber-like paints can bridge small cracks and offer excellent moisture protection while withstanding severe temperature fluctuations. Oil-based paints create a harder, more durable finish that resists moisture penetration. However, they are less flexible than acrylic options and may crack more easily during freeze-thaw cycles. High-quality exterior paints with advanced weather-resistant formulations include additives that enhance UV protection and mildew resistance. Look for products specifically rated for extreme climate conditions when selecting paint for your Saskatoon home. What preventative measures can be taken to protect exterior paint from peeling and blistering? Proper surface preparation before painting is essential. You must remove all loose paint, clean surfaces thoroughly, repair damaged areas, and ensure substrates are completely dry before applying new paint. Apply a high-quality primer designed for your specific substrate material. Primers improve paint adhesion and create a barrier against moisture penetration, significantly reducing the risk of future peeling. Maintain proper caulking around windows, doors, and trim. Check these areas annually and replace deteriorated caulk to prevent water infiltration behind your paint. Ensure adequate ventilation in your home to control interior humidity levels. Install and maintain exhaust fans in bathrooms, kitchens, and laundry areas to prevent moisture from migrating through walls. Keep gutters and downspouts clean and functioning properly. Direct water away from your home's foundation and exterior walls to minimize moisture exposure. How often should one perform maintenance on their home's exterior paint in a place like Saskatoon, SK? You should inspect your exterior paint at least twice annually, ideally in spring and fall. Look for signs of peeling, blistering, cracking, or chalking that indicate developing problems requiring attention. Plan to repaint your home's exterior every 7 to 10 years under normal conditions. Saskatoon's harsh climate may reduce this timeframe to 5 to 7 years, depending on paint quality and exposure to weather elements. Touch up minor damage immediately when you notice it. Small areas of peeling or cracking spread quickly if left unaddressed, potentially requiring more extensive repairs later. Clean your exterior surfaces annually to remove dirt, mildew, and contaminants. Use a pressure washer on appropriate settings or gentle hand washing to maintain paint integrity without causing damage. What professional services are recommended for addressing peeling and blistering exterior paint issues? Licensed painting contractors provide comprehensive assessments of paint failure causes and recommend appropriate solutions. They have the expertise to identify moisture sources, substrate problems, and application errors that DIY diagnosis might miss. Professional painters use specialized equipment and techniques for proper surface preparation. They can effectively remove failing paint, repair damaged substrates, and apply new coatings according to manufacturer specifications. Building envelope specialists can evaluate your home's overall moisture management system. They identify issues with vapor barriers, insulation, and ventilation that contribute to paint failure from the inside out. Certified home inspectors offer detailed evaluations of exterior conditions affecting paint performance. Their reports help you understand whether paint problems stem from application issues or underlying structural concerns requiring different solutions. Contact us today to help.
Choosing the Perfect Beige and Warm Taupe Paint Colours Beige and warm taupe paint colours offer versatile neutral foundations that adapt to different lighting conditions and design styles. These colors range from creamy beiges with golden undertones to sophisticated greiges that blend gray and beige elements. Understanding Beige, Greige, and Taupe Beige paint colours contain warm undertones of yellow, gold, or red that create inviting spaces. These shades work particularly well in rooms with abundant natural light, where they develop a soft, sun-kissed appearance. Greige combines gray and beige to produce a modern neutral that feels less traditional than pure beige. Greige paint colours offer more versatility in contemporary spaces while maintaining warmth through their beige undertones. Taupe sits between brown and gray, often featuring subtle purple or green undertones. Warm taupe variants lean toward brown with hints of red or yellow, making them ideal for cozy atmospheres. Cool taupes incorporate more gray, which can feel less welcoming in spaces lacking natural light. The key difference lies in undertones. We recommend testing paint samples on multiple walls and observing them throughout the day to see how lighting affects each shade's appearance. Popular Warm Beige and Taupe Paint Colours Sherwin Williams Accessible Beige stands as one of the most popular neutral paint colors. This warm beige strikes a balance between beige and taupe, making it adaptable to various design styles. Benjamin Moore Edgecomb Gray offers a greige option with warm undertones that shift between beige and gray depending on lighting. Revere Pewter provides another greige alternative with slightly cooler tones. For true warm beiges, we recommend: Sherwin Williams Balanced Beige - warm versatile shade Benjamin Moore Manchester Tan - rich creamy beige Sherwin Williams Kilim Beige - warm with golden undertones Benjamin Moore Shaker Beige - soft traditional beige Sherwin Williams Perfect Greige delivers exactly what its name suggests. Bungalow Beige , Wool Skein , and Grant Beige offer warmer alternatives, while Muslin and Sherwin Williams Natural Linen provide softer, fabric-inspired neutrals. Nomadic Desert brings earthy warmth for those seeking richer tones. Best Paint Colors for a Cozy Home Atmosphere Warm beige paint creates cozy sanctuaries by reflecting light softly while maintaining depth. Colors with golden or yellow undertones enhance this effect, particularly in living rooms and bedrooms where relaxation matters most. Accessible Beige and Balanced Beige work well in spaces with moderate to high natural light. These best beige paint colors pair beautifully with natural wood elements and earthy decor. For rooms with less light, we suggest Manchester Tan or Kilim Beige . Their stronger warm undertones prevent spaces from feeling dull or flat. Edgecomb Gray suits modern homes seeking warmth without traditional beige appearance. The greige paint color adapts to different lighting while maintaining a welcoming feel. Layer these neutral paint colors with textured fabrics, plants, and warm wood tones to maximize coziness. The best beige paint colors serve as foundations that let other design elements shine while providing consistent warmth throughout your home. Making Your Home Feel Cozy and Inviting Creating a cozy home starts with selecting paint colors that provide warmth and versatility, then enhancing those choices with thoughtful decor, proper testing, and an understanding of how light affects your space. Creating a Neutral Backdrop for Every Room We've found that the best neutral paint colors create a foundation that works throughout your entire home. A neutral backdrop allows us to change decor without repainting, saving time and money. When choosing neutrals, we need to consider the undertones. Warm beige paint colors with golden or yellow undertones create inviting spaces, while warm grays offer a modern feel without coldness. The key is understanding what "neutral" means for your specific style. The most versatile neutral backdrops include: Beige with subtle gray undertones for balanced warmth Warm grays that lean slightly beige rather than blue Natural linen tones that mimic organic textures Greige colors that blend the best of both worlds We recommend using LRV (Light Reflectance Value) to understand how bright or dark a color will appear. Colors with an LRV of 50-60 provide enough depth without making rooms feel heavy. The beauty of a neutral backdrop is its flexibility. We can pair it with sage green accents for a natural vibe or add rich wood tones for traditional warmth. Using Warm Golden and Earthy Hues Warm golden and earthy hues instantly transform rooms into welcoming retreats. These colors work because they mimic natural elements like sunlight, sand, and clay. We love using beige undertones with hints of gold or honey. These shades catch natural light beautifully, creating a gentle glow throughout the day. Unlike cool neutrals, warm beige paint makes spaces feel lived-in and comfortable. Earthy tones in the brown family ground a room. We can use them as accent walls or throughout entire spaces for maximum coziness. Terracotta, warm tan, and soft caramel all fall into this category. Consider these combinations: Golden beige walls with cream trim Warm taupe throughout with white ceilings Earthy brown accent wall with lighter beige surrounding walls Color trends come and go, but warm earth tones remain timeless. They've been popular for decades because they create the emotional response we want in our homes. Cozy Home Decor Pairings and Accents Our paint colors work best when we pair them with complementary decor. Natural materials enhance the warmth of beige and taupe walls. Wood furniture in medium to dark tones creates beautiful contrast against warm neutrals. Oak, walnut, and cherry all bring out the golden undertones in our paint choices. We also love natural linen curtains and upholstery, which add texture without competing visually. Metal finishes matter too. Brass, gold, and warm bronze hardware look stunning against warm beige paint and taupe walls. These finishes reflect light and add subtle luxury. Our favorite accent combinations: Sage green pillows and throws against warm beige Cream and ivory textiles for a layered neutral look Deep navy or forest green as bold contrast colors Natural fiber rugs in jute or sisal We can also add cozy elements through lighting. Warm-toned bulbs (2700K-3000K) enhance golden hues in paint, while table lamps with fabric shades create pools of soft light. Testing Paint Samples and Considering Lighting We never skip testing paint samples before committing to a full room. Colors look completely different on walls than they do on small chips. Paint large samples (at least 2x2 feet) directly on your walls. We observe them for at least 48 hours, checking how they look in morning light, afternoon sun, and evening artificial light. This reveals the true character of beige undertones and how warm grays shift throughout the day. North-facing rooms receive cooler light, which can make warm beige paint appear more gray. South-facing rooms get warm, direct light that intensifies golden tones. We adjust our color choices based on these conditions. Our testing checklist includes:
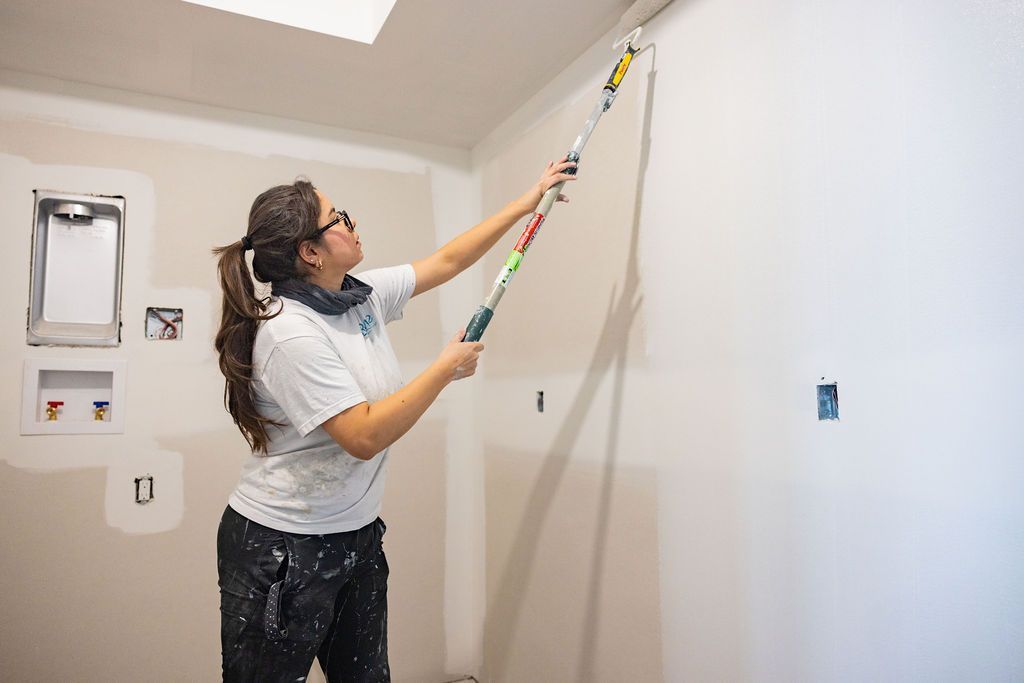
Let us share some paint coating basics that will save you time, money, and frustration before you pick up that paintbrush. Our team at Revive Painting & Wallcovering has watched many DIY projects go wrong because homeowners didn't know how many coats they needed. Here's everything you should know about this common confusion. When one coat might be enough People often ask us if they can get away with just one coat. The answer is yes – but only in specific situations. One coat might be enough if you're painting over a surface that has the same color and sheen, especially with existing paint in excellent condition. This works best in spare bedrooms or hallways where you don't need much durability. High-quality paints with premium formulations can sometimes give you good coverage in a single coat, especially with products that have higher solids content. You might also get by with one application for small touch-ups and quick cosmetic refreshes, but only with the exact same batch and color. Notwithstanding that manufacturers claim "one-coat coverage," these claims rarely work in real-life applications. You might save some money upfront with one coat, but it usually disappoints in its final appearance and costs more because you'll need to repaint sooner. Why two coats is the standard The science behind two-coat standard makes perfect sense to professionals like me. Your first coat builds the foundation – it seals surface pores, evens out texture, and starts the color transition. The second coat gives you accurate color and uniform sheen while covering roller marks and subtle streaks that show up under angled light. Two paint coats create a protective film that handles cleaning, scrubbing, and humidity exposure well. This becomes vital in your kitchen's and bathroom's high-use areas. Paint manufacturers design their products to reach a specific dry film thickness between 3 and 4 mils for homes, and a single coat usually gives you just half that thickness. Two properly applied thinner coats will always look better than one heavy application. Heavy paint application to get one-coat coverage often causes sagging, takes longer to dry, and cures poorly. Even premium "one-coat" products like Behr Marquee or Sherwin-Williams Emerald need two coats to honor their warranties. Your second coat builds up the film strength and improves durability and washability by a lot. This fuller film protects against moisture, ultraviolet damage, and scratches, giving you a longer-lasting paint job and better value over time. How color changes affect coverage Color changes affect the number of coats you'll need. Light colors over dark surfaces typically need more coats for complete coverage – sometimes three or more. The difference between your current color and desired shade plays a big role. Bright reds, oranges, and yellows create unique challenges because they use translucent organic pigments with poor opacity naturally. Even the best paints might need three or more coats to get these colors right. Benjamin Moore suggests using tinted primers for these colors to reduce the finish coats needed. Whites and light colors need special attention too. These colors reflect light and show every flaw, making two uniform coats essential for consistency and a smoother finish, especially under bright lights. A tinted primer can help reduce topcoats needed for dramatic color changes – gray-tinted primer works great when going from light to dark colors. My experience with clients in Saskatoon shows that knowing these basics saves both time and money while giving results that last. The number of coats you choose affects more than just looks—it determines protection, lifespan, and overall maintenance costs. Prepare the Surface for Better Coverage The perfect paint job starts well before you pick up your first brush. Our team at Revive Painting & Wallcovering in Saskatoon has learned that proper surface preparation determines the number of paint coats you'll need. Quality paint can't fix poorly prepared walls. Check wall condition and texture Getting a full picture of your walls is vital. Look at the whole surface to spot cracks, peeling paint, or uneven textures that could ruin your final result. Fresh paint won't hide these flaws—they'll stand out even more once you add color. You'll need to scrape away loose material from cracks or peeling spots, add spackle, then sand until everything's smooth. This detailed prep work might feel slow, but it cuts down the number of paint coats you'll need to achieve a flawless finish. Clean walls let paint stick properly. People often skip this step and end up needing extra coats because the paint won't bond well. Start by dusting with a clean towel or hoovering up loose debris with a brush attachment. Next, use a gentle cleaning solution—mix some baking soda and vinegar or mild dishwashing liquid for most surfaces. Kitchen walls or greasy areas might just need a stronger detergent. Mildew needs immediate attention—don't try to paint over it. The mildew will grow right through new paint layers and create bigger headaches down the road. Mix three to four parts water with one part bleach, put on protective gear, and tackle that mildew before painting. How many coats of primer on new drywall New drywall creates special challenges that affect your paint coat count. Drywall soaks up paint like a sponge, which leads to patchy coverage and wasted paint. Professional painters recommend at least two coats of latex primer on new drywall. This method creates an even base that seals the surface and stops the topcoat from soaking in unevenly. Primer does more than help paint stick—it builds a consistent foundation so your paint color looks true while using fewer topcoats. Drywall mud joints absolutely need primer to prevent "flashing"—those annoying shiny spots in your final paint job. Primer costs nowhere near as much as quality paint per gallon, making it an economical step that saves money over time. When to use primer and when to skip it Not every paint job needs primer, despite what DIY guides might say. Walls in great shape with a similar or lighter color might work fine with high-quality self-priming paint. All the same, primer can boost durability and give you an even sheen. Some situations just need primer: Bare surfaces like new drywall, wood, or metal Big color changes, especially going from dark to light Walls with water damage, smoke, or grease stains Patched or fixed areas Glossy or oil-painted surfaces Primer becomes your best friend during dramatic color changes. The sort of thing I love about tinted primer is how it cuts down topcoat needs when switching between dark and light colors. Without it, old colors can play tricks—like blue walls under yellow paint creating an unexpected green tinge. Note that primer does more than help paint stick—it evens things out, blocks stains, and lets your paint color shine through properly. Well-primed surfaces usually need fewer coats of paint, which saves time and money on your project. Choose the Right Paint and Tools My 15 years as a professional painter at Revive Painting & Wallcovering taught me something valuable - your choice of paint and tools makes a huge difference in the number of coats needed. The right materials can turn a week-long project with multiple store runs into a simple weekend job. How much does a gallon of paint cover You need to know about paint coverage to plan your project properly. Most major manufacturers say one gallon covers 350-400 square feet in a single coat. These numbers change quite a bit based on several things. Premium paints give you better coverage than budget options. Cheaper paints might look like a good deal at first, but you'll need extra coats that wipe out any savings. The surface texture really changes how much paint you'll use. Rough surfaces like stucco need almost double the paint compared to smooth, primed drywall. We've seen this firsthand in our Saskatoon projects - fresh primed surfaces get close to that 400 square foot maximum, while unprimed walls only cover about 300-325 square feet per gallon. Artist-quality paints teach home painters a vital lesson - quality makes all the difference. Better products have more pigment and superior resins, so you need fewer coats. Student-grade paints might cost half as much but need three times more product to get the same results. That's why at Revive Painting & Wallcovering, we only use premium paints. They save our clients money by cutting down on labor and materials. Using a paint calculator to estimate quantity Paint calculators are a great way to get accurate estimates for both pros and DIY fans. You'll find free online calculators from Sherwin-Williams, Benjamin Moore, and Behr that give you spot-on estimates. These tools just need some simple measurements - each wall's length and width, plus how tall your ceilings are. The math is pretty simple if you want to do it yourself: multiply each wall's length by its height, then add everything together for your total square footage. Take a typical 12' x 14' room with 8' ceilings as an example: 2 x (12 x 8) + 2 x (14 x 8) = 416 square feet. After you get the total square footage, divide it by how much one gallon covers (usually 350-400 square feet) to figure out your paint needs. Our example room would need 416 ÷ 375 = 1.1 gallons per coat. Most quality paint jobs need two coats to look good and last long, so you'd need about 2.2 gallons total. I always tell people to add 10% extra for spills, touch-ups, and uneven spots. This buffer has saved many projects from annoying mid-job store runs. Looking at our 416 square foot room, you'd need roughly 2.4 gallons - so grab three gallons to be safe. Brush vs. roller: which gives better coverage The choice between brush and roller isn't just about coverage. Rollers handle big areas faster, but brushes work better in certain spots. A good brush gives you more control, uses less paint, and works better on textured surfaces than rollers do. A fully-loaded roller should cover about 9 square feet of wall. Rollers spread paint more evenly with fewer visible marks than brushes, which makes them perfect for large, flat areas. Brushes shine when you're working around trim, corners, and ceilings where you need precision more than speed. Your roller choice really matters for coverage quality. Smooth walls and glossy finishes work best with a 1/4-inch nap, while textured surfaces need 1/2 or 3/4-inch naps to fill all the gaps. High-quality microfiber roller covers hold and release more paint evenly, so you get smoother results and better coverage with fewer coats. Paint manufacturers might promise one-coat coverage, but my work at Revive Painting & Wallcovering shows that two thin coats always look better than one thick one. This stays true whether you're using a brush or roller. Going for one-coat coverage usually leads to thick, uneven paint that drips, sags, and takes forever to dry. Apply Paint the Right Way Your paint selection and surface preparation are done. Now the way you apply the paint will determine if you get professional results with fewer coats. We at Revive Painting & Wallcovering have mastered techniques that deliver smooth, streak-free finishes on walls throughout Saskatoon. How to paint a wall without streaks The quickest way to get streak-free walls depends on proper technique and paint application. Load your roller evenly—it should be saturated but not dripping. You need to apply paint generously. A time to reload comes when you're pressing hard on the roller to get paint on the wall. The "W" or "M" method works best for smooth results. Roll paint in this pattern first, then fill gaps with straight strokes. This approach prevents uneven distribution and creates consistent coverage. While cutting in edges, press your loaded brush firmly to apply a thicker layer about 1 to 1.5 inches from the border. Then lightly feather the paint to the edge. Don't overwork the paint since it starts drying right after application. Work in manageable 3-foot by 3-foot sections to spot touch-up areas before they dry. You can prevent roller lines by gently rolling back over visible trails in the opposite direction. How long between coats of paint Time between coats is vital for a durable finish. Latex paints need 2-4 hours before you apply a second coat. Oil-based paints take much longer—about 24 hours between applications. Rushing creates peeling paint, uneven color, or bubbling from trapped moisture. Weather conditions affect these timeframes significantly. High humidity makes drying periods longer. Each coat must dry completely until the color looks uniform across the surface. Tips for maintaining a wet edge A "wet edge" technique helps achieve seamless results. This means you need to apply new paint next to areas that haven't dried yet. Missing this step creates lap marks—visible lines where wet paint meets dried sections. You can maintain a wet edge by: Breaking walls into manageable sections Working quickly and methodically Planning breaks at natural interruptions like windows or corners Paint from "wet to dry" instead of the other way around for the best results. This method creates a smooth, uniform look without noticeable overlaps between sections. High-quality paints with better "wet edge" properties give you more time to work before drying starts, especially on large areas. Special Cases That May Need Extra Coats Some painting jobs just need extra attention and more coats whatever your prep work. My experience with Revive Painting & Wallcovering shows that standard two-coat applications don't always cut it. Painting over dark or bold colors Color changes from dark to light shades bring unique challenges. We painted over navy, charcoal, and burgundy to lighter neutrals and usually needed three or more coats for full coverage. Dark pigments tend to bleed through even quality paint, which leads to patchy and uneven results. You can cut down on topcoats by using tinted primers made for color transitions. A gray-tinted primer works better than pure white for bold colors. Textured or porous surfaces Texture makes paint consumption go up faster. You'll need extra coats on rough surfaces like unsealed concrete, textured drywall, and bare wood because they soak up paint quickly. Start by cleaning textured walls really well - vacuum first, then use TSP cleaner. Longer nap rollers (3/4" to 1½") work best since their fibers reach deep into textures and give better coverage. Seal porous materials with 2-3 coats of sealant or use a mist coat - paint mixed with 5-10% water - before painting. Ceilings, trims, and high-traffic areas Ceilings can be tricky, especially with stains or bare surfaces. You'll want stain-blocking primers for water marks or smoke damage. High-traffic spots need extra coats to last longer - two coats will give you a strong barrier against moisture, wear, and scrapes. These extra layers make cleaning easier and save money on maintenance. Need help? Let Revive Painting and Wallcovering handle your interior painting in Saskatoon. We know how to tackle challenging projects and deliver professional results without endless coats or poor coverage. Key Takeaways Understanding the right number of paint coats saves time, money, and ensures professional-quality results that last longer: • Two coats is the professional standard - The first coat seals and evens texture, while the second delivers true color and durability • Surface preparation determines coat requirements - Clean, primed surfaces need fewer coats than unprepared walls with stains or damage • Color changes dramatically impact coverage needs - Dark to light transitions often require 3+ coats, while tinted primers reduce topcoat requirements • Quality paint and proper technique reduce coat count - Premium paints with higher solids content provide better coverage than budget alternatives • Special surfaces demand extra attention - Textured walls, ceilings with stains, and high-traffic areas typically need additional coats for optimal protection Investing in proper preparation, quality materials, and correct application techniques upfront prevents the frustration and expense of multiple repainting projects down the road.

Wainscoting has stood the test of time since the 1300s, and with good reason too. It's not just another fleeting interior design trend. This classic wall treatment brings both practical benefits and timeless appeal that can improve your Saskatoon home by a lot. Wainscoting does more than just decorate - it acts as a protective barrier against daily wear and tear. Your walls stay protected from scuffs, dents, and scratches that happen over time in busy areas like hallways and dining rooms. It also makes cleaning a breeze - just wipe with a damp cloth instead of constantly touching up painted walls. You might be surprised by wainscoting's acoustic benefits. These wooden panels help absorb sound and reduce echoes and noise levels. Rooms with hard flooring surfaces benefit especially since sound tends to bounce, which creates a more relaxed living environment. The right chair rail height can make your space look completely different. Your ceilings can appear taller, giving rooms an airier feel. This visual trick works wonders in smaller spaces or rooms with lower ceilings. Paint options for wainscoting are endless. White wainscoting against bold-colored walls creates classic contrast. Using the same color in different sheens adds subtle sophistication. Bathrooms need moisture-resistant options with semi-gloss finishes that are easy to clean and last longer. Quality wainscoting can boost your home's resale value. Buyers love architectural details that make spaces feel custom-designed. Houses with well-done wainscoting often look more elegant, making them more marketable. Different styles suit any interior design theme. Beadboard adds cottage charm, raised panels bring formal elegance, and board and batten creates modern appeal. Each option turns ordinary walls into standout features without needing a complete renovation. Understanding the Basics Before You Paint You need to understand wainscoting basics before starting your paint work to achieve professional results in your Saskatoon home. What is wainscoting and why it matters Wainscoting refers to decorative paneling installed on the lower portion of interior walls. It covers one-third of the wall height and follows the classic "rule of thirds". This 18th-century innovation protected walls from damage and provided extra insulation in drafty homes. It also improved the beauty of vintage interiors. Modern wainscoting serves mostly as decoration, yet it gives you both protection and visual appeal that lifts any space. Wainscoting does more than look good. The architectural detail makes rooms feel complete and purposeful. Saskatoon's climate often forces people to push furniture against walls during winter gatherings. This wall treatment acts as a practical shield against scuffs and dents. Different types of wainscoting you might have Here are six main wainscoting styles that create unique looks: Raised Panel : Traditional with beveled edges, ideal for formal dining rooms (30-40 inches high) Flat Panel : Clean, modern appearance with smooth panels that create depth without beveling Beadboard : Features narrow vertical grooves, perfect for cottage-style bathrooms and informal spaces Board and Batten : Vertical boards (usually 4-6 inches wide) spaced about 10 inches apart, excellent for contemporary homes Overlay : Combines raised and flat panel styles for a deeper, more detailed appearance Vinyl Panel : Waterproof PVC option ideal for bathrooms and high-humidity areas Your room's specific needs determine the material choice. Options range from traditional solid woods like pine, oak, and cherry to budget-friendly MDF or moisture-resistant PVC. How wainscoting affects home value A well-installed wainscoting can boost your home's value above its installation cost. Saskatoon buyers love the high-quality craftsmanship look that wainscoting provides. This architectural feature stands out as one of the most cost-effective ways to improve interior beauty and home value. White painted wainscoting in main living areas gives you the best return on investment. Future homeowners can easily change wall colors above it, creating timeless appeal. Rich stained wainscoting in cherry or oak tones can make your property stand out as more luxurious in competitive markets. Choosing the Right Paint and Finish Picking the right paint and finish is crucial to turn your wainscoting from basic to stunning. As Saskatoon's experienced painting contractors, we've seen how smart choices can boost your home's appeal and value. Should you paint wainscoting the same color as the wall? Using similar colors for walls and wainscoting creates a modern look that makes your space feel bigger. This works best with different sheens - a satin finish on walls with semi-gloss on wainscoting adds subtle dimension. You might also want to think about using lighter and darker shades of the same color family. This adds depth while keeping everything tied together nicely. When to go with white vs. bold colors White wainscoting is a safe bet that fits most interiors. All the same, you can make a bold statement with colors like raspberry pink or robin's egg blue. These work great with complementary wallpaper above. If you're selling your Saskatoon home, classic white wainscoting offers timeless appeal and lets buyers imagine their own wall color choices easily. Stain or paint: what works best for your space We used paint to hide wood grain and defects while creating a modern look. Staining shows off the natural wood beauty but needs more careful surface prep. Stained wainscoting looks great in rooms with existing wooden elements, while painted options give you cleaner, brighter results. Ideas for painting wainscoting in bathrooms and kitchens Bathrooms and kitchens just need extra attention because of moisture exposure . Semi-gloss or satin finishes are your best bet here since they're durable and easy to clean. Warm neutral tones like Natural Linen or Huntington Beige look fantastic with dark cabinetry. Note that you should prime both sides of panels in bathrooms so they don't warp from humidity changes. Step-by-Step: How to Paint Wainscoting Like a Pro Professional-looking wainscoting depends on the actual hands-on process. My experience as a Saskatoon painting contractor has helped me perfect these techniques through hundreds of installations. Prepping the surface: cleaning and sanding You should clean the surface with warm soapy water and let it dry. Sand previously painted surfaces that have a semi-gloss or gloss finish, unless you're dealing with lead paint . A 180-220 grit sandpaper works best for peeling paint or bare wood. The surface needs vacuuming and a wipe-down with a microfiber cloth. Priming for a smooth finish MDF surfaces need acrylic primer - Fresh Start from Benjamin Moore gives excellent results. It covers well, dries fast and sands smoothly. STIX Waterborne Bonding Primer works best for older homes with previously painted wainscoting because it sticks better. Best tools and brushes to use Quality angled brushes and microfiber rollers designed for trim make a big difference. These tools help create that smooth, professional finish you want. Painting techniques for even coverage Paint in two-foot sections instead of doing all horizontal pieces first. Short strokes work best for horizontal rails. Follow up with long vertical strokes on grooves right away. This approach prevents drips and creates clean directional finishes. Painting wainscoting before and after: what to expect The whole project takes 2-3 days - one day to prep and prime, another to paint. You'll need two coats for full coverage. Your home's interior will look dramatically better with properly painted wainscoting. Where It Works Best and How to Style It Wainscoting changes ordinary rooms into showcases of architectural interest. My experience as a Saskatoon painting contractor shows how strategic placement and thoughtful styling can maximize its effect. Painting wainscoting in living rooms and hallways Living rooms gain character from wainscoting that complements existing architectural elements . The wainscoting's finish should match fireplace mantels to create cohesive designs. Hallways look elegant when their wainscoting and walls share similar colors, while door frames stand out in contrasting shades. Rich chocolate browns combined with vintage blues add warmth to transitional spaces. Using wainscoting to define open spaces Wainscoting does more than just look good - it segments larger areas without physical barriers. A single wall of wainscoting creates a dynamic focal point that works well in Saskatoon's open-concept homes. The technique can outline dining spaces and define home office zones within multipurpose rooms. How height and proportion affect the look Traditional wainscoting covers about one-third of wall height. Rooms become more dramatic and less conventional when wainscoting runs two-thirds or three-quarters up the walls. Taller wainscoting (36-48 inches) maintains balanced proportions in rooms with lofty ceilings. Pairing wainscoting with wallpaper or color blocks Classic white wainscoting paired with dark patterned wallpaper creates high-contrast sophistication. Color blocking offers another option - use contrasting yet complementary shades between upper walls and wainscoting. Saskatoon's historic homes look authentic with wainscoting and trompe l'oeil architectural wallpaper that boosts their period character. A Small Change That Makes a Big Impact Wainscoting stands out as the smartest dollar-for-dollar home improvement investment you'll make. Professional painted wainscoting adds more property value than its installation costs. This renovation ranks among the most cost-effective ways to enhance interior appeal. Homes with quality wainscoting sell faster and fetch better prices, according to real estate experts. The architectural detail raises visual interest by adding depth, texture, and character that basic walls can't match. A simple installation transforms spaces into custom-built, designer-quality rooms. Saskatoon homeowners can maximize their returns with these value-adding combinations: White wainscoting against deep navy or charcoal walls creates lasting appeal Monochromatic designs using different sheens (matte walls with semi-gloss wainscoting) add subtle sophistication Bathroom beadboard painted with moisture-resistant semi-gloss finishes Wainscoting's versatility makes it perfect for formal dining rooms, cozy bedrooms, or practical kitchens. This modest investment delivers significant results in both beauty and value throughout the house. The right color choices paired with wainscoting make it one of the few home improvements that pays for itself while offering immediate visual impact. Key Takeaways Transform your home's value and appeal with these essential wainscoting painting insights that deliver maximum impact for minimal investment. • Proper preparation is crucial : Clean thoroughly, sand glossy surfaces, and use quality primer like Benjamin Moore Fresh Start for professional results that last. • Strategic color choices maximize impact : White wainscoting offers timeless appeal and broad buyer appeal, while bold colors create dramatic focal points in specific rooms. • Height and proportion matter : Follow the rule of thirds (one-third wall height) for traditional looks, or go taller (36-48 inches) in rooms with high ceilings. • Different finishes serve different purposes : Use semi-gloss in bathrooms and kitchens for moisture resistance, while satin works well in living areas for easy cleaning. • Wainscoting delivers exceptional ROI : This architectural feature often increases property value beyond installation costs and helps homes sell faster in competitive markets. Beyond esthetics, wainscoting provides practical benefits including wall protection from scuffs and scratches, improved acoustics, and easier maintenance compared to painted walls. The key to success lies in matching the wainscoting style to your home's architecture and choosing finishes appropriate for each room's specific needs.
Every year we head to Mexico to give back to the community! 2025 was another exceptional year helping families who can't afford to fix their homes. Thanks to support and customers like you, we were able to help families in need.

FOR YOUR PEACE OF MIND
Our Warranty Coverage
For All Exterior Products
2 YEAR WARRANTY
For All Interior Products
10 YEAR WARRANTY
6 MONTH WORKMANSHIP WARRANTY
1 YEAR WORKMANSHIP WARRANTY