Spraying Paint vs Rolling: What's Better?

Revive Painting • June 27, 2025

Paint sprayers might look like the obvious choice to save time, but the decision needs more thought. These machines start at $300, and daily rentals run between $65-$100. My experience as a commercial painting contractor in Saskatoon shows clients struggle with this choice. They're surprised to learn sprayers use about 25% more paint than regular rollers. Sure, sprayers are fast, but speed isn't everything.

The cost difference between spray and rolling methods hits hard upfront. A complete roller setup with frame, covers, brushes and tray costs just $20 to $40. Paint sprayers need much more investment. The speed advantage can be worth it though - projects that take several days with rollers wrap up in just two days with sprayers. The catch? Sprayers can burn through 33% more paint than rollers. Paint waste adds up too. You'll need about one liter of paint just to fill a 50-foot hose and prime the spraying machine.


Let me share what I've learned about paint sprayers versus rollers from my years in the painting business. We'll look at speed, costs, finish quality, ease of use, and environmental effects. This information will help you get professional results whether you're painting one room or your entire house. You won't waste money or end up frustrated if you understand what each method can and can't do.


When to Use a Paint Sprayer vs Roller


The choice between spray painting and rolling isn't just about what you like—it's about picking the right tool for your job. My experience running a commercial painting business in Saskatoon has taught me that knowing when to use each method saves time, money, and headaches.


Sprayer for large, open, or textured areas


Paint sprayers really shine when you're working with big surfaces or tricky textures. These tools are perfect for exterior jobs like siding, fences, and large walls. They work amazingly well on textured surfaces where rollers just can't do the job—think popcorn ceilings, brick walls, stucco exteriors, and detailed trim work like crown molding or built-up baseboards.


Sprayers prevent paint from pooling and dripping on complex textures, unlike brushes or rollers. They're also the quickest way to handle projects that need a precise finish. To name just one example, see how a new home or empty room needs minimal masking—you just cover plumbing stub-outs, electrical boxes, and windows.


Most pros use sprayers for new construction or empty houses. A sprayer can finish in two days what might take several days with rollers, which is a big deal for large projects. Just remember to hold the spray gun about 12 inches from the surface and keep it perpendicular for the best results.


Roller for small, detailed, or occupied spaces


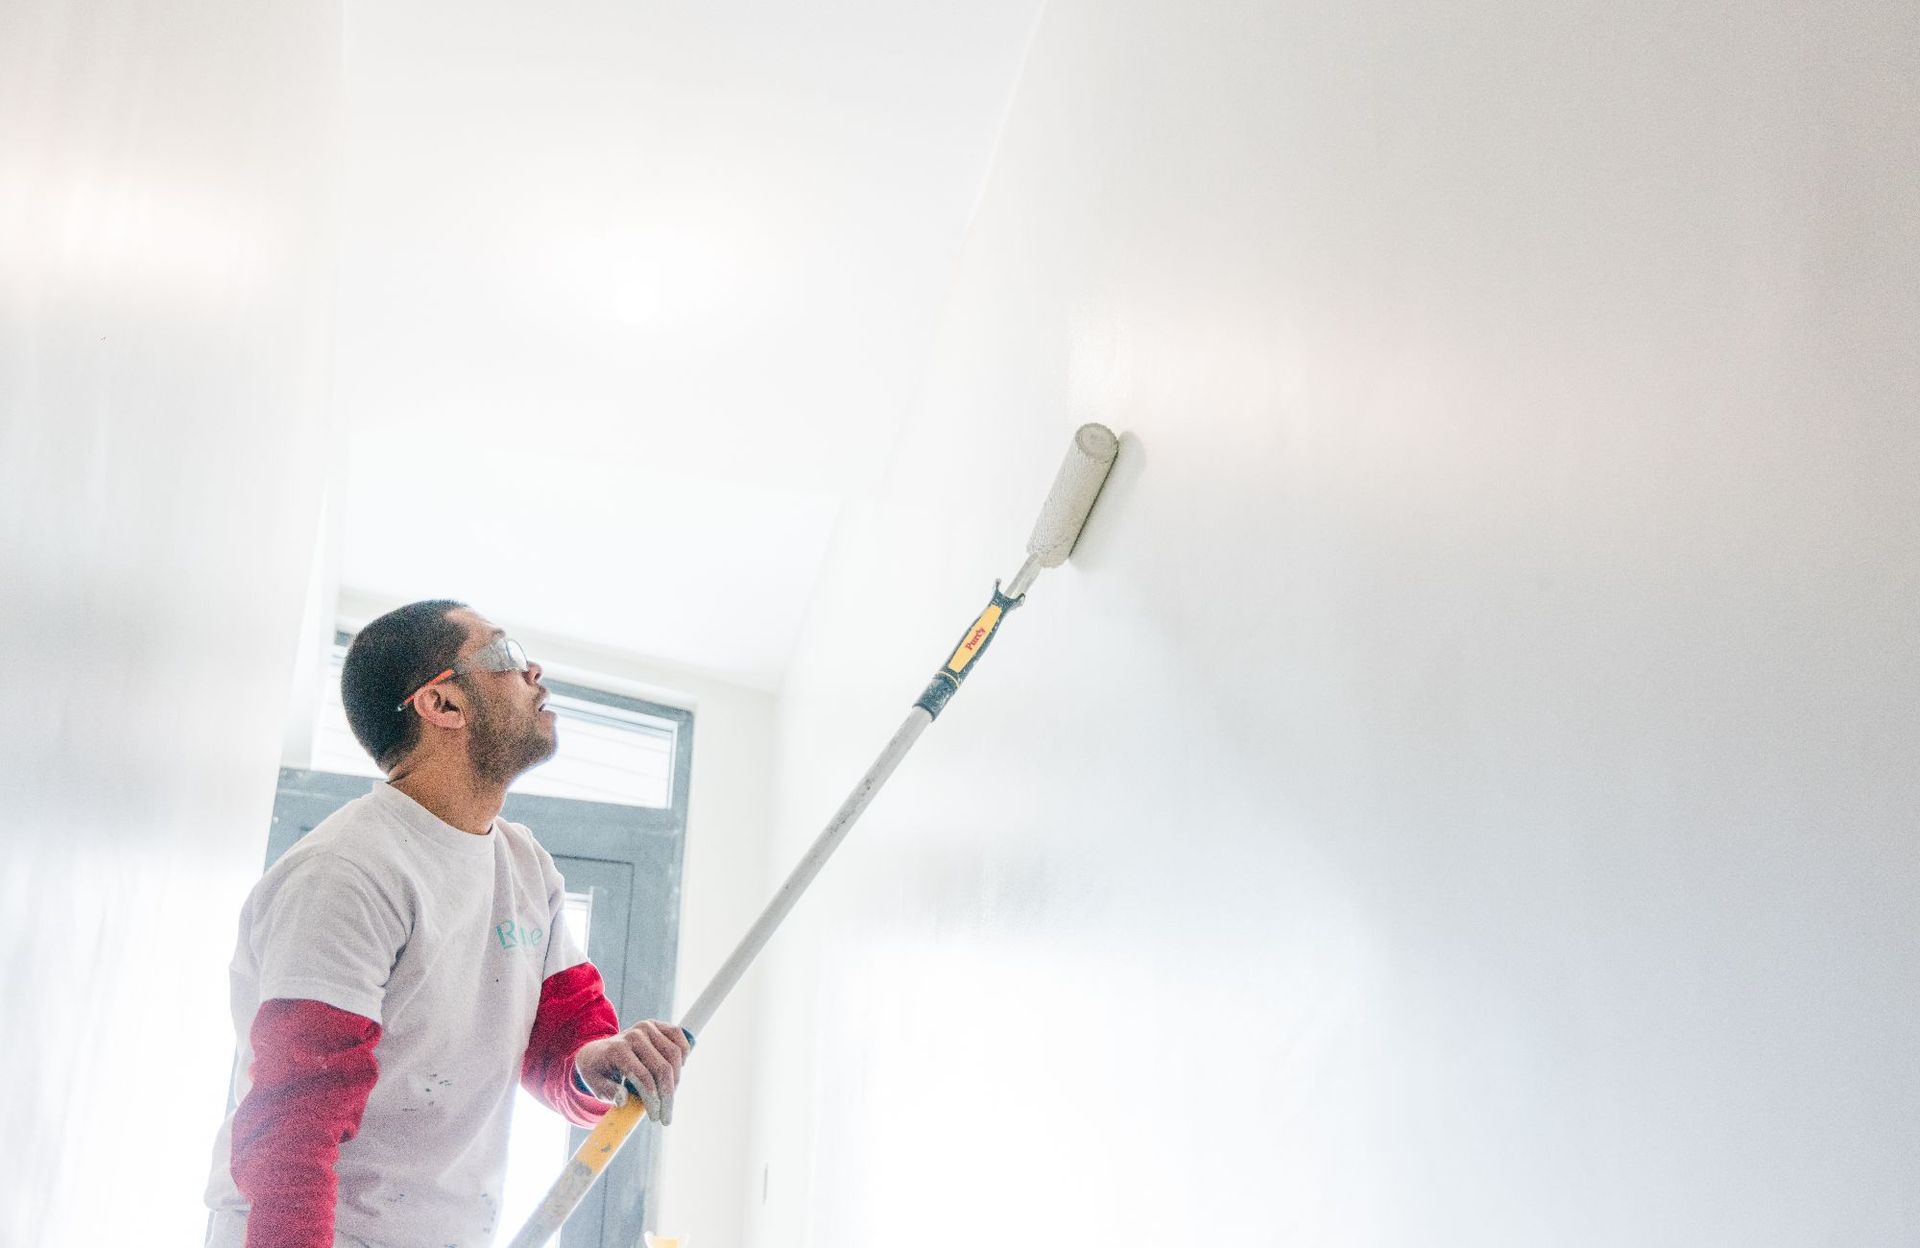
Rollers are your best bet for occupied homes and smaller projects. Living spaces need too much masking and taping to protect from overspray. Rollers give you flexibility—you can stop work, cover your stuff, and start again later without a lengthy setup.

You'll get better control and consistency with rollers, especially on surfaces that aren't spotless. The original coat goes on thicker, so you usually need just two coats instead of the extra ones spraying might require. On top of that, prep work is much simpler—you mainly protect trim and floors rather than everything nearby.


Small projects are cheaper with rollers. A good roller setup costs less than CAD 69.67, way below even basic sprayers. Rollers are also more paint-efficient—sprayers use about 25% more paint.


How room conditions affect your choice


Your environment plays a huge role in which method works best. Temperature and humidity affect how spray paint dries and looks. Paint dries too fast in direct sunlight, which can cause lap marks and blisters. Starting spray projects on the shaded side of the house usually works better.


Each method needs different prep work. Spraying an occupied space means covering everything you don't want painted—furniture, floors, trim, and nearby walls all need protection. Even heavy drop cloths can move from the spray force, so everything needs secure fastening.

The distance between sprayer and surface matters. Spray too far and you get patchy coverage; too close and you'll see runs and buildup. These factors make rolling the smarter choice for most interior projects in lived-in homes, even if it takes longer.


My years in Saskatoon have shown that mixing techniques often works best. Many pros use "back rolling"—they spray first for speed, then roll over wet paint right away. This ensures good adhesion and creates a texture that makes future touch-ups easier.


Speed and Setup Time: Which Is Really Faster?


Raw speed numbers don't tell the whole story when comparing paint sprayers to rollers. Professional painters can cover 1,000-2,000 square feet per hour with an airless sprayer. Rollers top out at 300-400 square feet per hour. This huge difference makes spray equipment look like the obvious choice. Speed includes more than just how fast you can apply paint.


Sprayer application speed vs prep time


Spraying paint is way faster than rolling - at least four times faster according to studies. This advantage becomes crystal clear on large-scale projects. Rollers just can't match sprayers when covering areas over 1,000 square feet. Even in average-sized rooms around 100 square meters, spray equipment finishes the job faster.


All the same, this speed comes with a catch. You really need to mask and protect everything that shouldn't get paint on it before spraying. Masking takes much longer compared to roller prep work. Our commercial painting company in Saskatoon has seen masking jobs stretch into several hours. Some complex projects take days. Small projects might not even save time because masking takes so long.


Roller setup and pause flexibility


Roller painting has a hidden advantage that people rarely talk about - flexibility. You can set up a roller in under a minute. Just pour paint in a tray, lay down drop cloths and start painting. Spray equipment needs assembly, testing, pressure adjustments and careful masking before you can begin.


Rollers let you take breaks easily, which is a big plus. When you need to pause, just wrap your roller in plastic to keep it from drying. You can pick up right where you left off without any issues. Sprayers don't work that way. Once paint fills the system, you're stuck until you finish. Paint left in the sprayer's hose or gun will clog everything up if you don't clean it right away.


Cleanup time comparison


Cleanup is another time factor that varies between these methods. Roller cleanup is straightforward - wash with soap and water for water-based paints until the water runs clear. This takes some work but it's easier than dealing with a sprayer.


Sprayers need a deep clean after each use. You'll have to take everything apart and flush the whole system. This wastes paint too - about a liter just to fill a 50-foot hose and prime the machine. Professional painters follow strict maintenance steps. They lubricate pistons, flush with the right solvents, and use pump-saving solutions to stop rust and protect internal parts.


The project's size and situation ended up determining which method saves more time. Rolling works faster for small areas when you add up all the factors. Spraying saves time on big surfaces that don't need much masking. You'll need to think about prep work, flexibility, and cleanup time - not just how fast the paint goes on.


Finish Quality and Paint Coverage


Your painted surface's look and feel depends a lot on how you apply the paint. My experience running a commercial painting company in Saskatoon has taught me that clients don't realize how much the application technique can affect the final look. Both methods can give great results in the right situations, but spray paint vs roller finishes have some big differences.


Smooth finish with sprayers


Paint sprayers are great at creating smooth, even finishes without visible marks. They usually give better, more professional results than brushes and rollers on smooth surfaces like trim, doors, and cabinets. This becomes really obvious with shaker-style doors and flat, rectangular profiles where rollers might leave unwanted texture.


The science behind this better finish comes from how sprayers turn paint into a fine mist. This lets the coating spread evenly across the surface - as long as you use the right tip size and pressure settings. The tiny paint particles can reach small crevices and uneven spots better than any roller. Some pros use HVLP (High Volume Low Pressure) sprayers to get automotive-quality results on furniture, cabinets, and other detailed projects.


A sprayed finish will naturally smooth out to create surfaces "smooth as a baby's bottom" if you use proper technique. Keep the sprayer 6-12 inches from the surface and move in smooth, overlapping strokes. Professional sprayers lay down thinner, more consistent coats that dry evenly. This reduces visible lap marks and creates a finish that looks like factory-applied coating.


Texture and thickness with rollers


Rollers beat sprayers at controlling texture and coating thickness, even though sprayers give smoother results. They work paint into uneven surfaces better than sprayers, which only force paint one way. This makes rollers perfect to use on rough surfaces like textured walls or ceilings, since the rolling motion pushes paint into every surface variation.


Roller texture does more than just look good. The subtle texture scatters light evenly across the surface and hides small imperfections, flatness variations, and blemishes. So that slight texture from rollers can actually help in many homes and commercial spaces.


Your choice of roller cover makes a big difference in the final texture. Match the nap length (the fiber thickness on the roller cover) to your surface's roughness. Shorter naps (¼-inch) give smoother finishes on metal, trim and cabinet doors. Longer naps (¾-1 inch) work better on rough surfaces like stucco or brick. You can also get specialty rollers with patterns or textured surfaces to create decorative effects that look like fabric, stone, or stucco.


Back rolling and hybrid techniques


Professional painters often combine both methods to get the best results. Back rolling is the most common hybrid technique. You follow spray application with a roller pass while the paint's still wet. This gives you speed while fixing any sprayer limitations.


Back rolling does three important things: it makes texture uniform, improves adhesion, and fixes surface variations. The roller creates an even texture that hides flaws, pushes paint deeper for better sticking, and flattens raised fibers on surfaces like new drywall. Without it, spray-only applications can be hard to touch up later because matching that smooth, non-textured surface becomes almost impossible.

This technique works especially well when priming new construction drywall. Sprayers put paint on fast but don't help it penetrate or stick better - they just coat the surface. Back rolling makes sure the coating bonds properly with the surface and prevents future separation around gaps, cracks, and pinholes as temperatures change.


Cost, Paint Usage, and Waste


The financial side of painting methods reveals surprising facts about immediate and future costs. Many first-time painters get caught off guard by focusing only on how fast they can apply the paint.


Upfront equipment costs


The price gap between sprayers and rollers is huge. A good roller setup with frame, covers, brush, and tray costs less than CAD 69.67. This makes it a budget-friendly choice for occasional painters. On the flip side, basic paint sprayers start at CAD 418.01, while professional equipment can cost anywhere from CAD 1,393.36 to CAD 6,966.80. Renting offers a middle ground option that costs between CAD 90.57 and CAD 139.34 per day. Yes, it is clear why rollers become the smart choice for single-room projects or occasional painting needs.


Paint consumption: spray vs rolling paint


Paint makes up a big part of project costs, and each method uses different amounts. Sprayers use 25-33% more paint than rollers because of overspray and atomization. Paint guns break down paint into tiny droplets, which leads to thinner coverage and more scattered application. Rollers put almost every drop right on the surface, but sprayers lose much paint during application. Some sprayer types work better than others. HVLP (High Volume Low Pressure) systems can transfer up to 65% of the paint effectively, while airless sprayers manage only 45-60%.


Waste and environmental impact


Rolling paint often proves better for the environment. This method creates less air pollution and waste compared to spraying. Rollers produce few VOC emissions during use, but spraying creates tiny paint particles that can pollute the air. Overspray poses extra environmental risks and might contaminate soil or water if not contained properly.


Using less paint saves money and helps protect the environment. Smart practices help cut waste whatever method you choose. These include measuring correctly before buying, using paint keys instead of screwdrivers to open cans, and storing paint in dry areas.


Ease of Use, Safety, and Learning Curve


The success of DIY projects depends a lot on how you apply paint. Choosing between spray paint and rollers isn't just about cost and speed. You also need to think about how easy they are to use and how safe they are.


Beginner-friendly tools


Rollers give new painters a clear advantage. You can get good results with minimal training, and they're easier to control. The simple dip-and-roll method makes rollers perfect for beginners who don't have special skills. Sprayers need precise adjustments and settings that can be tough for newcomers. Most professional painters tell DIYers and homeowners to use rollers and leave sprayers to the pros. Rollers are forgiving, and you can fix mistakes easily without redoing the whole job.


Safety gear for spraying


Spray painting needs way more safety gear than rolling does. Rolling needs basic protection, but spray painting requires detailed safety measures against harmful particles and fumes. You'll need respirators with NIOSH-approved organic-vapor-removing cartridges because regular dust masks won't protect you from paint vapors. Safety goggles or face shields are a must with spray equipment. You also need full-body protection - coveralls, chemical-resistant gloves, and head coverings to keep paint particles off your skin. Good ventilation is crucial, so open windows and use fans to reduce risks during indoor spraying. This setup takes much more prep work than rolling does.


Common mistakes and how to avoid them


New spray painters often make technique errors. They struggle to keep the right distance from the surface - too close creates drips, too far leaves patchy coverage. Beginners often use too much pressure, which makes paint build up and drip. To reduce these problems, practice on scrap materials first. Poor preparation is another big issue - surfaces need proper cleaning and prep work to help paint stick better. Many pros suggest taking specific training courses for airless sprayers. These courses help you understand dangers like injection injuries that can happen if you don't handle high-pressure equipment correctly.


What to Choose


The choice between spray painting and rolling depends on your project's specific needs rather than picking one as the clear winner. My years as a commercial painting contractor have shown that project size, surface texture, timeline, and budget all play significant roles in picking the right application method. Spray painters work faster for large, open areas and give incredibly smooth finishes on cabinets and trim. The downside? They cost more upfront and use more paint. Rollers give you better texture control, more flexibility, and cost nowhere near as much to start with—perfect for smaller projects and occupied spaces.


Most pros, including myself, suggest mixing both approaches by back rolling. This helps us work faster while making sure the paint sticks properly and looks uniform. The sort of thing I love about rolling is how it wastes less paint and creates fewer emissions compared to spraying—something that matters more and more in today's green practices.


Safety needs careful attention, especially if you're doing it yourself. Rollers need basic safety gear, but spray painting requires detailed safety measures like proper respirators, eye protection, and good ventilation. First-time painters usually find rollers easier to learn and less likely to cause problems. In spite of that, both methods give great results with the right technique and prep work.


Getting that perfect finish isn't just about picking the right tools—it's knowing exactly when and how to use them. Professional results take real expertise, which is why many Saskatoon property owners end up calling in the pros instead of tackling these challenges alone. If the technical side of your painting project feels overwhelming, Use Revive Painting & Wallpaper delivers results that last. We bring decades of hands-on experience to every job, choosing the best method for your surfaces instead of using a one-size-fits-all approach.


Revive Painters in Saskatoon
choosing right exterior paint for weather
By Revive Painting June 15, 2025
Choosing the right exterior paint can feel like picking a new outfit for your home—it needs to look great, hold up in all kinds of weather, and fit your personality. But there’s more to it than color swatches. The type of paint you choose impacts how long it lasts, how well it protects, and even how often you’ll need to repaint. Whether you live on the coast, in a rainy region, or under the hot southern sun, different paints serve different needs. Here's what you probably didn’t know about the smartest options on the market. Weatherproof Exterior Paints Designed for Harsh Climates Homes in regions with extreme temperature swings need more than just good-looking paint. Weatherproof exterior paints are built to expand and contract without cracking. These formulas resist peeling and keep their grip even through freezing winters and scorching summers. In desert heat or mountain chill, this type of paint keeps your home sealed and sharp-looking. What makes these stand out is their ability to bond tightly to surfaces while flexing with the weather. That means fewer repainting projects and longer-lasting protection. Another major benefit? Weatherproof paints often come with built-in UV blockers that reduce color fading. If your house faces long hours of direct sunlight or heavy snow, these paints can help your siding stand the test of time. These products also tend to include added resistance to moisture intrusion, which helps prevent internal damage from ice dams or water seepage. Choosing the right formula for your climate zone can mean the difference between repainting every five years or every fifteen. Durable Latex Paint Choices That Resist Fading and Cracking Latex paint is one of the most common picks for home exteriors—and for good reason. It’s water-based, which makes it easier to clean up and less harmful during application. But not all latex paints are created equal. Higher-end options are engineered to resist fading, cracking, and chalking, even after years of UV exposure. This makes them a reliable choice for homeowners who want solid color retention and low maintenance. Plus, latex dries quickly and adheres well to surfaces like stucco, wood, or fiber cement. Durable latex formulas also tend to resist dirt and mildew, keeping your home looking fresh between washes. Their flexibility helps them handle minor movements in the house’s structure without breaking their seal. If your home is older or made of wood that expands and contracts over the seasons, latex can adjust without flaking off. It’s also breathable, which lets trapped moisture escape instead of blistering underneath. A solid latex exterior paint can offer years of beauty and protection in one neat package. Acrylic Paint Options Offering Superior Adhesion and Longevity Acrylic paint stands out for its strong adhesion. That means it clings tightly to surfaces and resists peeling over time. It's especially effective on surfaces that are prone to movement or moisture, like exterior trim or hardboard siding. Acrylic paint penetrates the surface just enough to hold on even when weather tries to push it off. Many painters trust acrylics when they want paint that won’t lift or bubble, especially in challenging conditions. In terms of longevity, acrylic paint delivers some of the most impressive numbers. It holds its color longer than standard latex and resists the elements without frequent touch-ups. You’ll also find that acrylic paints are more resistant to mildew and mold growth, especially when paired with a good primer. Whether you're painting a modern vinyl-clad home or restoring an old craftsman, a high-grade acrylic exterior paint can keep the finish looking new for many years. Eco-Friendly Exterior Paints for Sustainable Homeowners Eco-conscious homeowners often assume they'll have to sacrifice performance for environmental responsibility—but that’s no longer true. Many eco-friendly exterior paints are now as durable and vibrant as traditional formulas. These paints are made with low or zero VOCs, which means fewer chemicals in the air during and after application. This is especially important if you have children, pets, or sensitive lungs in the house. Today’s green paints can handle the elements without harming the planet. In addition to being safer, these sustainable paints often come with natural mildew resistance and better breathability. This means they can help reduce moisture buildup on your siding while also keeping your indoor air cleaner. They're also manufactured using processes that limit environmental impact, from water conservation to recyclable packaging. Choosing an eco-friendly paint is more than a feel-good decision—it’s a smart one for health, performance, and the long haul. Specialized Exterior Paints Ideal for Coastal Conditions Living near the coast has its perks—salty breezes, ocean views—but it also comes with challenges for your home's exterior. Salt air corrodes surfaces and speeds up paint breakdown, especially on wood and metal. That’s where specialized coastal paints come in. These paints are designed to handle high humidity, salty moisture, and sand-blown winds without blistering or bubbling. They're formulated to resist rust and offer better protection against moisture damage. Coastal paints often contain added layers of resin or acrylic that seal out salt intrusion. They also have improved UV resistance to stand up against the blazing sun often found in seaside areas. If you’re painting a home near the beach or even within a few miles of saltwater, regular paint just won’t cut it. Using the wrong type could lead to premature cracking, peeling, and frequent touch-ups. Coastal formulas help preserve your home's appearance longer, with fewer headaches. Premium Elastomeric Paints for Optimal Flexibility Elastomeric paint works differently from standard paints—it forms a thick, rubbery coating that bridges hairline cracks and seals surfaces. It’s great for stucco, masonry, and concrete because it prevents water from seeping in while letting vapor escape. Think of it like a waterproof jacket that still breathes. If your home’s exterior is prone to small cracks or has shifting surfaces, this paint helps prevent more damage while looking polished. What makes elastomeric paint a premium option is its long-term flexibility. It stretches and contracts without breaking its bond to the surface, which means fewer touch-ups over the years. Many of these paints also offer superior dirt and mildew resistance, so your home stays cleaner for longer. If you're dealing with hairline fractures or harsh sun exposure, this paint provides a strong, protective layer that doubles as an attractive finish. Mold-Resistant Formulas Best for Humid and Rainy Regions In wet or humid regions, mold and mildew are the biggest threats to your home’s exterior. Mold-resistant paints are made with additives that prevent spores from growing, even in consistently damp conditions. These formulas are especially helpful in regions where summer humidity lingers or where rain comes often. You’ll usually find them with a satin or semi-gloss finish, which helps shed water and dirt more easily. Mold-resistant exterior paints also add an extra layer of protection against rot, especially for wood siding. This helps extend the life of your siding and trim while keeping the home looking fresh and clean. If your house sits near woods, lakes, or shady areas with less sun exposure, investing in a mold-resistant formula can save you the cost of re-siding or major repairs down the line. They're ideal for year-round protection in climates where dampness is just part of life. Revive Painting can help you find the best exterior paint for your specific needs—whether you're near the coast, battling humid summers, or just want a vibrant finish that lasts. Contact us today and we’ll help you choose the right protection, style, and color that your home deserves.
house painted in saskatoon
By Revive Painting June 9, 2025
Selecting the right exterior paint colors makes all the difference between a stunning home and a neighborhood eyesore. Most homeowners repaint their houses every 7 years - not from choice, but to fix their previous color mistakes. Our experience as a professional exterior house painting company in Saskatoon shows this pattern repeatedly. A quality exterior paint job can last up to 10 years. That decade feels like forever when you cringe at your home's color every time you park in your driveway. Your home's exterior color selection goes beyond picking an attractive paint chip. Paint colors often look completely different when applied to your home's exterior walls. House painting projects need knowledge about sunlight's effect on color perception, your home's architectural features' impact on color schemes, and the right finish's role in transforming appearances. Sunlight degrades paint gradually and causes the original color and gloss to fade - something you should definitely think over given Saskatoon's extreme seasonal changes. These challenges notwithstanding, the right approach helps you pick exterior paint that stands up to Canadian weather while boosting your home's best features and curb appeal. Why homeowners often choose the wrong exterior paint colour You've probably driven through a neighborhood and spotted a house that made you think, "What were they thinking with that color?" Trust me, you're not alone. Our painting team has covered thousands of Saskatoon homes. We've seen how even careful homeowners end up with exterior paint colors that miss the mark. It's not their fault. Picking the perfect exterior house paint needs you to understand several tricky factors that most people learn about only after the paint dries. 1. Misjudging how colors look in natural light Natural light plays tricks on exterior paint colors. That beautiful sage green from your sample might look like an odd yellow-green in the afternoon sun. Color experts say south-facing homes get such bright sunlight that colors look two to three shades lighter than expected. North-facing homes have a gray cast that makes colors look darker. Your perfect neutral might end up looking gloomy. Different times of day create their own challenges. Your east-facing walls might look great in the morning but change by afternoon. One expert puts it well: "And then BOOM, the light's gone, and just like magic, your home is a different color!". This explains why paint chips that looked amazing in the store lead to disappointment on your walls. 2. Ignoring how surroundings and landscaping affect color Your Saskatoon home's natural environment changes how exterior house colors look. People often pick colors without thinking about trees, grass, or neighboring houses. This leads to some surprising results. Trees do more than provide shade. They cast green reflections on your home. Light filtering through trees can make lighter neutrals pick up green undertones. Even your lawn bounces light that changes how colors look. Those green tints in every paint sample? That's probably why. Your neighbor's houses also affect how your color choice looks. Paint colors that ignore the neighborhood's look can make your house stick out badly. Outside paint for house should blend with nearby homes while showing your style. 3. Overlooking the architectural style of the home We see this mistake all over Saskatoon. People ignore what their home's architecture needs in terms of color. Each architectural style works best with specific color palettes. Craftsman-style homes look amazing in earth tones that showcase their front porches and match their natural materials. Contemporary homes look best with colors that match the landscape and create contrast with their design features. Greek Revival homes with their bold details traditionally use white as their signature color. The wrong architectural color choice looks as odd as wearing a tuxedo to the beach. Even upscale neighborhoods have homes with paint that fights their architectural style. Your home looks timeless when you respect its architectural heritage while adding personal touches. This beats having a house that screams, "We built this during the gray trend". These three key factors can help you avoid joining homeowners who repaint too soon because they picked the wrong color first time around. The role of paint finishes in color perception Paint brings more than just color to your home—the finish matters just as much! Our years of painting homes in Saskatoon have taught us that many homeowners don't realize how paint sheen can transform their exterior paint colors . The sheen gives your home its character and can make colors look completely different based on light reflection. 1. Flat vs. gloss: how sheen changes appearance Ever painted a test patch in your garage only to find it looks totally different on your house? The secret lies in sheen—the amount of light bouncing off your painted surface. Flat finishes soak up light with about 12% reflectiveness, while glossy finishes act like mirrors with reflectiveness that can reach 85%. Colors take on a new life with different sheens. A high-gloss finish makes colors look deeper and more vibrant than the same shade in flat paint. Sunlight hitting glossy surfaces makes colors pop with rich saturation. Flat finishes create a softer, more subtle look. Gloss levels also affect how we see architectural details—flat paint hides flaws while glossier finishes make every bump stand out. 2. Why satin is often the safest choice for siding Satin finishes have become the top choice for exterior house paint because they hit the sweet spot. A reflectiveness of 25-40% creates a pearl-like look that balances between flat and shiny. This middle-ground sheen resists dirt well and forgives surface imperfections. Satin has become more popular than glossier options for exterior siding. The finish stands up to Saskatoon's tough weather changes and cleans up easily with a quick spray from the hose. Best of all, satin offers great UV protection without creating blinding glare on bright summer days. 3. Using gloss strategically on trim and doors Semi-gloss and high-gloss finishes work magic on trim, doors, and architectural details. Semi-gloss proves essential for doors and trim that need to last. The smooth surface creates beautiful contrast against siding and makes architectural features pop. Glossy finishes create a tough shell that handles touching, weather, and cleaning. Front doors look elegant in semi-gloss while staying easy to maintain. The key is to use these shiny finishes carefully—too much gloss on large areas overwhelms the eye and shows every flaw. A simple rule makes all the difference: low-luster finishes for big surfaces, higher sheen for spots you want to catch the eye. Flat paint blends into the background while glossier finishes draw attention right where you want it. This balance turns your exterior house colors from random choices into purposeful decisions—the mark of true professional results. How climate and lighting affect exterior house colors The sun does more than make you squint—it completely changes how your exterior paint colors look! I've seen countless homeowners in Saskatoon gasp when their "perfect beige" turns pink in the afternoon light. Let me explain why your home's exterior might be playing these color tricks on you. 1. Sunlight and UV exposure Sunshine secretly works against your paint. UV rays break down the chemical bonds in paint pigments, which makes colors fade as time passes. Dark colors take the biggest hit—red and blue shades fade faster than neutral ones. The science behind this is the sort of thing I love—UV radiation gets the paint polymers excited and creates free radicals that mix with oxygen to break down your paint's binder molecules. UV exposure makes your exterior house paint brittle, and this leads to cracks and peeling. Quality paints now come with UV inhibitors that reflect sunlight to stop early wear and tear. You can think of it as putting sunscreen on your house—it needs protection from our harsh prairie sun! 2. Seasonal changes in Saskatoon Our extreme seasons create a color show for Saskatoon homes. Colors that look perfect under summer's golden light might look totally different beneath winter's blue-tinted skies. Houses facing south show these changes more than others as the sun moves through different angles all year. Paint colors look darker in shade compared to direct sunlight. This explains why your "soft gray" might look just right on the sunny side but turns almost charcoal in shadier spots. The way colors look changes with humidity too, which swings wildly between our dry winters and humid summers. 3. How shadows and orientation influence color Your home's direction changes how exterior house colors look—sometimes by two or three shades! Walls facing south get intense sunlight that makes colors look much lighter than expected. Many homeowners pick darker shades for these walls to balance this washing-out effect. North-facing surfaces get gray-tinted light that makes colors look darker and more muted. East-facing walls shine brightest in morning light but darken by afternoon. The most dramatic change happens on west-facing walls—they bathe in golden-orange afternoon light that turns neutral colors warm. No paint color stays the same around your entire house! Professional painters test samples on different walls and check them throughout the day before starting an outside paint for house project. This attention to detail makes all the difference. Tips for choosing the right exterior house paint color My years of watching Saskatoon homeowners struggle with paint choices have taught me plenty. These foolproof tips will help you get your home's exterior color scheme right the first time. Paint your home with us - use our color consultation and avoid mistakes that can make houses look expensive yet unappealing! 1. Test samples on different walls Testing exterior house paint requires isolation. You'll need a large area—at least one square meter—to properly see how the color looks. Tiny patches won't show you the color's true appearance on your entire facade. A white border around your test area prevents your current color from affecting your judgment. The same color reads differently based on sunlight direction, so test it on both sides of a corner. 2. View colors at different times of day Light changes everything about colors throughout the day. Your perfect sage green might look bland during noon and too dark by evening. Your samples need several days of observation to be sure. The sun makes south-facing walls appear two to three tones lighter than expected. East-facing walls look completely different from morning to afternoon. 3. Use color visualizer tools Digital tools show how colors will look on your home before you buy paint. Most major paint brands have color visualizer apps. You can upload your home's photos and "paint" them virtually. These tools help narrow down your choices before you spend money on samples. 4. Stick to 3-color schemes: body, trim, accents The most appealing exterior color schemes use three colors: a dominant body color, trim, and accents. This time-tested formula creates visual balance and showcases architectural features. The most expensive homes look their best with this balanced approach rather than multiple competing colors. 5. Think about resale value and neighborhood trends Your color choices can boost your home's value significantly. A black front door alone can add up to CAD 8360.16 to your home's worth. Sage green tends to perform well in the market. Bright colors and yellow exteriors often sell below expected values. Neutral shades like white, gray, and beige remain the safest choices to maintain resale appeal. When to consult a professional painting company DIY might not always work out for exterior paint colors . You might love those home improvement shows, but some situations need more than just enthusiasm. Paint your home with us - use our color consultation if you face challenges beyond what your local hardware store offers. 1. Complex color schemes or large homes Multi-level homes with intricate architectural details need more than a steady hand and YouTube tutorials. Professional painters bring not just ladders and brushes but years of experience. They create cohesive exterior house paint schemes that blend perfectly across different materials and elevations. The right colors involve more than picking a shade. Your home's architectural style, neighborhood look, and light conditions shape its final appearance. A professional color consultant learns your style priorities and suggests schemes that match your home and surroundings. They look at all options, check your home's structure, and guide you toward the best choices for your situation. Professional painters think about color psychology too. Your selected palette sets the right mood. They help you follow HOA rules if needed, which stops problems before they start. They make an overwhelming job simple and worry-free. 2. Historical or custom architecture Historic buildings tell stories of past times through their architecture. These properties need artistic skill and care beyond standard painting methods. Original construction materials and techniques are rare now, which makes preservation both challenging and rewarding. Companies that specialize in historical properties know how to balance preservation with modern needs. They match authentic colors through paint analysis or find current alternatives that keep your home's character intact. Their training covers ornate details and decorative features that make historic architecture special. Safety makes professional help valuable too. Historic homes often have lead paint and hazardous materials that need careful handling. Professionals test for these issues and bring in specialized crews to remove dangers safely before painting starts. A professional color consultation will make your exterior house colors highlight your home's unique character. You'll avoid expensive mistakes and years of regret about your color choices. 3. Need for long-lasting, weather-resistant finishes Durability should top your priority list if you're investing thousands in your home's exterior paint . Your house constantly battles UV rays, rain, snow, and temperature fluctuations in Saskatoon's wild weather swings. These elements can transform a beautiful paint job into a peeling, fading mess faster than you'd expect. The science behind weather-resistant paints Your home needs more than just pretty colors—it needs armor against the elements! High-quality 100% acrylic latex paints have improved substantially in the last decade. They've evolved from cracking and fading within five years to maintaining their beauty for more than a decade. These sophisticated formulations create a breathable film that lets moisture vapor escape while blocking liquid water penetration. UV exposure silently destroys exterior house paint . Sunlight breaks down the chemical bonds in paint pigments, which makes colors fade and paint become brittle. Premium paints now include UV inhibitors that work like sunscreen for your siding! Light colors such as white, beige, and gray reflect heat and light away from surfaces and substantially reduce UV damage. Premium finishes that stand up to Saskatoon weather Not all exterior house colors deliver equal longevity. Professional-grade options like Sherwin-Williams Duration protect excellently from cracking, peeling, and blistering while fighting dirt and mildew. Benjamin Moore's Element Guard delivers advanced moisture protection specifically made for humid environments and comes with a limited lifetime warranty. Elastomeric coatings create a thicker, flexible layer that bridges small cracks—perfect for our prairie climate's dramatic freeze-thaw cycles. These specialized outside paint for house projects cost more at first, yet their extended lifespan makes them more economical long-term. Choosing the right exterior finish protects your investment beyond just appearance. Note that bargain paint might look good at first, but premium weather-resistant formulations prevent premature repainting and save thousands over time. Nobody wants to climb back on a ladder to repaint their home every few years!