Why Smart Property Managers Choose Tenant Improvement Painting First

Revive Painting • July 8, 2025

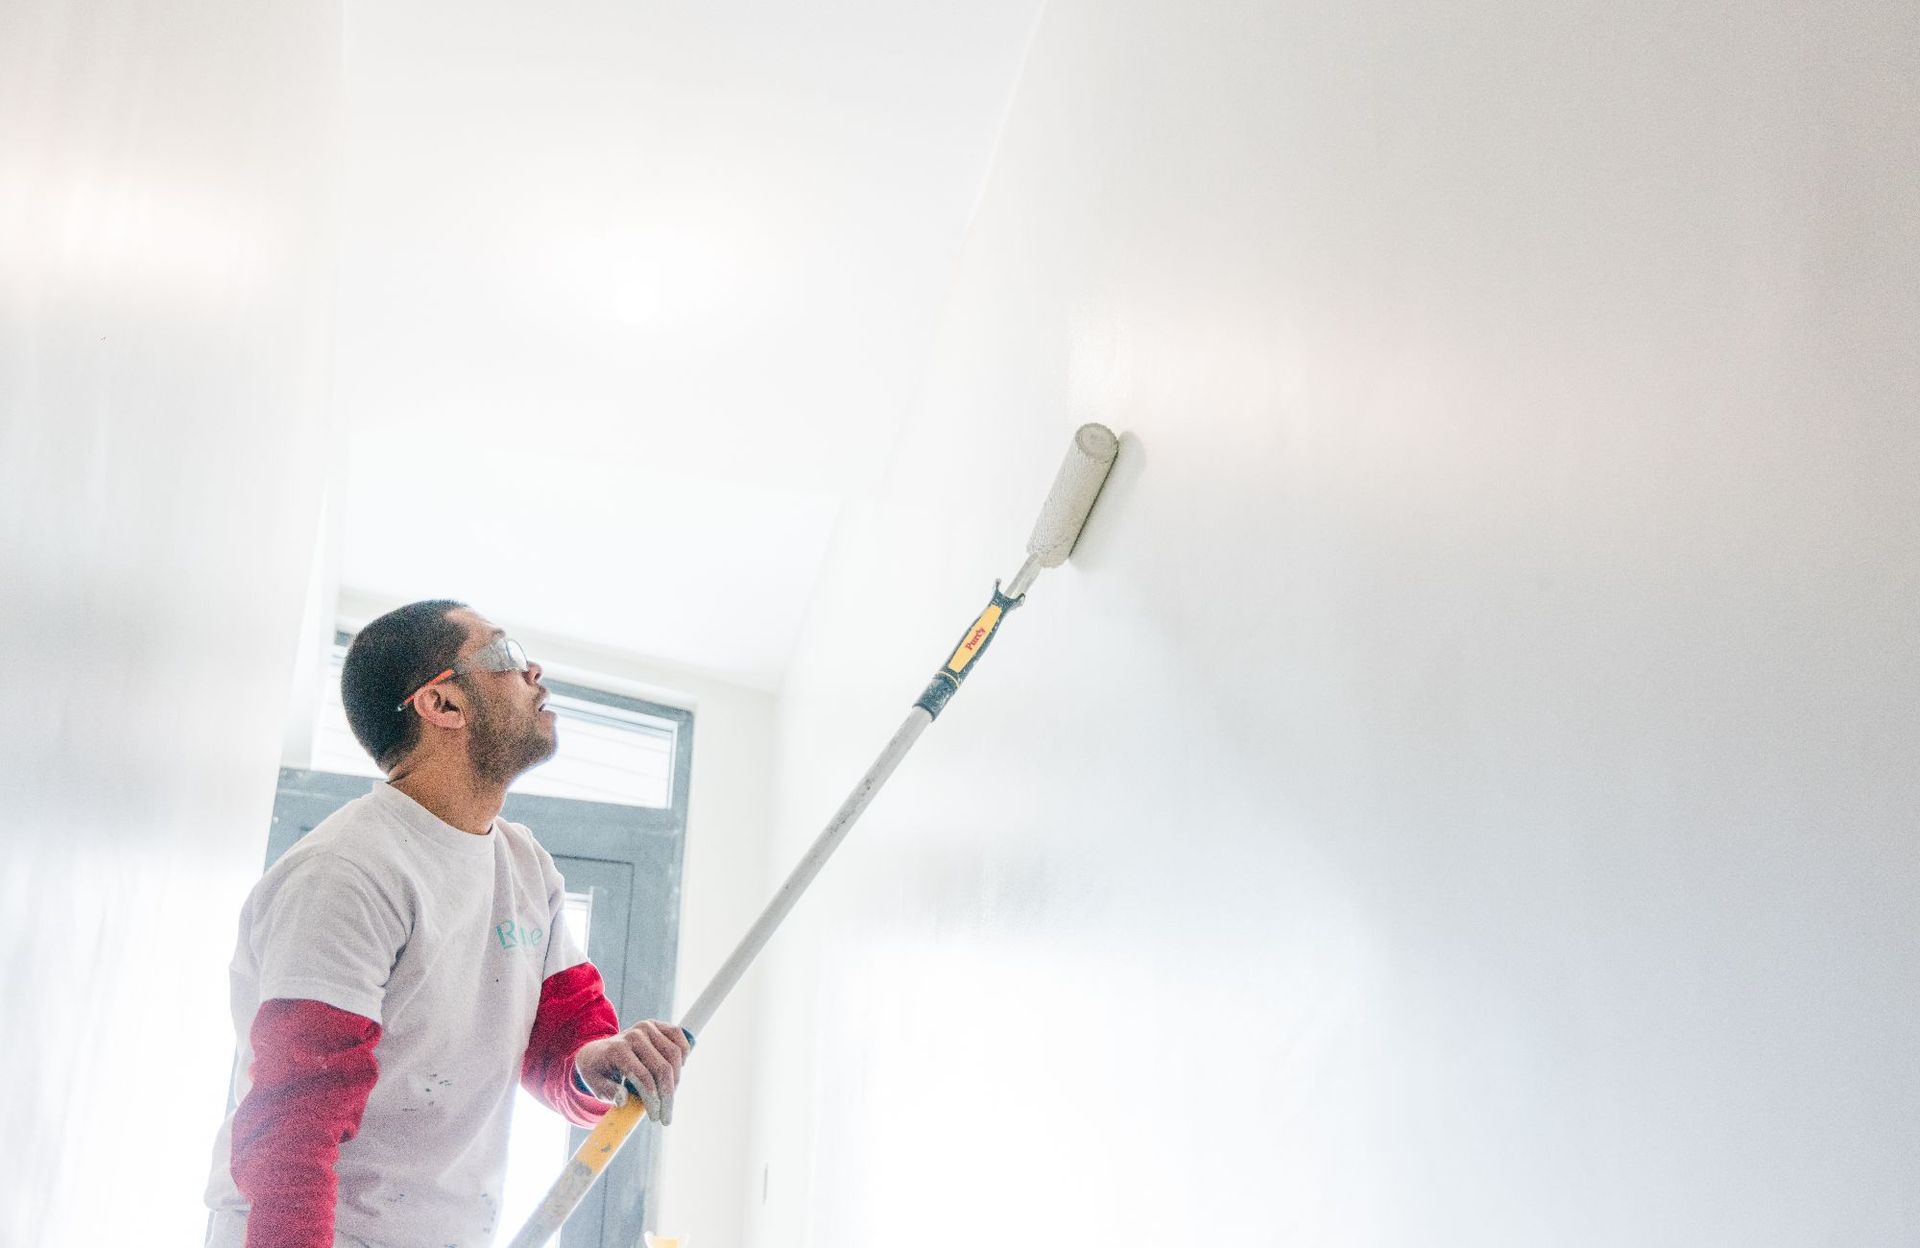
Tenant improvement painting remains the cornerstone of successful commercial property renovations. Property managers who face the challenge of prioritizing leasehold improvements often find painting to be the most logical first step. Our experience shows that a fresh coat of paint can revolutionize a commercial space and make it more appealing to potential tenants while protecting the property's structural elements. Tenant improvements, or leasehold improvements, customize a leased commercial space to meet a tenant's specific needs.

Revive Painting & Wallpaper's team in Saskatoon recognizes that property managers need to balance visual appeal with budget constraints. Leading industry experts suggest repainting commercial buildings every seven to eight years to maintain their condition. Strategic painting serves as a budget-friendly tenant improvement that draws new occupants. The project's cost ranks among the most affordable options for property managers compared to other improvements. A properly executed tenant improvement project prepares the workspace to showcase brand identity and creates value for both tenant and landlord. Regular commercial painting services also reduce maintenance costs over time, which makes it a smart investment for proactive property managers.


Why Tenant Improvement Painting Is a Smart First Step


The right paint job can make or break your commercial property renovations. Property managers struggle to decide where to start their upgrades, but painting stands out as the best first step for several key reasons.


Sets the tone for all future upgrades


Paint work creates the foundation for all other tenant improvements. A well-executed paint job gives you a clean canvas that makes future upgrades look better. More than that, the right colors and finishes let commercial spaces showcase the tenant's brand identity and values through the property. A fresh coat of protective paint shows professionalism and attention to detail, which proves the property gets proper care.


Our team at Revive Painting & Wallpaper has seen how the original paint work shapes a space's design direction and guides choices about flooring, lighting, and fixtures. Quality painting protects surfaces and helps other improvements last longer. This protection becomes crucial in Saskatoon's weather, where buildings face tough seasonal changes that can wear down commercial properties.


Quickly improves visual appeal and tenant perception


First impressions can determine a property's success in commercial real estate. Fresh paint on the exterior creates an instant positive impact that could seal the deal with potential tenants. This visual upgrade changes the feel of a commercial space overnight – much faster than structural changes or mechanical updates.


Studies show tenants prefer to stay in buildings that look fresh and updated. A clean, modern appearance proves the property receives good care, which helps attract quality commercial tenants. Retail spaces with appealing fronts pull in more foot traffic, which boosts the tenant's business success.


Fresh interior paint modernizes outdated spaces and creates bright, welcoming environments that feel more spacious. These refreshed interiors boost tenant satisfaction and can lift employee morale and productivity in office settings.


Often the most cost-effective improvement


Paint jobs deliver the highest return on investment among tenant improvements. The numbers tell the story - quality interior painting can bring up to 107% return on investment, while exterior painting offers up to 55% ROI. These impressive returns make painting the smart first choice for any tenant improvement project.


Paint work happens quickly with minimal business disruption, unlike major renovations that can halt operations for weeks. Saskatoon property managers working with tight budgets find that tenant improvement painting gives them the biggest visual impact for their money.


Paint as a tenant improvement saves money long-term too. Regular paint maintenance costs less than fixing major damage and helps surfaces last longer. Yes, it is true that property managers who use strategic painting in their tenant improvement plans can ask for higher prices by showing they take care of their properties.


Our team at Revive Painting & Wallpaper has helped many Saskatoon property managers transform their commercial spaces through smart tenant improvement painting. Our experience backs up the data – starting with paint builds a strong foundation for property improvements, makes tenants happier, and gives exceptional value for every dollar spent.


How Painting Enhances Property Value and Marketability


Property managers in real estate know that looks drive value. Quality painting's connection to property marketability goes beyond esthetics. It shapes tenant acquisition, property valuation, and long-term profitability. Our team at Revive Painting & Wallpaper has seen how tenant improvement painting reshapes commercial spaces in Saskatoon and creates advantages in competitive markets.


Boosts curb appeal and first impressions


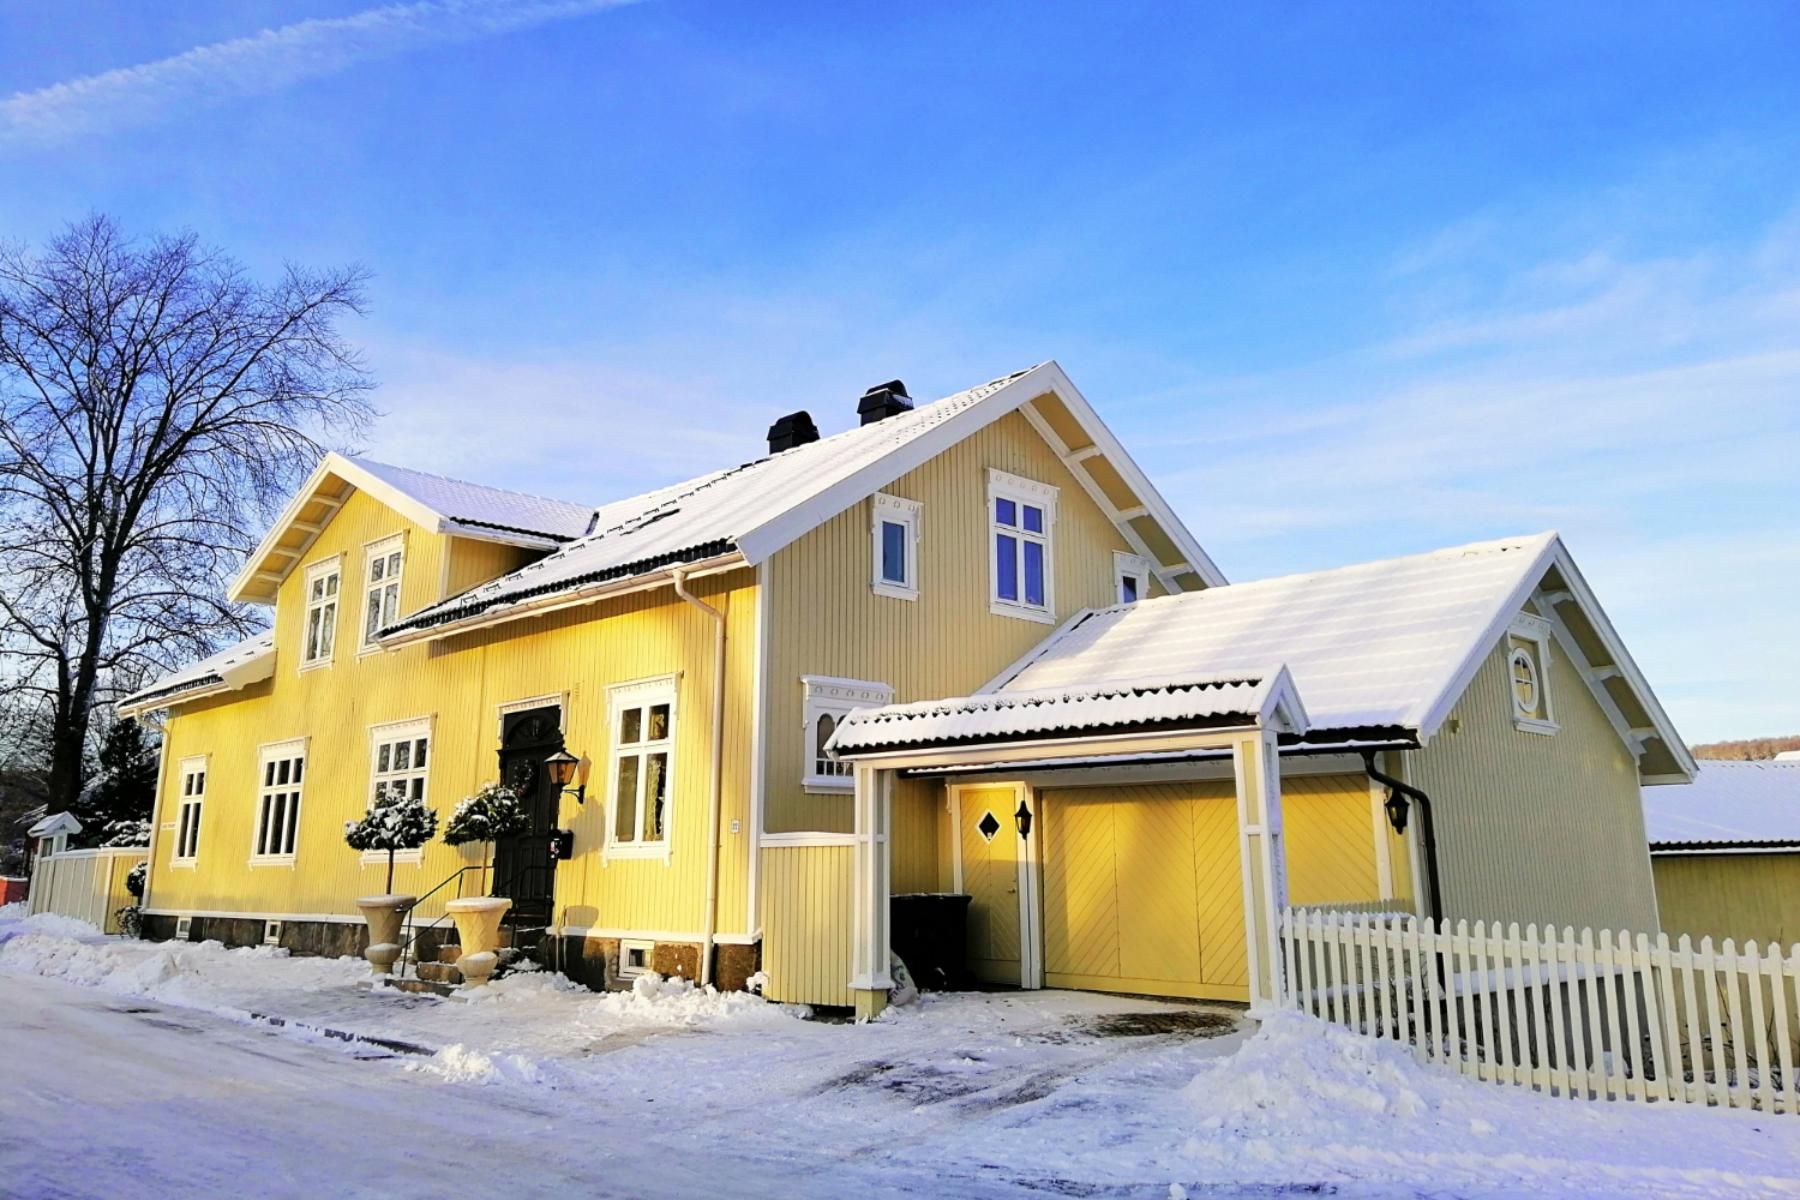
Your commercial property's exterior creates an immediate visual impact that shapes all other perceptions. Research shows people form quick first impressions that affect their decision-making in commercial real estate. A well-executed exterior paint job can make all the difference when marketing your commercial property in Saskatoon's competitive market.


Property valuation experts say a fresh exterior paint job can boost a commercial property's market value by 2-5%. This return on investment happens because potential tenants judge property quality based on how it looks outside. A clean, professionally painted facade shows professionalism and careful maintenance standards that carry over to interior spaces.


Research proves properties with professional exterior painting get more interest and better prices in the market. The psychological effect of a pristine look matters. Many commercial real estate agents confirm that fresh paint boosts curb appeal and reflects company's brand identity through carefully chosen colors and finishes.


Signals proactive property management


Property management quality affects how you attract and keep tenants. Our experience at Revive Painting & Wallpaper shows that tenant improvement painting sends a clear message about management standards. Regular painting schedules suggest thorough upkeep throughout the property. This raises both perceived and actual value.


Professional commercial painting creates spaces where tenants feel welcome and comfortable. Property managers who paint regularly see better tenant retention rates. Occupants connect refreshed environments with attentive management. This makes them less worried about maintenance issues and willing to pay higher rates for spaces that show consistent care.


Buildings with professional tenant improvement painting often get better appraisals than their competitors. Smart property owners don't wait for obvious wear. They use proactive painting schedules to keep spaces looking great and protect surfaces underneath. This approach shows potential tenants that owners value long-term relationships and invest in optimal conditions.


Helps attract higher-quality tenants


Your property's tenant quality directly affects profit and management ease. High-quality commercial painting creates spaces that appeal to selective businesses. These companies will pay premium rates for well-maintained environments. Clean, appealing surroundings boost tenant satisfaction and can extend lease durations while reducing costly turnover.


Commercial buildings with fresh, professional paint find tenants faster and stay vacant less. This edge matters in Saskatoon's evolving commercial market where businesses prioritize workspace quality for leasing decisions. Office buildings with modern, professional exteriors attract quality tenants who commit to favorable rental agreements.


The benefits go beyond initial attraction. Tenant improvement painting helps with retention strategies too. Our Saskatoon business clients report higher satisfaction after quality painting projects. Happy occupants show more commitment to their space and often renew leases instead of moving. This satisfaction leads to steady income and lower marketing costs for finding new tenants.


Saskatoon property managers can boost property value, attract quality tenants, and build a reputation for exceptional management through strategic tenant improvement painting. At Revive Painting & Wallpaper, we work with property managers to develop painting strategies that optimize these marketability benefits while delivering outstanding esthetic results.


Understanding the Role of Painting in Tenant Improvement Allowances


Tenant improvement allowances create a vital financial arrangement between commercial property owners and tenants. Your bottom line and property's appearance depend on how painting fits into these allowances. Our expertise in Saskatoon's commercial painting industry has helped many property managers navigate painting's role in tenant improvement plans.


When painting is covered under TIA


Most tenant improvement allowances cover painting as an eligible expense. Standard TIA packages list painting and wall coverings among common approved modifications. This makes perfect sense because painting beautifies and protects the property. The lease agreement terms and landlord's policies ultimately determine the coverage specifics for property modifications.


Property owners structure tenant improvement allowances in two ways - as rent percentage or dollar value per square foot of leased space. A standard office lease might include 5% or 10% tenant improvement allowance. This translates to around CAD 20.90 per square foot. Our team at Revive Painting & Wallpaper finds that painting projects fit these allocation parameters well, making them perfect for TIA funding.


Negotiating painting costs in lease agreements


Smart property managers emphasize painting as an economical improvement with substantial visual impact during lease negotiations. The agreement should describe which painting services qualify under the tenant improvement allowance. This prevents confusion later in the tenant relationship.


Tenant improvement allowances set maximum landlord contributions. Tenants pay extra costs beyond the allocated allowance unless negotiated differently. This applies to specialized finishes or extensive surface preparation. Our years serving Saskatoon's commercial properties show that clear discussions about painting specifications lead to smoother projects.


How painting fits into overall TI budgeting


Painting stands out as one of the most affordable yet influential modifications in tenant improvement budgeting. Unlike structural changes or mechanical upgrades, paint transforms spaces without major disruption or permits.


Property managers should recognize painting's dual advantages in their budgets. Paint enhances esthetics and protects structural elements. This protection reduces future repair costs, doubling the value of the original painting investment.


The tenant improvement allowance structure works for everyone - landlords boost property value while tenants get customized spaces. Saskatoon property managers looking to maximize their allowance value should start with professional commercial painting services. This delivers immediate visual impact and preserves budget for other needed modifications.


Planning a Tenant Improvement Painting Project in Saskatoon


A successful tenant improvement painting project needs good planning and attention to detail. The right preparation will give optimal results and keep tenants happy in Saskatoon's commercial spaces.


Assessing the current condition of the space


Your commercial property needs a detailed visual inspection to spot problems that might affect the paint job. You should look for cracks, peeling paint, uneven surfaces, or water damage signs before starting any work. Saskatoon's changing climate puts extra wear on commercial buildings. The weather speeds up damage, which makes getting the full picture crucial. Good surface preparation helps paint stick better and stops peeling, bubbling, or cracking later.


Choosing the right commercial painting contractor


The best way to find a reliable commercial painting contractor in Saskatoon starts with checking their credentials and past work. Revive Painting & Wallpaper's deep roots in Saskatoon's construction industry give us complete knowledge of local building rules and safety protocols for commercial properties. Expert contractors know commercial painting's fine points, including surface preparation methods that work best in different business settings.


Coordinating with tenants to minimize disruption


Good communication is the life-blood of painting projects in tenant-occupied buildings. Property managers should tell tenants about the work 2-4 weeks ahead. They need to explain what will happen, how long it will take, and how it might affect them. Smart scheduling proves to be one of the best ways to keep tenants happy during commercial painting. The work can happen after hours, on weekends, or in phases that move through the building step by step.


Selecting colors that match tenant branding


Your commercial property's colors tell visitors about the businesses inside. Using tenant brand colors helps send the right message and creates a unified look. Colors spark different feelings - blue suggests trust and professionalism, while green speaks of growth and peace. Revive Painting and Wallpaper helps pick colors that work for both tenant brands and the building's long-term appeal.


Ensuring compliance with local codes and permits


Saskatoon's rules say some painting projects need permits. You should know which jobs need paperwork and which don't. Basic fixes like painting and patching drywall usually don't need permits if they're just small repairs rather than big changes. But larger renovations that include painting might need proper documentation, especially in heritage buildings or when changing commercial spaces.


Long-Term Benefits for Property Managers


Quality painting serves as the life-blood of successful commercial property management strategies. This piece shows how a well-planned approach to painting brings benefits that go way beyond looks. Smart property managers who make painting their first priority in tenant improvement projects create strong foundations. These foundations boost future renovations and protect the building's structure.

The financial rewards of tenant improvement painting speak for themselves. Many renovations need big investments with uncertain payoffs. However, quality painting delivers exceptional value consistently. Interior work can give ROI figures up to 107%. Property managers can revolutionize spaces without emptying improvement budgets. On top of that, professional painting shows the quality of management. This directly shapes how tenants view the property and its marketability in Saskatoon's competitive commercial real estate world.


Smart planning with painting in tenant improvement allowances creates major advantages. Clear negotiations during lease agreements help both sides understand what to expect about painting specs and who handles what. Property managers know painting does two jobs at once. It refreshes the look and acts as preventive maintenance against Saskatoon's tough seasonal weather.


A full picture and professional execution make tenant improvement painting projects work. Property managers need to assess conditions, pick colors that match tenant's branding, and coordinate carefully to avoid business disruptions. These factors show why experienced commercial painting contractors are crucial. Revive Painting & Wallpaper has helped countless Saskatoon property managers turn ordinary commercial spaces into environments that draw and keep quality tenants.


The facts tell a clear story - tenant improvement painting should be the top priority to get the best results from renovation investments. Painting might look basic compared to complex upgrades. Yet its deep effect on tenant happiness, property value, and ongoing upkeep makes it the foundation of a commercial property's reputation. Property managers who grasp this concept gain an edge in Saskatoon's commercial real estate market. They create spaces that tenants love and competitors wish they had. Great property management starts with choices that mix immediate visual appeal and long-term protection - exactly what tenant improvement painting delivers.


Let Us Help


Want to improve your commercial property with strategic tenant improvement painting? Revive Painting & Wallpaper is Saskatoon's trusted commercial painting specialist, ready to turn your property management vision into reality. This piece shows why painting should be a priority in your tenant improvement strategy. Let us help you make it happen.


Our team brings decades of experience to every commercial painting project in Saskatoon. Property managers often struggle to balance tenant satisfaction with budget constraints. We've spent years in the local market and refined our approach to tenant improvement painting. The result? Maximum visual effect with minimal disruption to your tenants' operations.


Revive Painting & Wallpaper stands out because we completely understand commercial property needs. We work with property managers from the first meeting through project completion. Together, we develop custom painting solutions that improve marketability and protect structural elements. Our expertise goes beyond simple application. We guide you through color selection, finish options, and scheduling strategies that match your tenant improvement goals.


Your property's transformation begins with the decision to invest in tenant improvement painting. Choosing Revive Painting & Wallpaper gives you access to professionals who know both quality painting techniques and property management business needs. We work well with other contractors and respect tenant operations. Our results consistently go beyond expectations.


Our team adapts to your specific needs, whether you're preparing an empty space for new tenants or refreshing an occupied property. We take pride in clear communication, careful preparation, and perfect execution. Your tenant improvement painting project will run smoothly from start to finish.


Call Revive Painting & Wallpaper today to learn how our tenant improvement painting services can help your property stand out in Saskatoon's competitive commercial real estate market. We'll help you create spaces that attract quality tenants, earn premium rates, and build your reputation as an innovative property manager.


Key Takeaways


Smart property managers prioritize tenant improvement painting as their first renovation step because it delivers exceptional ROI while creating the foundation for all future upgrades.


• Painting delivers unmatched ROI: Interior painting offers up to 107% return on investment, making it the most cost-effective tenant improvement available to property managers.


• First impressions drive tenant quality: Fresh paint boosts curb appeal and signals proactive management, attracting higher-quality tenants willing to pay premium rates.


• Strategic timing minimizes disruption: Painting first sets the visual foundation for other improvements while being completed quickly with minimal business interruption.


• TIA integration maximizes budgets: Painting typically qualifies under tenant improvement allowances, allowing property managers to enhance spaces without depleting renovation budgets.


• Long-term protection reduces costs: Quality painting serves dual purposes—enhancing esthetics while protecting structural elements from Saskatoon's challenging seasonal conditions.


When executed strategically, tenant improvement painting transforms ordinary commercial spaces into environments that attract quality tenants, justify higher rental rates, and establish property managers' reputations for excellence in Saskatoon's competitive market.


painting beige wall in home
By Revive Painting February 19, 2026
Choosing the Perfect Beige and Warm Taupe Paint Colours Beige and warm taupe paint colours offer versatile neutral foundations that adapt to different lighting conditions and design styles. These colors range from creamy beiges with golden undertones to sophisticated greiges that blend gray and beige elements. Understanding Beige, Greige, and Taupe Beige paint colours contain warm undertones of yellow, gold, or red that create inviting spaces. These shades work particularly well in rooms with abundant natural light, where they develop a soft, sun-kissed appearance. Greige combines gray and beige to produce a modern neutral that feels less traditional than pure beige. Greige paint colours offer more versatility in contemporary spaces while maintaining warmth through their beige undertones. Taupe sits between brown and gray, often featuring subtle purple or green undertones. Warm taupe variants lean toward brown with hints of red or yellow, making them ideal for cozy atmospheres. Cool taupes incorporate more gray, which can feel less welcoming in spaces lacking natural light. The key difference lies in undertones. We recommend testing paint samples on multiple walls and observing them throughout the day to see how lighting affects each shade's appearance. Popular Warm Beige and Taupe Paint Colours Sherwin Williams Accessible Beige stands as one of the most popular neutral paint colors. This warm beige strikes a balance between beige and taupe, making it adaptable to various design styles. Benjamin Moore Edgecomb Gray offers a greige option with warm undertones that shift between beige and gray depending on lighting. Revere Pewter provides another greige alternative with slightly cooler tones. For true warm beiges, we recommend: Sherwin Williams Balanced Beige - warm versatile shade Benjamin Moore Manchester Tan - rich creamy beige Sherwin Williams Kilim Beige - warm with golden undertones Benjamin Moore Shaker Beige - soft traditional beige Sherwin Williams Perfect Greige delivers exactly what its name suggests. Bungalow Beige , Wool Skein , and Grant Beige offer warmer alternatives, while Muslin and Sherwin Williams Natural Linen provide softer, fabric-inspired neutrals. Nomadic Desert brings earthy warmth for those seeking richer tones. Best Paint Colors for a Cozy Home Atmosphere Warm beige paint creates cozy sanctuaries by reflecting light softly while maintaining depth. Colors with golden or yellow undertones enhance this effect, particularly in living rooms and bedrooms where relaxation matters most. Accessible Beige and Balanced Beige work well in spaces with moderate to high natural light. These best beige paint colors pair beautifully with natural wood elements and earthy decor. For rooms with less light, we suggest Manchester Tan or Kilim Beige . Their stronger warm undertones prevent spaces from feeling dull or flat. Edgecomb Gray suits modern homes seeking warmth without traditional beige appearance. The greige paint color adapts to different lighting while maintaining a welcoming feel. Layer these neutral paint colors with textured fabrics, plants, and warm wood tones to maximize coziness. The best beige paint colors serve as foundations that let other design elements shine while providing consistent warmth throughout your home. Making Your Home Feel Cozy and Inviting Creating a cozy home starts with selecting paint colors that provide warmth and versatility, then enhancing those choices with thoughtful decor, proper testing, and an understanding of how light affects your space. Creating a Neutral Backdrop for Every Room We've found that the best neutral paint colors create a foundation that works throughout your entire home. A neutral backdrop allows us to change decor without repainting, saving time and money. When choosing neutrals, we need to consider the undertones. Warm beige paint colors with golden or yellow undertones create inviting spaces, while warm grays offer a modern feel without coldness. The key is understanding what "neutral" means for your specific style. The most versatile neutral backdrops include: Beige with subtle gray undertones for balanced warmth Warm grays that lean slightly beige rather than blue Natural linen tones that mimic organic textures Greige colors that blend the best of both worlds We recommend using LRV (Light Reflectance Value) to understand how bright or dark a color will appear. Colors with an LRV of 50-60 provide enough depth without making rooms feel heavy. The beauty of a neutral backdrop is its flexibility. We can pair it with sage green accents for a natural vibe or add rich wood tones for traditional warmth. Using Warm Golden and Earthy Hues Warm golden and earthy hues instantly transform rooms into welcoming retreats. These colors work because they mimic natural elements like sunlight, sand, and clay. We love using beige undertones with hints of gold or honey. These shades catch natural light beautifully, creating a gentle glow throughout the day. Unlike cool neutrals, warm beige paint makes spaces feel lived-in and comfortable. Earthy tones in the brown family ground a room. We can use them as accent walls or throughout entire spaces for maximum coziness. Terracotta, warm tan, and soft caramel all fall into this category. Consider these combinations: Golden beige walls with cream trim Warm taupe throughout with white ceilings Earthy brown accent wall with lighter beige surrounding walls Color trends come and go, but warm earth tones remain timeless. They've been popular for decades because they create the emotional response we want in our homes. Cozy Home Decor Pairings and Accents Our paint colors work best when we pair them with complementary decor. Natural materials enhance the warmth of beige and taupe walls. Wood furniture in medium to dark tones creates beautiful contrast against warm neutrals. Oak, walnut, and cherry all bring out the golden undertones in our paint choices. We also love natural linen curtains and upholstery, which add texture without competing visually. Metal finishes matter too. Brass, gold, and warm bronze hardware look stunning against warm beige paint and taupe walls. These finishes reflect light and add subtle luxury. Our favorite accent combinations: Sage green pillows and throws against warm beige Cream and ivory textiles for a layered neutral look Deep navy or forest green as bold contrast colors Natural fiber rugs in jute or sisal We can also add cozy elements through lighting. Warm-toned bulbs (2700K-3000K) enhance golden hues in paint, while table lamps with fabric shades create pools of soft light. Testing Paint Samples and Considering Lighting We never skip testing paint samples before committing to a full room. Colors look completely different on walls than they do on small chips. Paint large samples (at least 2x2 feet) directly on your walls. We observe them for at least 48 hours, checking how they look in morning light, afternoon sun, and evening artificial light. This reveals the true character of beige undertones and how warm grays shift throughout the day. North-facing rooms receive cooler light, which can make warm beige paint appear more gray. South-facing rooms get warm, direct light that intensifies golden tones. We adjust our color choices based on these conditions. Our testing checklist includes:
applying two coats of paint on wall
By Revive Painting February 8, 2026
Let us share some paint coating basics that will save you time, money, and frustration before you pick up that paintbrush. Our team at Revive Painting & Wallcovering has watched many DIY projects go wrong because homeowners didn't know how many coats they needed. Here's everything you should know about this common confusion. When one coat might be enough People often ask us if they can get away with just one coat. The answer is yes – but only in specific situations. One coat might be enough if you're painting over a surface that has the same color and sheen, especially with existing paint in excellent condition. This works best in spare bedrooms or hallways where you don't need much durability. High-quality paints with premium formulations can sometimes give you good coverage in a single coat, especially with products that have higher solids content. You might also get by with one application for small touch-ups and quick cosmetic refreshes, but only with the exact same batch and color. Notwithstanding that manufacturers claim "one-coat coverage," these claims rarely work in real-life applications. You might save some money upfront with one coat, but it usually disappoints in its final appearance and costs more because you'll need to repaint sooner. Why two coats is the standard The science behind two-coat standard makes perfect sense to professionals like me. Your first coat builds the foundation – it seals surface pores, evens out texture, and starts the color transition. The second coat gives you accurate color and uniform sheen while covering roller marks and subtle streaks that show up under angled light. Two paint coats create a protective film that handles cleaning, scrubbing, and humidity exposure well. This becomes vital in your kitchen's and bathroom's high-use areas. Paint manufacturers design their products to reach a specific dry film thickness between 3 and 4 mils for homes, and a single coat usually gives you just half that thickness. Two properly applied thinner coats will always look better than one heavy application. Heavy paint application to get one-coat coverage often causes sagging, takes longer to dry, and cures poorly. Even premium "one-coat" products like Behr Marquee or Sherwin-Williams Emerald need two coats to honor their warranties. Your second coat builds up the film strength and improves durability and washability by a lot. This fuller film protects against moisture, ultraviolet damage, and scratches, giving you a longer-lasting paint job and better value over time. How color changes affect coverage Color changes affect the number of coats you'll need. Light colors over dark surfaces typically need more coats for complete coverage – sometimes three or more. The difference between your current color and desired shade plays a big role. Bright reds, oranges, and yellows create unique challenges because they use translucent organic pigments with poor opacity naturally. Even the best paints might need three or more coats to get these colors right. Benjamin Moore suggests using tinted primers for these colors to reduce the finish coats needed. Whites and light colors need special attention too. These colors reflect light and show every flaw, making two uniform coats essential for consistency and a smoother finish, especially under bright lights. A tinted primer can help reduce topcoats needed for dramatic color changes – gray-tinted primer works great when going from light to dark colors. My experience with clients in Saskatoon shows that knowing these basics saves both time and money while giving results that last. The number of coats you choose affects more than just looks—it determines protection, lifespan, and overall maintenance costs. Prepare the Surface for Better Coverage The perfect paint job starts well before you pick up your first brush. Our team at Revive Painting & Wallcovering in Saskatoon has learned that proper surface preparation determines the number of paint coats you'll need. Quality paint can't fix poorly prepared walls. Check wall condition and texture Getting a full picture of your walls is vital. Look at the whole surface to spot cracks, peeling paint, or uneven textures that could ruin your final result. Fresh paint won't hide these flaws—they'll stand out even more once you add color. You'll need to scrape away loose material from cracks or peeling spots, add spackle, then sand until everything's smooth. This detailed prep work might feel slow, but it cuts down the number of paint coats you'll need to achieve a flawless finish. Clean walls let paint stick properly. People often skip this step and end up needing extra coats because the paint won't bond well. Start by dusting with a clean towel or hoovering up loose debris with a brush attachment. Next, use a gentle cleaning solution—mix some baking soda and vinegar or mild dishwashing liquid for most surfaces. Kitchen walls or greasy areas might just need a stronger detergent. Mildew needs immediate attention—don't try to paint over it. The mildew will grow right through new paint layers and create bigger headaches down the road. Mix three to four parts water with one part bleach, put on protective gear, and tackle that mildew before painting. How many coats of primer on new drywall New drywall creates special challenges that affect your paint coat count. Drywall soaks up paint like a sponge, which leads to patchy coverage and wasted paint. Professional painters recommend at least two coats of latex primer on new drywall. This method creates an even base that seals the surface and stops the topcoat from soaking in unevenly. Primer does more than help paint stick—it builds a consistent foundation so your paint color looks true while using fewer topcoats. Drywall mud joints absolutely need primer to prevent "flashing"—those annoying shiny spots in your final paint job. Primer costs nowhere near as much as quality paint per gallon, making it an economical step that saves money over time. When to use primer and when to skip it Not every paint job needs primer, despite what DIY guides might say. Walls in great shape with a similar or lighter color might work fine with high-quality self-priming paint. All the same, primer can boost durability and give you an even sheen. Some situations just need primer: Bare surfaces like new drywall, wood, or metal Big color changes, especially going from dark to light Walls with water damage, smoke, or grease stains Patched or fixed areas Glossy or oil-painted surfaces Primer becomes your best friend during dramatic color changes. The sort of thing I love about tinted primer is how it cuts down topcoat needs when switching between dark and light colors. Without it, old colors can play tricks—like blue walls under yellow paint creating an unexpected green tinge. Note that primer does more than help paint stick—it evens things out, blocks stains, and lets your paint color shine through properly. Well-primed surfaces usually need fewer coats of paint, which saves time and money on your project. Choose the Right Paint and Tools My 15 years as a professional painter at Revive Painting & Wallcovering taught me something valuable - your choice of paint and tools makes a huge difference in the number of coats needed. The right materials can turn a week-long project with multiple store runs into a simple weekend job. How much does a gallon of paint cover You need to know about paint coverage to plan your project properly. Most major manufacturers say one gallon covers 350-400 square feet in a single coat. These numbers change quite a bit based on several things. Premium paints give you better coverage than budget options. Cheaper paints might look like a good deal at first, but you'll need extra coats that wipe out any savings. The surface texture really changes how much paint you'll use. Rough surfaces like stucco need almost double the paint compared to smooth, primed drywall. We've seen this firsthand in our Saskatoon projects - fresh primed surfaces get close to that 400 square foot maximum, while unprimed walls only cover about 300-325 square feet per gallon. Artist-quality paints teach home painters a vital lesson - quality makes all the difference. Better products have more pigment and superior resins, so you need fewer coats. Student-grade paints might cost half as much but need three times more product to get the same results. That's why at Revive Painting & Wallcovering, we only use premium paints. They save our clients money by cutting down on labor and materials. Using a paint calculator to estimate quantity Paint calculators are a great way to get accurate estimates for both pros and DIY fans. You'll find free online calculators from Sherwin-Williams, Benjamin Moore, and Behr that give you spot-on estimates. These tools just need some simple measurements - each wall's length and width, plus how tall your ceilings are. The math is pretty simple if you want to do it yourself: multiply each wall's length by its height, then add everything together for your total square footage. Take a typical 12' x 14' room with 8' ceilings as an example: 2 x (12 x 8) + 2 x (14 x 8) = 416 square feet. After you get the total square footage, divide it by how much one gallon covers (usually 350-400 square feet) to figure out your paint needs. Our example room would need 416 ÷ 375 = 1.1 gallons per coat. Most quality paint jobs need two coats to look good and last long, so you'd need about 2.2 gallons total. I always tell people to add 10% extra for spills, touch-ups, and uneven spots. This buffer has saved many projects from annoying mid-job store runs. Looking at our 416 square foot room, you'd need roughly 2.4 gallons - so grab three gallons to be safe. Brush vs. roller: which gives better coverage The choice between brush and roller isn't just about coverage. Rollers handle big areas faster, but brushes work better in certain spots. A good brush gives you more control, uses less paint, and works better on textured surfaces than rollers do. A fully-loaded roller should cover about 9 square feet of wall. Rollers spread paint more evenly with fewer visible marks than brushes, which makes them perfect for large, flat areas. Brushes shine when you're working around trim, corners, and ceilings where you need precision more than speed. Your roller choice really matters for coverage quality. Smooth walls and glossy finishes work best with a 1/4-inch nap, while textured surfaces need 1/2 or 3/4-inch naps to fill all the gaps. High-quality microfiber roller covers hold and release more paint evenly, so you get smoother results and better coverage with fewer coats. Paint manufacturers might promise one-coat coverage, but my work at Revive Painting & Wallcovering shows that two thin coats always look better than one thick one. This stays true whether you're using a brush or roller. Going for one-coat coverage usually leads to thick, uneven paint that drips, sags, and takes forever to dry. Apply Paint the Right Way Your paint selection and surface preparation are done. Now the way you apply the paint will determine if you get professional results with fewer coats. We at Revive Painting & Wallcovering have mastered techniques that deliver smooth, streak-free finishes on walls throughout Saskatoon. How to paint a wall without streaks The quickest way to get streak-free walls depends on proper technique and paint application. Load your roller evenly—it should be saturated but not dripping. You need to apply paint generously. A time to reload comes when you're pressing hard on the roller to get paint on the wall. The "W" or "M" method works best for smooth results. Roll paint in this pattern first, then fill gaps with straight strokes. This approach prevents uneven distribution and creates consistent coverage. While cutting in edges, press your loaded brush firmly to apply a thicker layer about 1 to 1.5 inches from the border. Then lightly feather the paint to the edge. Don't overwork the paint since it starts drying right after application. Work in manageable 3-foot by 3-foot sections to spot touch-up areas before they dry. You can prevent roller lines by gently rolling back over visible trails in the opposite direction. How long between coats of paint Time between coats is vital for a durable finish. Latex paints need 2-4 hours before you apply a second coat. Oil-based paints take much longer—about 24 hours between applications. Rushing creates peeling paint, uneven color, or bubbling from trapped moisture. Weather conditions affect these timeframes significantly. High humidity makes drying periods longer. Each coat must dry completely until the color looks uniform across the surface. Tips for maintaining a wet edge A "wet edge" technique helps achieve seamless results. This means you need to apply new paint next to areas that haven't dried yet. Missing this step creates lap marks—visible lines where wet paint meets dried sections. You can maintain a wet edge by: Breaking walls into manageable sections Working quickly and methodically Planning breaks at natural interruptions like windows or corners Paint from "wet to dry" instead of the other way around for the best results. This method creates a smooth, uniform look without noticeable overlaps between sections. High-quality paints with better "wet edge" properties give you more time to work before drying starts, especially on large areas. Special Cases That May Need Extra Coats Some painting jobs just need extra attention and more coats whatever your prep work. My experience with Revive Painting & Wallcovering shows that standard two-coat applications don't always cut it. Painting over dark or bold colors Color changes from dark to light shades bring unique challenges. We painted over navy, charcoal, and burgundy to lighter neutrals and usually needed three or more coats for full coverage. Dark pigments tend to bleed through even quality paint, which leads to patchy and uneven results. You can cut down on topcoats by using tinted primers made for color transitions. A gray-tinted primer works better than pure white for bold colors. Textured or porous surfaces Texture makes paint consumption go up faster. You'll need extra coats on rough surfaces like unsealed concrete, textured drywall, and bare wood because they soak up paint quickly. Start by cleaning textured walls really well - vacuum first, then use TSP cleaner. Longer nap rollers (3/4" to 1½") work best since their fibers reach deep into textures and give better coverage. Seal porous materials with 2-3 coats of sealant or use a mist coat - paint mixed with 5-10% water - before painting. Ceilings, trims, and high-traffic areas Ceilings can be tricky, especially with stains or bare surfaces. You'll want stain-blocking primers for water marks or smoke damage. High-traffic spots need extra coats to last longer - two coats will give you a strong barrier against moisture, wear, and scrapes. These extra layers make cleaning easier and save money on maintenance. Need help? Let Revive Painting and Wallcovering handle your interior painting in Saskatoon. We know how to tackle challenging projects and deliver professional results without endless coats or poor coverage. Key Takeaways Understanding the right number of paint coats saves time, money, and ensures professional-quality results that last longer:  • Two coats is the professional standard - The first coat seals and evens texture, while the second delivers true color and durability • Surface preparation determines coat requirements - Clean, primed surfaces need fewer coats than unprepared walls with stains or damage • Color changes dramatically impact coverage needs - Dark to light transitions often require 3+ coats, while tinted primers reduce topcoat requirements • Quality paint and proper technique reduce coat count - Premium paints with higher solids content provide better coverage than budget alternatives • Special surfaces demand extra attention - Textured walls, ceilings with stains, and high-traffic areas typically need additional coats for optimal protection Investing in proper preparation, quality materials, and correct application techniques upfront prevents the frustration and expense of multiple repainting projects down the road.