How Many Coats of Paint Do I Need?

Revive Painting • May 17, 2025

Painting might seem simple—brush, roll, done. But anyone who's tackled a room makeover knows the number of paint coats isn’t just a guess. It's a calculated decision influenced by everything from the wall's texture to the paint’s formula. Knowing what affects coat count can save time, money, and plenty of frustration down the line.


Paint Coverage Factors That Determine Coat Quantity


Several variables quietly affect how many coats of paint a project will need. The type of paint used—whether it's oil-based, latex, or acrylic—can make a significant difference in how well it spreads and how much it covers. High-quality paints tend to have better pigments and binders, allowing for fuller coverage in fewer coats. Budget paint might cost less upfront but often requires more layers to get the same look.


The color you start with compared to the one you want to achieve matters too. Going from a dark red to a light gray, for example, almost always takes more paint than switching from beige to a similar tone. Light colors tend to need more coverage when painting over anything darker, and bright shades like yellows and oranges often demand extra layers because of their lower opacity.


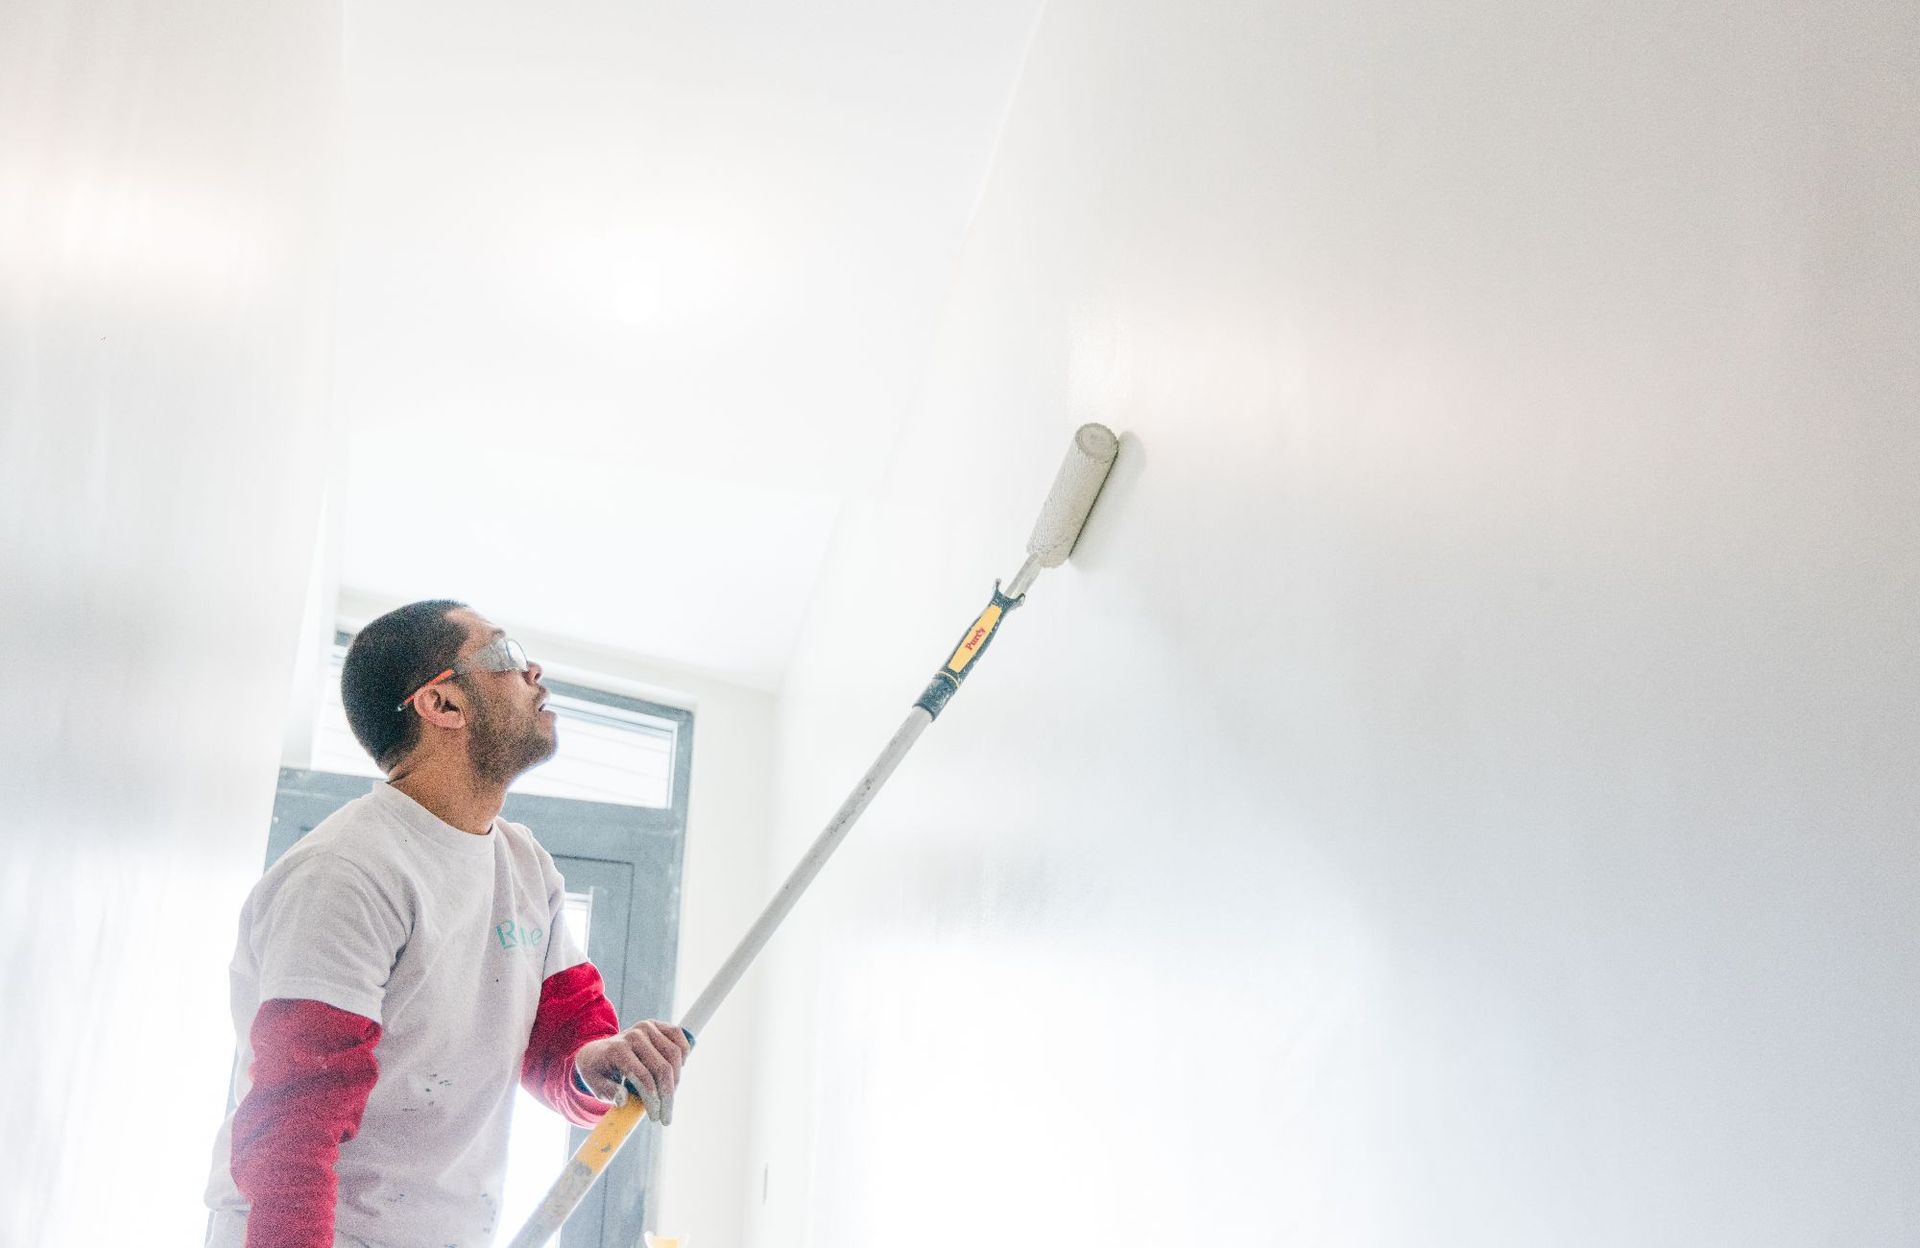
Surface Porosity and Its Effect on Paint Layers


Porous surfaces like bare drywall, brick, or raw wood tend to absorb paint rapidly. That absorption weakens the color’s saturation, forcing the painter to apply additional coats just to get even, rich coverage. If the first coat sinks deep into the material, the second—or even third—may be necessary to form a visible surface layer.


On smoother, sealed surfaces, paint behaves differently. It sits on top, distributing more evenly, which often results in better coverage with fewer coats. Understanding how absorbent your walls or surfaces are can guide you to apply the right number of coats the first time without surprises halfway through the job.


Understanding Color Intensity and Coverage Requirements


Colors with high intensity—like bold reds, deep blues, or vibrant greens—carry pigment loads that don’t always spread evenly in one coat. These tones tend to look streaky at first because the pigment saturation requires time and layering to build up. Trying to shortcut the process with one heavy coat usually results in uneven spots and long drying times.


Lighter shades may seem easier, but they bring their own challenges. Whites, pastels, and other soft hues don’t always mask darker base colors easily. Even over primer, these lighter tones may need a second or third coat to get that crisp, uniform appearance that looks good from all angles.


Primer Influence on Final Coat Numbers


Primer plays an underappreciated role in the painting process. It creates a consistent surface that helps paint stick better, dries faster, and spreads more evenly. Applying a primer coat often reduces the number of paint coats needed, especially when switching between drastically different colors.


Skipping primer can be tempting, but it usually leads to more work later. Without primer, the topcoat may not bond well, leading to blotches or streaks. A simple layer of primer may eliminate the need for a third coat, saving time and money in the long run. It's especially useful on new drywall, stained surfaces, or glossy walls that resist paint adhesion.


Impact of Finish Types on Coating Thickness


Paint finish—whether it's matte, eggshell, satin, semi-gloss, or high-gloss—affects how thick each coat feels and how many you’ll need. Flat or matte paints often require more coats because they lack reflective quality and absorb more into the surface. These finishes also show scuffs more easily, sometimes prompting a second coat just to even out touch-ups.


In contrast, glossy finishes tend to go on thicker and reflect light, which helps mask imperfections. However, their shine can emphasize roller marks or thin areas, requiring a careful hand and often an extra coat to look smooth. Knowing how the finish behaves helps determine coat count before opening the can.


Role of Surface Condition in Coat Application


The condition of the surface being painted can silently increase the number of coats needed. Walls with peeling paint, cracks, or uneven textures absorb paint unevenly, creating inconsistent patches. Even small imperfections become noticeable after the first coat dries, making a second or third pass necessary for a clean finish.


Prepping the wall by sanding, patching, or washing it down can make a huge difference. A clean, smooth wall holds paint more effectively, reducing waste and the need for extra layers. Time spent on preparation often pays off in fewer coats and better results.


When to Consider Additional Paint Layers for Durability


In high-traffic areas like hallways, kitchens, or children's rooms, more paint coats mean better durability. Even if a wall looks good after one coat, adding another can protect it against daily wear and tear. More layers create a thicker barrier that resists moisture, scuffs, and stains longer than a single application.


Exterior surfaces, too, benefit from extra layers. Wind, rain, and sun can wear down paint faster outdoors, and more coats offer extended protection. Taking time to apply additional coats in these zones ensures the paint job lasts, reducing the need for touch-ups or re-dos.


Cost vs. Quality—Balancing Coats for Lasting Results


Using cheaper paint often leads to more coats. Lower-quality formulas have less pigment and weaker binders, which affects how well they cover and how long they last. It may seem cost-effective initially, but by the third or fourth coat, the savings vanish. Investing in a high-quality product up front often means fewer coats and less labor overall.


Balancing cost and quality also involves thinking about the long-term. A quality paint job done with the right number of coats lasts years longer than a rushed one. Fewer repaints down the road means lower overall maintenance costs and better-looking walls for longer.


Give Your Walls the Professional Touch with Revive Painting—Reliable, Beautiful, and Built to Last


Choosing how many coats of paint to apply shouldn’t feel like a guessing game. Every wall, room, and project has its own story—and the team at Revive Painting knows how to read it. Whether it’s matching bold new colors or refreshing tired surfaces, our experienced painters understand the subtle details that make a job last. We prepare surfaces the right way, choose premium paints, and apply every coat with purpose.


Revive Painting doesn’t just deliver pretty walls—we deliver smart, durable solutions backed by years of hands-on expertise. From choosing finishes that match your space to deciding the exact number of coats needed for lasting beauty, they handle it all with professionalism and care. Contact us today to schedule your consultation and bring your space to life with confidence. Visit Revive Painting to learn more and get started.


By Revive Painting January 9, 2026
You might wonder why bathroom ceiling paint keeps peeling. Our team at Revive Painting and Wallpaper sees this frustrating problem in Saskatoon homes quite often. Your bathroom creates unique challenges that other rooms don't face. The ongoing battle between moisture and ceiling paint explains why bathrooms can show signs of paint failure within months, even after a fresh coat. How steam and condensation weaken paint Your relaxing morning shower might be your bathroom ceiling's worst enemy. Hot water creates steam that rises and settles on the cooler ceiling surface. This isn't just a temporary fog – it starts breaking down your paint. Many homeowners don't realize this damage isn't visible right away. Steam quietly softens the paint film and makes it lose elasticity and strength over time. The science behind bathroom ceiling paint peeling makes sense – moisture gets between paint layers and breaks the bond between paint and ceiling. This wet-dry cycle makes paint expand and contract until it loses its grip. The situation gets worse when steam cools into tiny droplets that either evaporate or seep behind the paint layer. Since this happens every day, sometimes multiple times, damage builds up until the paint finally gives way. Water doesn't just affect the surface – it makes paint flake, especially on bathroom ceilings. Moisture that seeps through paint coats causes layers to separate from the surface, which leads to bulging, cracking, and peeling. The role of poor ventilation in paint failure Our team at Revive Painting has found that many ceiling problems come from poor ventilation. People often think having an exhaust fan solves moisture problems. Reality proves this wrong. A weak fan, dusty fan, or one that runs only during showers can't remove moisture effectively. Bad ventilation traps humidity that slowly damages visible surfaces and hidden materials. Mirrors that stay foggy long after your shower signal that humid air remains trapped instead of being pulled out. Bathrooms without windows must rely on extractor fans to clear damp air. Underpowered or inconsistent fan use lets moisture settle on walls and ceilings, which damages paintwork. Paint lasts longer when rooms dry fully between showers, but many bathrooms can't achieve this naturally. Without good airflow, even high-quality paint will peel, grow mildew, or become discolored. Common paint types that don't hold up in bathrooms Using the wrong paint spells trouble in bathroom environments. Our experience at Revive Painting shows certain finishes fail no matter how well they work elsewhere in homes. Flat or matte finishes cause the biggest problems – they soak up moisture like a sponge and let mildew grow. Their porous surface lets moisture seep in, which causes swelling, mildew, and stains. Never use regular flat white paint on bathroom ceilings. These formulas pack more pigment particles but fewer resins and binders. This gives rich colors and low shine but makes them vulnerable to moisture damage. They also can't handle cleaning well – hard scrubbing leaves shiny or silvery marks. Regular ceiling paint doesn't last in steamy bathrooms because it lacks special properties needed for these tough conditions. Standard interior paints without moisture resistance break down quickly. Bathroom ceilings need high-performance solutions built to handle daily moisture and humidity. How to Prepare the Ceiling Before Any Fix A solid prep job is the foundation for fixing bathroom ceiling paint peeling . Our team at Revive Painting and Wallpaper has seen many Saskatoon homeowners try quick fixes that don't last more than a few months. Take it from us - good preparation makes the difference between a patch job and a permanent solution. Scraping off all loose and flaking paint The bathroom ceiling restoration starts with removing every bit of loose paint. We use paint scrapers at a 30-degree angle to lift away all the loose material. A wire brush helps tackle stubborn spots that won't budge with the scraper alone. Note that covering peeling paint never works - it's just a band-aid solution that won't stop the spread. Years of working on Saskatoon homes have taught us to be meticulous during this stage. Safety comes first when scraping your bathroom ceiling. You'll need goggles and a dust mask to protect yourself from falling debris and paint particles. The ceiling should be checked again a day after the first scraping since more areas tend to loosen up. Sanding the surface to smooth out edges Sanding turns those rough, uneven edges into a smooth surface after scraping. We begin with 150-grit sandpaper for the first pass. This medium grit effectively blends the areas between scraped and unscraped parts of the ceiling. A final pass with 220-240 grit sandpaper creates that perfectly smooth finish. Simple bathroom ceilings might only need a sanding block. Surfaces with extensive damage call for a palm sander that's light enough to use overhead without tiring your arms. The key is gentle sanding that creates an even surface for the new paint to stick. Cleaning the ceiling with sugar soap or mild detergent The prep work ends with a deep clean. Sugar soap works best for bathroom ceiling preparation because it removes grease, dirt, and residue effectively. We mix one part sugar soap with ten parts warm water to create the perfect cleaning solution. Our team works in methodical sections from top to bottom while cleaning bathroom ceilings. Clean water removes any leftover sugar soap residue. Some products claim you can skip rinsing before painting, but an extra rinse creates the best surface for paint adhesion . A proper cleaning job eliminates hidden barriers between your ceiling and new paint, like bathroom grime and sanding dust. These three steps set the stage for lasting repairs that actually work. Steps to Fix Peeling Bathroom Ceiling Paint Permanently Your bathroom ceiling is ready for its permanent fix! At Revive Painting and Wallpaper, we have mastered our bathroom ceiling restoration process by working on countless Saskatoon homes. Let's take a closer look at the steps that will transform your peeling ceiling into a beautiful, lasting finish. Filling cracks and holes with patching compound The first step to fix bathroom ceiling paint peeling requires proper attention to cracks and holes. We start by slightly widening straight cracks with a utility knife to help the filler stick better. Next, we smooth out patching compound with a putty knife until the surface becomes even. The compound needs to dry overnight before moving forward. Deep cracks might need a second layer to create a perfectly level surface. Applying a finishing skim for a level surface A thin, uniform coat of all-purpose joint compound goes on the entire ceiling surface after filling the cracks. This vital step creates a level base for your new paint. We recommend using a setting-type compound like Durabond 90 or Easy Sand in bathrooms because it resists bubbling when exposed to moisture. The first coat must dry completely before we check for spots that need more attention. Sanding again for a smooth finish The ceiling needs sanding with 220-grit sandpaper once the skim coating dries. This step creates that perfectly smooth surface you want. Your finished ceiling's quality depends on proper sanding - rough spots or visible lines will show through the final paint coat. Need help? Let us (Revive Wallpaper and Painting) take care of it! Priming with a moisture-resistant bonding primer The right primer plays a vital role in long-term success when combined with proper preparation. Our team only uses moisture-resistant bonding primers like KILZ Kitchen & Bath in bathrooms. This special primer creates a mildew-resistant film that guards against future moisture issues. Regular primers just don't handle bathroom conditions well. We apply primer evenly across the ceiling to ensure the topcoat sticks properly and looks uniform. Painting with anti-mold, humidity-resistant paint Anti-mold, humidity-resistant paint made specifically for bathrooms goes on last. Products like Zinsser PERMA-WHITE guarantee mold and mildew protection for 5 years with proper application. We apply two full coats of semi- gloss paint for best results. Flat or eggshell finishes absorb moisture, so we never use them. Semi-gloss creates a protective barrier that stops moisture from damaging the paint, which prevents future flaking, cracking, and peeling. The surface needs 24 hours without shower use after painting, and you should avoid scrubbing it for at least 7 days while it cures properly. How to Prevent Peeling Paint from Coming Back Fixing bathroom ceiling paint peeling properly the first time is just as important as preventing it. Our team at Revive Painting and Wallpaper has seen many Saskatoon homeowners who can't solve their recurring ceiling problems. Let us share what we've learned to help your ceiling stay fresh longer. Improving bathroom ventilation and airflow Good ventilation is the best way to prevent moisture damage. You should run your exhaust fan during showers and keep it running 10-15 minutes after to remove humid air. A portable dehumidifier can be a great solution for bathrooms that don't have enough ventilation. These devices pull moisture from the air and reduce paint damage risks significantly. Your bathroom mirrors staying foggy long after showering shows there's trapped humidity that will damage your paint job eventually. Choosing the right paint for high-moisture areas Bathroom conditions need special paint - that's just a fact. We only use moisture-resistant formulas that contain mildew-resistant additives made specifically for humid spaces. Products like Aura Bath & Spa or Tikkurila Luja Matt 7 Anti-Mold paint resist moisture exceptionally well. Bathroom-specific paints with Color Lock Technology and burnish resistance help maintain beauty even in steamy conditions. Inspecting caulk and sealing gaps regularly Caulking plays a vital role in stopping water infiltration. You should check your bathroom caulking every year for cracks, peeling, or discoloration. Silicone caulk works better than acrylic latex in bathrooms because it resists water and mold better. Quick action on caulking problems stops water from getting behind surfaces and ruining paint. Finding it tricky to handle yourself? Revive Wallpaper and Painting is here to help! Letting each coat dry fully before the next  Paint jobs fail when you rush between coats. Each paint type needs specific drying time - latex and acrylic paints usually need 1-2 hours between coats and take 2-3 weeks to cure completely. Good airflow helps optimal drying, so keep those fans running and windows open when possible. Too complicated for you? Let us help! Contact our painting team in Saskatoon today.
bathroom repaint in Saskatoon home
By Revive Painting December 18, 2025
Interior painting projects are a major investment when you want to refresh your home. You need to understand the actual costs to plan your budget and avoid surprises in your next painting project. What is the average cost per square foot? The cost of painting per square foot ranges between CAD 2.79 and CAD 8.36. These prices vary because many things affect the final cost beyond your wall size. Wall painting costs between CAD 1.39 and CAD 5.57 per square foot, while ceiling work runs from CAD 1.05 to CAD 3.48 per square foot. Trim and door painting needs more precision and time, so it costs about CAD 2.79 to CAD 6.97 per linear foot. A 1,000 square foot home costs between CAD 3,901.41 and CAD 4,458.75 to paint. Larger homes around 1,500 square feet need between CAD 5,573.44 and CAD 9,056.84. A 2,000 square foot home can cost between CAD 7,663.48 and CAD 11,843.56. Even a single room of about 150 square feet will cost between CAD 766.35 and CAD 1,393.36. How pricing has changed in recent years Paint prices have gone up steadily in the last few years. Raw material costs have risen for paint makers, leading to higher retail prices. Supply chain issues from the pandemic still affect material costs and availability. Labor costs have also increased as skilled workers are in high demand and wages keep rising. Better quality paints with improved durability, coverage, and environmental standards are now common. These premium products cost more upfront but offer better value because they last longer and need fewer touch-ups. Why square footage is only part of the story Square footage helps estimate costs, but it's just the beginning. Your wall's condition plays a big role in the final price. Walls with cracks, holes, water damage, or peeling paint need extra prep work, which adds time and materials. Room complexity matters as much as size. High ceilings, detailed trim work, built-in shelving, or decorative moldings need special attention and techniques that increase labor costs. The number of paint coats varies with colors too. Dark or bright colors usually need multiple coats, especially over lighter shades. Paint quality is a vital cost factor. Cheap paint might save money now but often needs more coats and frequent repainting. Premium paints from trusted brands give better coverage and last longer. Labor makes up the biggest part of interior painting costs —usually 60% to 90% of the total. This covers not just painting but all prep work: moving furniture, protecting floors, cleaning walls, scraping, sanding, and priming. This careful preparation takes time but gives you flawless, lasting results that stand out from DIY work. Breaking Down the Cost of Materials Material costs make up much of your interior painting budget and account for 15-25% of the total project expense. A detailed understanding of these costs helps you plan your next painting project better. Paint types and their price ranges Paint prices vary based on quality, brand, and formulation. You truly get what you pay for with interior paint. Budget latex paints cost around CAD 20.90 to CAD 34.83 per gallon. These paints need more coats and don't last as long. Quality options from Sherwin-Williams and Benjamin Moore range between CAD 69.67 and CAD 111.47 per gallon. They deliver excellent durability and coverage. High-end paints cost from CAD 125.40 to CAD 167.20 per gallon. To name just one example, see Benjamin Moore's Aura Interior Paint at CAD 157.44 per 3.79L can. This ultra-premium line offers unmatched color and longevity. Their Ben Interior Paint costs around CAD 105.88 per 3.79L and strikes a balance between quality and cost. Oil-based paints cost between CAD 34.83 and CAD 97.54 per gallon. These paints are less common now but work great in high-traffic areas and trim work despite their higher VOC content. How many coats are typically needed Paint coat numbers affect your material costs by a lot. Professional painters suggest two coats on most surfaces to get the best color and durability. This rule applies even with premium products because multiple thin coats work better than one thick layer. Some situations need different approaches. Quality paint might need just one coat when you're painting a wall the same color. New drywall needs one coat of primer plus two coats of paint. Dark to light color changes could need up to six coats without proper priming. Textured walls use the same number of coats as smooth ones but need more paint per square foot—sometimes double. Good surface preparation cuts down the coats you'll need, which saves time and money. Additional materials: primer, tape, drop cloths Your project needs several key materials beyond paint. Primer costs about CAD 13.93 per quart and covers around 100 square feet per coat. This investment reduces topcoat needs, especially with stains or big color changes. Painter's tape costs from CAD 11.13 for basic 3M ScotchBlue to CAD 18.10 for premium FrogTape Multi-Surface. Drop cloths protect floors and furniture well. Canvas options are best at CAD 32.03 to CAD 83.59. Plastic sheeting costs less at CAD 19.49 to CAD 32.03 for multi-packs. These extra materials usually cost between CAD 278.67 and CAD 418.01 for DIY projects. Professional painters include these costs in their estimates or add them separately at lower rates than retail. Estimating gallons based on surface area Accurate paint calculations prevent supply runs and waste. One gallon usually covers 300-400 square feet of smooth wall. Textured surfaces need more paint, often covering just 200-300 square feet per gallon. Major paint manufacturers offer online calculators that are a great way to get precise amounts. These tools consider wall size, doors, windows, and coat numbers. A quick method is to divide total square footage by 300-400 to find gallons needed, plus extra for touch-ups. A 1,500 square foot home needs about 8-12 gallons of paint. This amount assumes normal coverage rates and two coats. Note that trim and ceiling paint needs separate calculations because these surfaces have different coverage rates and often use different products. Labor Costs: The Largest Piece of the Puzzle Labor costs make up 75% to 95% of what you'll pay for any interior painting project. Knowing how painters price their work helps you plan your budget and value their expertise. Hourly rates for painters in Saskatoon Recent employment data shows professional painters in our area charge between CAD 18.00 and CAD 33.00 per hour. The typical rate sits at CAD 24.00. Independent surveys paint an even better picture - painters earn CAD 33.27 per hour on average. These rates show how much skill goes into professional painting. The rates keep going up as more people want quality work done. How experience and crew size affect pricing Experience changes labor costs a lot. New painters with 1-3 years of experience charge about CAD 59,233 yearly (around CAD 28.48 per hour). Seasoned painters with 8+ years under their belt earn up to CAD 97,310 yearly (about CAD 46.78 per hour). Yes, it is worth paying more for expertise. Experienced painters work faster and deliver better results with fewer mistakes that could get pricey to fix. The size of the painting crew affects both time and cost. A painter working alone takes 10-16 hours to finish a standard room because they must do each task one after another. A team can knock out the same job in 4-6 hours. Teams might charge more per hour, but they often cost the same or less overall because they finish faster. Time estimates for different room sizes A standard 12×12 bedroom with 8-foot ceilings takes pros 6-10 hours to paint. They spend 2-3 hours on prep work, 1-2 hours cutting in, 2-4 hours rolling, and 1-2 hours cleaning up. Bigger rooms or high ceilings need more time - sometimes 1-2 full days of work. Why prep and cleanup time matters Prep work takes time but it's crucial. Good prep work accounts for about 80% of what makes a paint job great. Painters must move furniture, protect surfaces, clean walls, fix flaws, and tape trim before they open a paint can. Pro painters know that rushing prep work leads to poor results. Paint itself only costs about 20% of your total project - labor makes up the other 80%. The time spent on proper preparation will give a paint job that lasts and looks great, making every dollar spent on labor worth it. Overhead, Profit, and Business Costs Running a successful painting business needs more than just materials and labor. You must understand the financial framework that supports your operations. Many business owners overlook overhead costs, yet these significant expenses affect every square foot price calculation. What overhead includes for painting contractors A painting business has many hidden costs that go far beyond brushes and paint. Monthly overhead makes up about 10% of your total costs. Everything you need to run the business has costs - insurance premiums average CAD 696.68 monthly, office space or storage facilities run about CAD 2,438.38 monthly. Vehicle maintenance and fuel costs typically reach 20% of revenue. Marketing expenses can hit 30% of revenue. Business software subscriptions and administrative staff wages add to these costs. Even small operations need simple overhead like tools, utilities (around CAD 100 monthly), and marketing expenses (about CAD 139.34 weekly). These costs help create accurate estimates that keep your business profitable. Factoring in your own salary as a business owner Many painting contractors make one big mistake - they don't include their compensation in overhead calculations. As owner and operator, you should receive 15% to 18% of your business's total revenue. You likely handle multiple roles - business owner (15% share), salesperson (7-8%), production manager (5-7%), and administrative tasks (3-5%). Each role deserves separate pay. Your business sustainability suffers when you leave out your salary from estimates - you end up working for free. Calculate a company labor rate that covers all costs, including fair compensation. Setting a sustainable profit margin Net profit margins in painting businesses range between 13% and 27%. Poorly managed operations can drop below 13%. A gross profit margin above 45% helps maintain good profitability. The most successful contractors keep labor costs around 40% of revenue with materials at about 15%. Industry experts suggest adding a 15% profit buffer to estimates. This buffer isn't extra - it's vital for your business to last and grow. Your estimates should target at least 15% cash flow as the business owner. This ensures each project properly contributes to overhead costs and reasonable profit. Creating Accurate Estimates for Clients The success of painting businesses depends on creating accurate estimates. Your profits rely on precise quotes. Clients need to trust your painting cost per square foot calculations. Why site visits are essential On-site assessments eliminate guesswork that comes with phone or email estimates. A walkthrough helps you spot vital details like wall damage, complex trim work, and moisture problems that affect your pricing. You can take exact measurements instead of depending on numbers from clients. The difference between 8-foot and 12-foot ceilings adds hundreds more square feet per room. This oversight can get pricey if missed. Site visits build trust with potential clients and show your professionalism right from the start. Using digital tools and calculators New estimating software makes calculations more accurate and cuts down office work. Painters can calculate material quantities, labor needs, and project schedules with these digital solutions. Specialized software makes the job easier than using rulers and calculators. It automatically factors in doors, windows, and multiple coats. These tools boost accuracy by using databases and ground costs, which prevents expensive estimation mistakes. How to present a professional quote A professional estimate should spell out everything in the job: preparation, materials, labor, and cleanup. Your quote must include branding, contact details, and clear terms. This builds credibility with clients looking for interior painting services. Digital tools create polished, consistent documents that showcase your company's professionalism. We are Revive Painting & Wallpaper, Saskatoon's local painters, get a quote from us today. Avoiding underbidding and scope creep Underbidding starts a harmful cycle. Winning jobs but losing money leads to cutting corners and damages your reputation. The solution is to add a 5-15% buffer in estimates for unexpected issues. Clear documentation of included and excluded items helps manage scope creep. A well-laid-out change management process helps evaluate and implement adjustments when needed. Well-documented scope statements with pre-approved clauses protect everyone from misunderstandings. Find the Cost of Your Home Want to know the real cost of refreshing your home's interior? A proper budget calculation based on your space will help you plan your painting project better. Room size and complexity play a key role in determining costs. A standard bedroom (12' x 12') costs CAD 557.34 for walls, CAD 139.34 for ceilings, and CAD 222.94 for baseboards. Larger primary bedrooms (16' x 14') cost more at CAD 696.68 for walls. Kitchen and dining area walls average CAD 766.35, while living rooms (18' x 22') run about CAD 919.62. Your home's condition affects the final price significantly. Wall repairs add CAD 55.73 per hour to your estimate. Crown moldings cost an extra CAD 0.91 per linear foot. Sherwin-Williams and Benjamin Moore's online calculators are a great way to get quick estimates. These tools help you figure out material quantities and professional costs based on your measurements. The full picture depends on preparation needs. Quick identification of wall damage, repairs, and space complexity leads to more accurate pricing. We are Revive Painting & Wallpaper, Saskatoon's local painters. Let us give you a quote today. Our detailed assessment looks at all these factors to give you exact pricing without surprises—making sure your interior painting investment brings both beauty and value.