How to Choose the Best Paint for High Traffic Areas: A Guide for Homeowners

Revive Painting • October 7, 2025

Did you know that high-traffic areas in homes need a paint review every 2 to 4 years? The best paint choice for high traffic areas goes beyond looks—it protects your investment from daily wear and tear.


Durability should be your top priority for high traffic areas. Acrylic latex paints create a strong surface that resists chipping and cracking, which makes them perfect for spaces under constant stress. Satin and semi-gloss finishes work best for high traffic areas because they balance durability with style effectively. Saskatoon's extreme seasonal changes put extra stress on interior surfaces, so picking the right paint matters even more for lasting results.


We created this detailed guide to help homeowners. Our years of experience as Saskatoon's painting contractors taught us which paints last longest in busy homes. Interior paint lasts 5 to 10 years based on quality, preparation, and maintenance, but busy areas face unique challenges that need special solutions. High-quality, durable paints and finishes can extend the time between repaints, which reduces disruption and maintenance costs over time.


Understanding High-Traffic Areas in Your Home


High-traffic areas are the foundations of your home's daily function. These spaces see the most movement and face natural wear from everyday life. You need to spot and understand these busy zones before picking the right paint that will last for years.


What qualifies as a high-traffic area?


Your home's busy spots are places with steady movement from family and visitors. The front door sees everyone coming and going. Hallways link different rooms together. Your kitchen hosts meal prep and family gatherings. Living rooms bring people together often. Bathrooms get used a lot and deal with moisture. These active spaces work like your home's central hub and host most of your daily life. Saskatoon homes face extra stress during winter. Boots, coats, and gear create more wall contact as people move through tight spaces. Your mudroom and entrance need extra care since they're always exposed to tracked-in dirt and outdoor elements.


Common wear and tear issues in busy spaces


Walls in busy areas show many problems you won't see in quieter parts of your home. Scuffs, fingerprints, and spills top the list of common issues. On top of that, moving furniture and daily activities leave marks that regular cleaning can't fix. Floors take a beating just from people walking. You'll notice tiny scratches from foot traffic and dents where beds, couches, and tables sit. Kitchen surfaces show faded spots near stove controls, light counter scratches, and loose knobs. Bathroom surfaces have their own issues - foggy mirrors, discolored grout, and slight rust on fixtures from humidity. Even careful families will see paint fade and dull in these spots over time.


Why these areas need special paint considerations


Busy areas just need finishes that can handle regular cleaning and daily wear without damage. Regular wall paint isn't enough here since people touch and clean these spots all the time. Knowing how to clean your walls without ruining the paint is vital, as these areas attract messes. Saskatoon's weather shifts from humid summers to very dry winters. This puts extra stress on paint in busy areas as temperature and moisture changes speed up wear. Commercial-grade acrylic or latex paints stick well, flex right, and resist cracking - perfect for active households. Special coatings give you an even tougher surface in very busy spots. The right paint keeps these areas looking fresh with less upkeep, saving your time and money down the road.


Choosing the Best Paint for High Traffic Areas


Your walls' fresh look in busy areas depends on choosing the right paint. Learning about paint features helps you make smart choices that save money and prevent headaches later.


What is the best paint for high traffic areas?


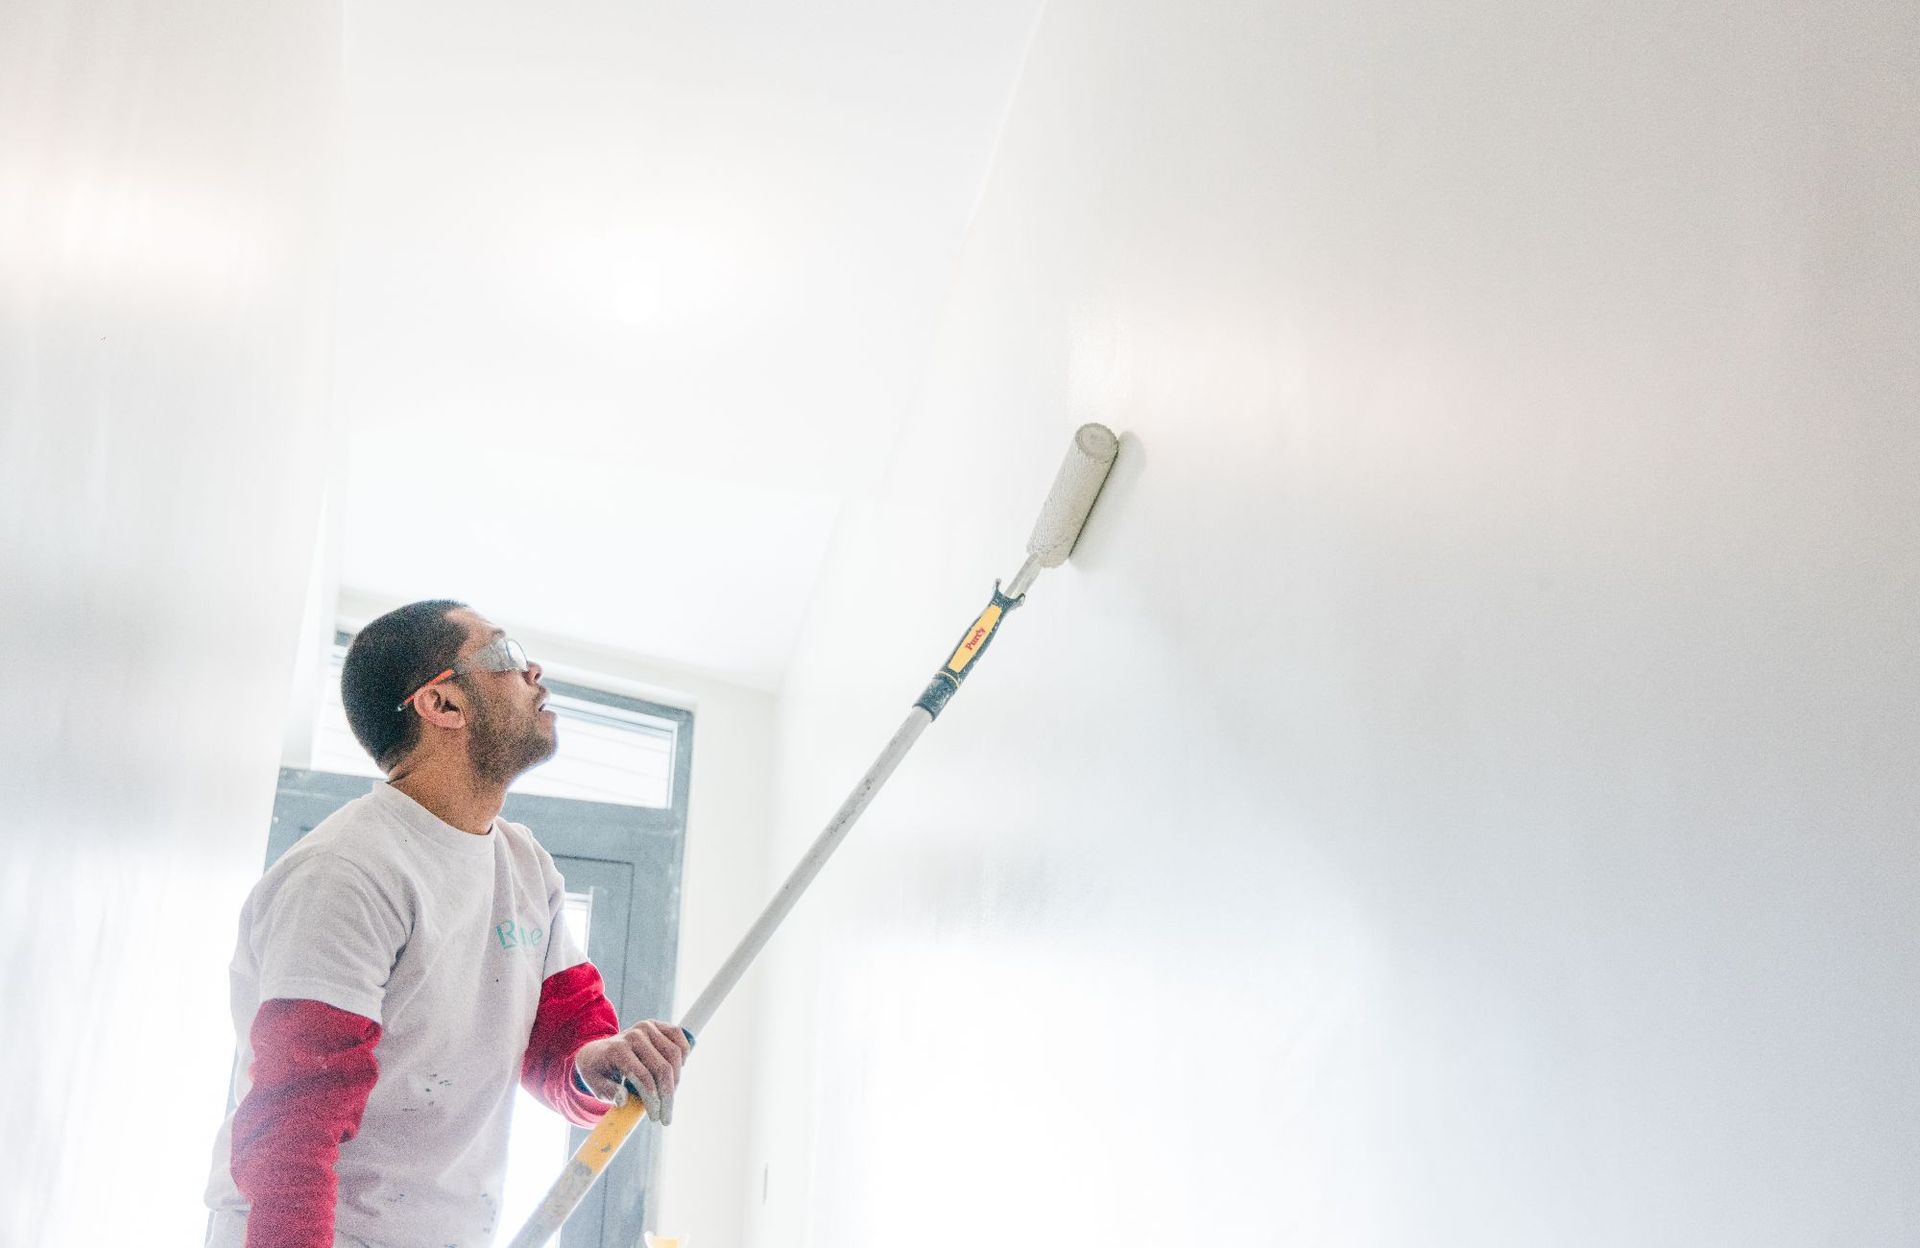
The best paint for busy areas needs to be both durable and easy to clean. Paint with scuff-resistant technology lets you wipe away marks without hurting the finish. Satin and semi-gloss paints work best in active spaces because they fight dirt, stains, and handle regular cleaning well. These choices give you a smooth, polished look while protecting against daily wear. Semi-gloss creates an elegant, bright surface with a tough finish that resists moisture, fading, and stains. Benjamin Moore's Scuff-X has shown great results in homes with kids, pets, and busy entrances.


Types of paint that offer durability and washability


Modern washable paints come with stain-fighting technology that keeps common marks at bay. You can clean these walls with just soap and water without losing color or damaging the surface. Quality washable paints stay bright even with frequent cleaning - this matters a lot in family homes. Semi-gloss finishes resist moisture better than other options, which makes them perfect for kitchens and bathrooms. Satin finishes, also known as eggshell, give you a smooth, velvety look that lasts, with just enough shine. Commercial-grade acrylic or latex paints provide the best protection with excellent sticking power, flexibility, and crack resistance.


How Saskatoon's climate affects paint performance


Paint in Saskatoon faces unique challenges. Your home deals with big swings between very dry winters and humid summers, which can speed up wear in high-traffic spots. These weather changes make moisture-resistant paint formulations valuable to keep your walls in good shape. Paint in busy areas must handle these seasonal changes while standing up to daily wear. Quality paints with extra durability features are worth the higher price tag because they last longer in our local weather conditions.


Selecting the Right Finish and Color


The right finishing touches can transform how your painted surfaces handle everyday wear and tear. The finish you pick matters just as much as paint quality, especially in areas that see heavy use.


Best paint finish for high traffic areas


Busy spaces need durable finishes, and satin and semi-gloss options shine here. A satin finish gives you a soft, velvety look that resists scuffs while adding subtle depth to your space. Semi-gloss works even better with its reflective surface, making it ideal for trim, doors, and cabinets that often collect fingerprints and bumps. Eggshell finishes give you the sweet spot between durability and subtle elegance, with more luster than flat paints but without too much shine.


How finish affects durability and cleaning


Here's a simple truth: shinier finishes are tougher and easier to clean. Glossier surfaces resist stains better and you can wipe them clean without leaving marks. Flat or matte finishes look great at hiding wall flaws but become tricky to clean without damaging the surface. These lower-sheen options work best in quieter, adult spaces rather than busy family areas.


Color choices that hide scuffs and stains


Earth tones naturally hide dirt and wear because they blend with what they're covering. Warm neutrals like taupe and beige hold up well against scuffs. If you want more color, olive and sage greens create a calm feel while hiding imperfections. Muted blues absorb just enough light to minimize flaws yet keep spaces looking fresh.


Balancing esthetics with practicality


Saskatoon's homes face unique challenges from seasonal humidity changes, so paint must handle both weather shifts and daily use. Mid-range colors prove most practical - they don't show white scuffs like dark paints or dark marks like light colors do. Benjamin Moore's Scuff-X has shown excellent results in real-life use, fighting off oils and dirt for years. Paint samples should be tested under both natural and artificial light since colors can look different from morning to evening.


Preparing and Maintaining Painted Surfaces


Good preparation forms the foundations of any lasting paint job in high-traffic areas of your home. Your paint won't deliver its promised durability without proper prep work.


Steps for proper surface preparation


A flawless finish starts with cleaning. You should empty the room completely or move furniture to the center and cover it with plastic sheeting instead of drop cloths. Clean off all dirt, grease, and previous paint residue that might affect adhesion. Walls with imperfections—common in Saskatoon's older homes—need holes and cracks filled before painting. Shallow dents (less than 1/8-inch) need spackling while deeper imperfections require epoxy wood filler. Sand between coats with non-clogging 180-220 grit sandpaper to get rid of bubbles and ridges.


Cleaning and touch-up strategies


Regular dusting with a vacuum's brush attachment keeps your painted surfaces clean and prevents buildup. Most surfaces respond well to cleaning with mild soap and warm water. Note that flat and matte finishes need gentler treatment than semi-gloss or satin finishes. Stubborn stains come off naturally with a baking soda and water solution without damaging the paint. Touch-ups work best with the original paint and application method—if you rolled the paint originally, use a mini-roller for touch-ups.


How often to repaint high-traffic areas


High-traffic zones need assessment for repainting every 2-4 years. Saskatoon homes typically need hallway and entryway repainting every 3-4 years because of scuffs and dings. Kitchens and bathrooms also follow this 3-4 year cycle due to humidity and cooking residue exposure. Doors, trim, and baseboards show wear fastest, so plan to refresh these high-touch areas every 2-4 years. Revive Painting & Wallpaper - Saskatoon offers experienced interior painters who know how our local climate affects paint performance.


When to call a professional painter in Saskatoon


Experienced professional painters are your best bet. Older Saskatoon homes often have wall imperfections that need expert attention to achieve perfectly smooth surfaces. Expert help becomes crucial for high or hard-to-reach areas where DIY attempts might lead to water damage or injury. You should also get professional help if you're unsure whether an issue is just cosmetic or points to structural problems.


Let Us Help


The right paint choice for high-traffic areas will make the most important difference in your home's durability against daily wear and tear. Acrylic latex paints with satin or semi-gloss finishes are the best options for busy households. These paints give you that perfect balance of durability and esthetic appeal. The specialized formulas resist scuffs and clean up easily. They keep looking fresh despite constant touching, moving furniture, and the inevitable spills that come with family life.


Saskatoon's unique climate creates extra challenges for painted surfaces during seasonal changes. The temperature swings from harsh winters to warm summers make walls expand and contract. Standard paints have trouble holding up, especially in busy areas that see lots of traffic. Quality paint designed for durability becomes crucial for homeowners in our region. These superior products cost more up front but ended up saving money. They extend the time between repainting well past the usual 2-4 year mark.


You need proper prep work and upkeep to get the most life from your paint, whatever quality product you pick. Your painted surfaces will last longer with regular gentle cleaning and the right solutions. Paint will show wear over time and need refreshing. Revive Painting & Wallpaper - Saskatoon's experienced interior painters know our local climate conditions inside and out. They will help you pick the perfect paint solutions for your high-traffic spots. Professional application will give you the best performance from your investment and that fresh, clean look that makes your house feel like home.  Contact us!


painting beige wall in home
By Revive Painting February 19, 2026
Choosing the Perfect Beige and Warm Taupe Paint Colours Beige and warm taupe paint colours offer versatile neutral foundations that adapt to different lighting conditions and design styles. These colors range from creamy beiges with golden undertones to sophisticated greiges that blend gray and beige elements. Understanding Beige, Greige, and Taupe Beige paint colours contain warm undertones of yellow, gold, or red that create inviting spaces. These shades work particularly well in rooms with abundant natural light, where they develop a soft, sun-kissed appearance. Greige combines gray and beige to produce a modern neutral that feels less traditional than pure beige. Greige paint colours offer more versatility in contemporary spaces while maintaining warmth through their beige undertones. Taupe sits between brown and gray, often featuring subtle purple or green undertones. Warm taupe variants lean toward brown with hints of red or yellow, making them ideal for cozy atmospheres. Cool taupes incorporate more gray, which can feel less welcoming in spaces lacking natural light. The key difference lies in undertones. We recommend testing paint samples on multiple walls and observing them throughout the day to see how lighting affects each shade's appearance. Popular Warm Beige and Taupe Paint Colours Sherwin Williams Accessible Beige stands as one of the most popular neutral paint colors. This warm beige strikes a balance between beige and taupe, making it adaptable to various design styles. Benjamin Moore Edgecomb Gray offers a greige option with warm undertones that shift between beige and gray depending on lighting. Revere Pewter provides another greige alternative with slightly cooler tones. For true warm beiges, we recommend: Sherwin Williams Balanced Beige - warm versatile shade Benjamin Moore Manchester Tan - rich creamy beige Sherwin Williams Kilim Beige - warm with golden undertones Benjamin Moore Shaker Beige - soft traditional beige Sherwin Williams Perfect Greige delivers exactly what its name suggests. Bungalow Beige , Wool Skein , and Grant Beige offer warmer alternatives, while Muslin and Sherwin Williams Natural Linen provide softer, fabric-inspired neutrals. Nomadic Desert brings earthy warmth for those seeking richer tones. Best Paint Colors for a Cozy Home Atmosphere Warm beige paint creates cozy sanctuaries by reflecting light softly while maintaining depth. Colors with golden or yellow undertones enhance this effect, particularly in living rooms and bedrooms where relaxation matters most. Accessible Beige and Balanced Beige work well in spaces with moderate to high natural light. These best beige paint colors pair beautifully with natural wood elements and earthy decor. For rooms with less light, we suggest Manchester Tan or Kilim Beige . Their stronger warm undertones prevent spaces from feeling dull or flat. Edgecomb Gray suits modern homes seeking warmth without traditional beige appearance. The greige paint color adapts to different lighting while maintaining a welcoming feel. Layer these neutral paint colors with textured fabrics, plants, and warm wood tones to maximize coziness. The best beige paint colors serve as foundations that let other design elements shine while providing consistent warmth throughout your home. Making Your Home Feel Cozy and Inviting Creating a cozy home starts with selecting paint colors that provide warmth and versatility, then enhancing those choices with thoughtful decor, proper testing, and an understanding of how light affects your space. Creating a Neutral Backdrop for Every Room We've found that the best neutral paint colors create a foundation that works throughout your entire home. A neutral backdrop allows us to change decor without repainting, saving time and money. When choosing neutrals, we need to consider the undertones. Warm beige paint colors with golden or yellow undertones create inviting spaces, while warm grays offer a modern feel without coldness. The key is understanding what "neutral" means for your specific style. The most versatile neutral backdrops include: Beige with subtle gray undertones for balanced warmth Warm grays that lean slightly beige rather than blue Natural linen tones that mimic organic textures Greige colors that blend the best of both worlds We recommend using LRV (Light Reflectance Value) to understand how bright or dark a color will appear. Colors with an LRV of 50-60 provide enough depth without making rooms feel heavy. The beauty of a neutral backdrop is its flexibility. We can pair it with sage green accents for a natural vibe or add rich wood tones for traditional warmth. Using Warm Golden and Earthy Hues Warm golden and earthy hues instantly transform rooms into welcoming retreats. These colors work because they mimic natural elements like sunlight, sand, and clay. We love using beige undertones with hints of gold or honey. These shades catch natural light beautifully, creating a gentle glow throughout the day. Unlike cool neutrals, warm beige paint makes spaces feel lived-in and comfortable. Earthy tones in the brown family ground a room. We can use them as accent walls or throughout entire spaces for maximum coziness. Terracotta, warm tan, and soft caramel all fall into this category. Consider these combinations: Golden beige walls with cream trim Warm taupe throughout with white ceilings Earthy brown accent wall with lighter beige surrounding walls Color trends come and go, but warm earth tones remain timeless. They've been popular for decades because they create the emotional response we want in our homes. Cozy Home Decor Pairings and Accents Our paint colors work best when we pair them with complementary decor. Natural materials enhance the warmth of beige and taupe walls. Wood furniture in medium to dark tones creates beautiful contrast against warm neutrals. Oak, walnut, and cherry all bring out the golden undertones in our paint choices. We also love natural linen curtains and upholstery, which add texture without competing visually. Metal finishes matter too. Brass, gold, and warm bronze hardware look stunning against warm beige paint and taupe walls. These finishes reflect light and add subtle luxury. Our favorite accent combinations: Sage green pillows and throws against warm beige Cream and ivory textiles for a layered neutral look Deep navy or forest green as bold contrast colors Natural fiber rugs in jute or sisal We can also add cozy elements through lighting. Warm-toned bulbs (2700K-3000K) enhance golden hues in paint, while table lamps with fabric shades create pools of soft light. Testing Paint Samples and Considering Lighting We never skip testing paint samples before committing to a full room. Colors look completely different on walls than they do on small chips. Paint large samples (at least 2x2 feet) directly on your walls. We observe them for at least 48 hours, checking how they look in morning light, afternoon sun, and evening artificial light. This reveals the true character of beige undertones and how warm grays shift throughout the day. North-facing rooms receive cooler light, which can make warm beige paint appear more gray. South-facing rooms get warm, direct light that intensifies golden tones. We adjust our color choices based on these conditions. Our testing checklist includes:
applying two coats of paint on wall
By Revive Painting February 8, 2026
Let us share some paint coating basics that will save you time, money, and frustration before you pick up that paintbrush. Our team at Revive Painting & Wallcovering has watched many DIY projects go wrong because homeowners didn't know how many coats they needed. Here's everything you should know about this common confusion. When one coat might be enough People often ask us if they can get away with just one coat. The answer is yes – but only in specific situations. One coat might be enough if you're painting over a surface that has the same color and sheen, especially with existing paint in excellent condition. This works best in spare bedrooms or hallways where you don't need much durability. High-quality paints with premium formulations can sometimes give you good coverage in a single coat, especially with products that have higher solids content. You might also get by with one application for small touch-ups and quick cosmetic refreshes, but only with the exact same batch and color. Notwithstanding that manufacturers claim "one-coat coverage," these claims rarely work in real-life applications. You might save some money upfront with one coat, but it usually disappoints in its final appearance and costs more because you'll need to repaint sooner. Why two coats is the standard The science behind two-coat standard makes perfect sense to professionals like me. Your first coat builds the foundation – it seals surface pores, evens out texture, and starts the color transition. The second coat gives you accurate color and uniform sheen while covering roller marks and subtle streaks that show up under angled light. Two paint coats create a protective film that handles cleaning, scrubbing, and humidity exposure well. This becomes vital in your kitchen's and bathroom's high-use areas. Paint manufacturers design their products to reach a specific dry film thickness between 3 and 4 mils for homes, and a single coat usually gives you just half that thickness. Two properly applied thinner coats will always look better than one heavy application. Heavy paint application to get one-coat coverage often causes sagging, takes longer to dry, and cures poorly. Even premium "one-coat" products like Behr Marquee or Sherwin-Williams Emerald need two coats to honor their warranties. Your second coat builds up the film strength and improves durability and washability by a lot. This fuller film protects against moisture, ultraviolet damage, and scratches, giving you a longer-lasting paint job and better value over time. How color changes affect coverage Color changes affect the number of coats you'll need. Light colors over dark surfaces typically need more coats for complete coverage – sometimes three or more. The difference between your current color and desired shade plays a big role. Bright reds, oranges, and yellows create unique challenges because they use translucent organic pigments with poor opacity naturally. Even the best paints might need three or more coats to get these colors right. Benjamin Moore suggests using tinted primers for these colors to reduce the finish coats needed. Whites and light colors need special attention too. These colors reflect light and show every flaw, making two uniform coats essential for consistency and a smoother finish, especially under bright lights. A tinted primer can help reduce topcoats needed for dramatic color changes – gray-tinted primer works great when going from light to dark colors. My experience with clients in Saskatoon shows that knowing these basics saves both time and money while giving results that last. The number of coats you choose affects more than just looks—it determines protection, lifespan, and overall maintenance costs. Prepare the Surface for Better Coverage The perfect paint job starts well before you pick up your first brush. Our team at Revive Painting & Wallcovering in Saskatoon has learned that proper surface preparation determines the number of paint coats you'll need. Quality paint can't fix poorly prepared walls. Check wall condition and texture Getting a full picture of your walls is vital. Look at the whole surface to spot cracks, peeling paint, or uneven textures that could ruin your final result. Fresh paint won't hide these flaws—they'll stand out even more once you add color. You'll need to scrape away loose material from cracks or peeling spots, add spackle, then sand until everything's smooth. This detailed prep work might feel slow, but it cuts down the number of paint coats you'll need to achieve a flawless finish. Clean walls let paint stick properly. People often skip this step and end up needing extra coats because the paint won't bond well. Start by dusting with a clean towel or hoovering up loose debris with a brush attachment. Next, use a gentle cleaning solution—mix some baking soda and vinegar or mild dishwashing liquid for most surfaces. Kitchen walls or greasy areas might just need a stronger detergent. Mildew needs immediate attention—don't try to paint over it. The mildew will grow right through new paint layers and create bigger headaches down the road. Mix three to four parts water with one part bleach, put on protective gear, and tackle that mildew before painting. How many coats of primer on new drywall New drywall creates special challenges that affect your paint coat count. Drywall soaks up paint like a sponge, which leads to patchy coverage and wasted paint. Professional painters recommend at least two coats of latex primer on new drywall. This method creates an even base that seals the surface and stops the topcoat from soaking in unevenly. Primer does more than help paint stick—it builds a consistent foundation so your paint color looks true while using fewer topcoats. Drywall mud joints absolutely need primer to prevent "flashing"—those annoying shiny spots in your final paint job. Primer costs nowhere near as much as quality paint per gallon, making it an economical step that saves money over time. When to use primer and when to skip it Not every paint job needs primer, despite what DIY guides might say. Walls in great shape with a similar or lighter color might work fine with high-quality self-priming paint. All the same, primer can boost durability and give you an even sheen. Some situations just need primer: Bare surfaces like new drywall, wood, or metal Big color changes, especially going from dark to light Walls with water damage, smoke, or grease stains Patched or fixed areas Glossy or oil-painted surfaces Primer becomes your best friend during dramatic color changes. The sort of thing I love about tinted primer is how it cuts down topcoat needs when switching between dark and light colors. Without it, old colors can play tricks—like blue walls under yellow paint creating an unexpected green tinge. Note that primer does more than help paint stick—it evens things out, blocks stains, and lets your paint color shine through properly. Well-primed surfaces usually need fewer coats of paint, which saves time and money on your project. Choose the Right Paint and Tools My 15 years as a professional painter at Revive Painting & Wallcovering taught me something valuable - your choice of paint and tools makes a huge difference in the number of coats needed. The right materials can turn a week-long project with multiple store runs into a simple weekend job. How much does a gallon of paint cover You need to know about paint coverage to plan your project properly. Most major manufacturers say one gallon covers 350-400 square feet in a single coat. These numbers change quite a bit based on several things. Premium paints give you better coverage than budget options. Cheaper paints might look like a good deal at first, but you'll need extra coats that wipe out any savings. The surface texture really changes how much paint you'll use. Rough surfaces like stucco need almost double the paint compared to smooth, primed drywall. We've seen this firsthand in our Saskatoon projects - fresh primed surfaces get close to that 400 square foot maximum, while unprimed walls only cover about 300-325 square feet per gallon. Artist-quality paints teach home painters a vital lesson - quality makes all the difference. Better products have more pigment and superior resins, so you need fewer coats. Student-grade paints might cost half as much but need three times more product to get the same results. That's why at Revive Painting & Wallcovering, we only use premium paints. They save our clients money by cutting down on labor and materials. Using a paint calculator to estimate quantity Paint calculators are a great way to get accurate estimates for both pros and DIY fans. You'll find free online calculators from Sherwin-Williams, Benjamin Moore, and Behr that give you spot-on estimates. These tools just need some simple measurements - each wall's length and width, plus how tall your ceilings are. The math is pretty simple if you want to do it yourself: multiply each wall's length by its height, then add everything together for your total square footage. Take a typical 12' x 14' room with 8' ceilings as an example: 2 x (12 x 8) + 2 x (14 x 8) = 416 square feet. After you get the total square footage, divide it by how much one gallon covers (usually 350-400 square feet) to figure out your paint needs. Our example room would need 416 ÷ 375 = 1.1 gallons per coat. Most quality paint jobs need two coats to look good and last long, so you'd need about 2.2 gallons total. I always tell people to add 10% extra for spills, touch-ups, and uneven spots. This buffer has saved many projects from annoying mid-job store runs. Looking at our 416 square foot room, you'd need roughly 2.4 gallons - so grab three gallons to be safe. Brush vs. roller: which gives better coverage The choice between brush and roller isn't just about coverage. Rollers handle big areas faster, but brushes work better in certain spots. A good brush gives you more control, uses less paint, and works better on textured surfaces than rollers do. A fully-loaded roller should cover about 9 square feet of wall. Rollers spread paint more evenly with fewer visible marks than brushes, which makes them perfect for large, flat areas. Brushes shine when you're working around trim, corners, and ceilings where you need precision more than speed. Your roller choice really matters for coverage quality. Smooth walls and glossy finishes work best with a 1/4-inch nap, while textured surfaces need 1/2 or 3/4-inch naps to fill all the gaps. High-quality microfiber roller covers hold and release more paint evenly, so you get smoother results and better coverage with fewer coats. Paint manufacturers might promise one-coat coverage, but my work at Revive Painting & Wallcovering shows that two thin coats always look better than one thick one. This stays true whether you're using a brush or roller. Going for one-coat coverage usually leads to thick, uneven paint that drips, sags, and takes forever to dry. Apply Paint the Right Way Your paint selection and surface preparation are done. Now the way you apply the paint will determine if you get professional results with fewer coats. We at Revive Painting & Wallcovering have mastered techniques that deliver smooth, streak-free finishes on walls throughout Saskatoon. How to paint a wall without streaks The quickest way to get streak-free walls depends on proper technique and paint application. Load your roller evenly—it should be saturated but not dripping. You need to apply paint generously. A time to reload comes when you're pressing hard on the roller to get paint on the wall. The "W" or "M" method works best for smooth results. Roll paint in this pattern first, then fill gaps with straight strokes. This approach prevents uneven distribution and creates consistent coverage. While cutting in edges, press your loaded brush firmly to apply a thicker layer about 1 to 1.5 inches from the border. Then lightly feather the paint to the edge. Don't overwork the paint since it starts drying right after application. Work in manageable 3-foot by 3-foot sections to spot touch-up areas before they dry. You can prevent roller lines by gently rolling back over visible trails in the opposite direction. How long between coats of paint Time between coats is vital for a durable finish. Latex paints need 2-4 hours before you apply a second coat. Oil-based paints take much longer—about 24 hours between applications. Rushing creates peeling paint, uneven color, or bubbling from trapped moisture. Weather conditions affect these timeframes significantly. High humidity makes drying periods longer. Each coat must dry completely until the color looks uniform across the surface. Tips for maintaining a wet edge A "wet edge" technique helps achieve seamless results. This means you need to apply new paint next to areas that haven't dried yet. Missing this step creates lap marks—visible lines where wet paint meets dried sections. You can maintain a wet edge by: Breaking walls into manageable sections Working quickly and methodically Planning breaks at natural interruptions like windows or corners Paint from "wet to dry" instead of the other way around for the best results. This method creates a smooth, uniform look without noticeable overlaps between sections. High-quality paints with better "wet edge" properties give you more time to work before drying starts, especially on large areas. Special Cases That May Need Extra Coats Some painting jobs just need extra attention and more coats whatever your prep work. My experience with Revive Painting & Wallcovering shows that standard two-coat applications don't always cut it. Painting over dark or bold colors Color changes from dark to light shades bring unique challenges. We painted over navy, charcoal, and burgundy to lighter neutrals and usually needed three or more coats for full coverage. Dark pigments tend to bleed through even quality paint, which leads to patchy and uneven results. You can cut down on topcoats by using tinted primers made for color transitions. A gray-tinted primer works better than pure white for bold colors. Textured or porous surfaces Texture makes paint consumption go up faster. You'll need extra coats on rough surfaces like unsealed concrete, textured drywall, and bare wood because they soak up paint quickly. Start by cleaning textured walls really well - vacuum first, then use TSP cleaner. Longer nap rollers (3/4" to 1½") work best since their fibers reach deep into textures and give better coverage. Seal porous materials with 2-3 coats of sealant or use a mist coat - paint mixed with 5-10% water - before painting. Ceilings, trims, and high-traffic areas Ceilings can be tricky, especially with stains or bare surfaces. You'll want stain-blocking primers for water marks or smoke damage. High-traffic spots need extra coats to last longer - two coats will give you a strong barrier against moisture, wear, and scrapes. These extra layers make cleaning easier and save money on maintenance. Need help? Let Revive Painting and Wallcovering handle your interior painting in Saskatoon. We know how to tackle challenging projects and deliver professional results without endless coats or poor coverage. Key Takeaways Understanding the right number of paint coats saves time, money, and ensures professional-quality results that last longer:  • Two coats is the professional standard - The first coat seals and evens texture, while the second delivers true color and durability • Surface preparation determines coat requirements - Clean, primed surfaces need fewer coats than unprepared walls with stains or damage • Color changes dramatically impact coverage needs - Dark to light transitions often require 3+ coats, while tinted primers reduce topcoat requirements • Quality paint and proper technique reduce coat count - Premium paints with higher solids content provide better coverage than budget alternatives • Special surfaces demand extra attention - Textured walls, ceilings with stains, and high-traffic areas typically need additional coats for optimal protection Investing in proper preparation, quality materials, and correct application techniques upfront prevents the frustration and expense of multiple repainting projects down the road.