The Right Waterproof Paint For Your Home

Revive Painting • August 26, 2025

Waterproof paint protects your home against extreme weather conditions, especially in regions like Saskatoon where we face everything from heavy rainfall to intense snowfall. Standard paint doesn't protect adequately and lasts only 3-5 years before it starts peeling and fading. High-quality waterproof exterior paint stays effective for 10+ years, even under the harshest weather conditions.

Our experience as exterior painting contractors shows how the right waterproof paint on wood outdoors and exterior walls makes the most important difference to your home's longevity. The best waterproof paint for exterior walls, particularly those with silicone-based formulations, doesn't just resist water—it actively repels it. Water beads up and runs off instead of penetrating the surface. Premium options like Emperor Paint are designed to be hydrophobic and can protect your home for up to 25 years. Your water resistant paint must maintain breathability, or it might trap moisture within your walls. In this piece, you'll learn about different types of outdoor waterproof paint, proper application techniques, and ways to pick the best product that matches your specific needs and climate conditions.

Understanding the Role of Waterproof Paint in Harsh Weather

Saskatoon's diverse climate puts your home's exterior through constant wear and tear. Let's get into why protecting your home matters and why waterproof paint is worth the investment.

Why standard paint fails in extreme climates

Moisture is standard paint's worst enemy. Regular paint doesn't have special ingredients to keep water out. This lets moisture seep through and damage what's underneath by a lot. Standard paints only last 3-5 years before they show clear signs of wear. When temperatures go up and down, regular paint can't flex properly. This makes it crack, peel, and fail too soon.

Regular paints also don't curb UV radiation well, which breaks down paint molecules. When UV light hits certain paint parts (called chromophores), it releases energy. This energy breaks bonds in the paint film and creates free radicals. The process makes colors fade, the film become brittle, and the coating break down. In wet or humid places, regular paint doesn't protect enough against mold and mildew that love damp spots.

How waterproof paint protects your home year-round

Waterproof paint creates a special barrier that pushes moisture away instead of soaking it up. This barrier keeps water from getting into walls, which means less cracking, fading, and peeling as time goes by. The paint has water-hating agents that make water form beads and roll off surfaces.

On top of that, good waterproof paint flexes with temperature changes. This helps it stay intact through different seasons. Many brands have UV-fighting pigments to keep colors from fading in the sun. Best of all, waterproof coatings last much longer—usually 8-12 years. Some premium products work for up to a decade. You'll spend less time repainting and your home stays protected better.

The difference between water-resistant and waterproof paint

These terms mean different things, though people often mix them up. Water-resistant paint keeps some water out but doesn't block moisture infiltration completely. It gives simple protection against occasional wetness but water can still get through. This makes it good enough for spots that don't get wet often. Water-resistant paint is usually 50-60 microns thick.

Waterproof paint, however, creates a complete seal against moisture. At over 100 microns thick, it forms a barrier nothing can get through. This makes it perfect for constant moisture exposure. Water-resistant options might be enough for mild conditions. But Saskatoon's harsh climate, with its long snow seasons, freeze-thaw cycles, and heavy rains, needs the maximum protection that only waterproof paint provides.

Types of Waterproof Paint and Their Best Uses

The paint market offers many specialized coatings that shield homes from moisture damage. Your project's success depends on the surface material, how exposed it is to elements, and how long you need the protection to last.

Acrylic latex: flexible and breathable

Acrylic latex paint is a versatile shield for exterior protection. This water-based formula creates a flexible barrier that moves with temperature changes, which stops cracking during Saskatoon's harsh seasons. Today's acrylic latex paints give excellent UV protection and work great on surfaces that get direct sunlight. They also create a breathable layer that lets water vapor escape but keeps liquid water out. High-end products like Sherwin-Williams Emerald Rain Refresh come with self-cleaning technology - dirt just washes away when it rains. A good application of acrylic latex paint protects against moisture, UV rays, and extreme temperatures. These paints are also better for the environment with lower VOC levels than oil-based options.

Elastomeric coatings: ideal for stucco and masonry

Elastomeric paint is a thick, specialized coating that works best on masonry surfaces. It's so flexible that it can bridge tiny cracks in vertical masonry walls. This feature makes it perfect for stucco homes that shift slightly over time. Quality elastomeric coatings can handle wind-driven rain up to 98 mph and create a waterproof barrier when applied right. The 100% acrylic latex formula creates a breathable layer that releases wall moisture, which stops mold from growing due to trapped dampness. You'll need spray equipment and thick coats to get elastomeric paint's full waterproofing benefits. These coatings work well on stucco, masonry, concrete, concrete block and brick.

Oil-based and alkyd paints: durable but less eco-friendly

Alkyd paints are known for their exceptional durability. They take about five days to cure through oxidation, creating a hard, glossy finish that latex paints can't match. This toughness makes them perfect for high-traffic areas that need frequent cleaning. Regular alkyd paints use petroleum-based solvents with high VOC levels, which isn't great for the environment. You'll need paint thinner instead of soap and water for cleanup. All the same, newer options like Benjamin Moore's ADVANCE® blend oil-based paint's smooth finish with easier cleanup. These hybrid products keep the weather-resistant durability while cutting down VOC levels.

Silicone-based masonry paint: superior water repellency

Silicone masonry paint shows off state-of-the-art waterproofing technology. These coatings excel at repelling water while letting the surface breathe. The silicone technology pushes away surface water but lets trapped moisture escape, which prevents blistering you might see with other coatings. These products flex easily and stop water from getting through even when surfaces move. Some silicone formulas are so tough they show no wear after simulated 25-year weather tests. Rain just rolls off these "super hydrophobic" surfaces instead of soaking in. They cost more than basic masonry paints, but their 20+ year lifespan makes them worth it.

Waterproof paint for wood outdoors: what to look for

Outdoor wood needs special waterproof formulas to stay protected. Good outdoor wood paint should keep rain out - some premium brands become rainproof just an hour after you apply them. Look for products with UV stabilizers that block harmful rays that make wood splinter and crack. Oil-based wood sealers take 48-72 hours to cure but give the best protection against water damage. Water-based options are easier to apply and clean up, with fewer fumes. The best outdoor wood paints combine color and protection, so you don't need a separate primer. Quality products guarantee up to 10 years of protection, which means less maintenance work for you.

Preparing and Applying Waterproof Paint for Maximum Protection

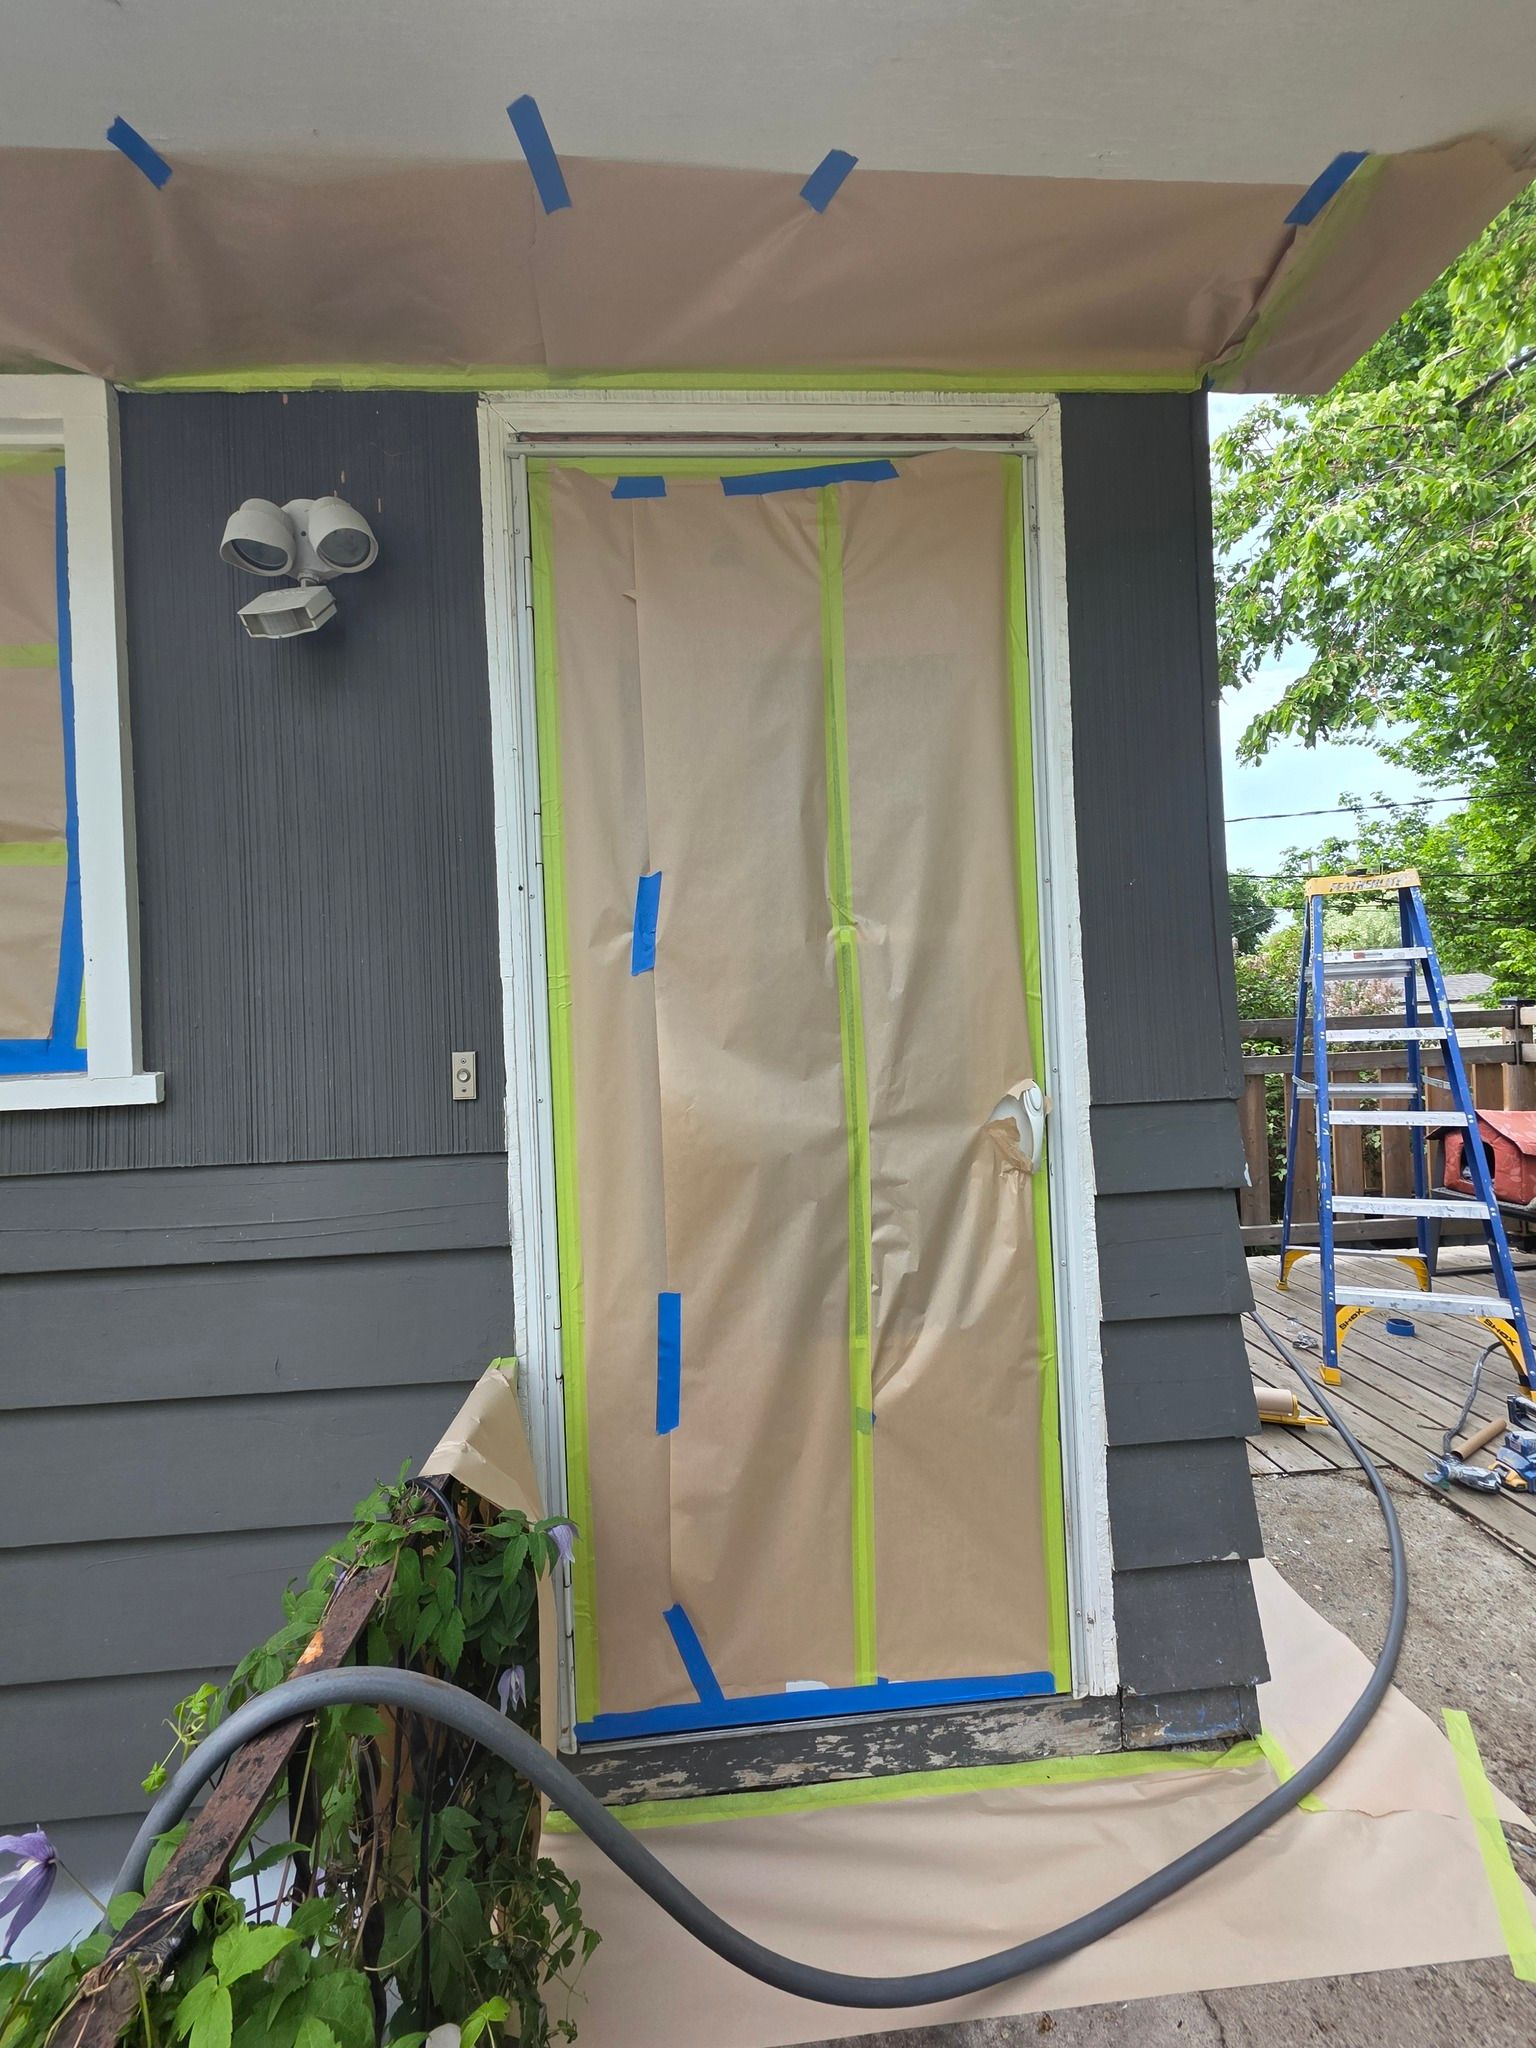
Good preparation is the life-blood of any successful waterproofing project. Our experience as Saskatoon painting contractors shows that poor surface prep often guides projects toward premature failure that can get pricey to fix.

Surface cleaning and repair essentials

A thorough visual inspection helps spot cracks, spalling, or surface contaminants. These spots need attention before any waterproof coating application. Concrete surfaces need a moisture check using a tape test to avoid adhesion problems. You must completely remove all dust, grease, oil, and loose particles. Previously painted surfaces require removal of any inconsistent or flaking parts that have weak mechanical properties.

Priming: at the time and why it matters

Quality priming is a crucial step many people skip. A good primer improves the bond between surface and paint to magnify durability and waterproofing properties. Primers also protect against leftover dampness. Porous substrates like plaster work best with acrylic primers, while epoxy primers give superior strength. H2O primers are the only choice for polystyrene surfaces before waterproof membrane installation.

Application tools: brushes, rollers, and sprayers

Surface and material type largely determine your tool selection. Phenolic core short-nap rollers work well for thin films. Brushes do the best job with details around penetrations and transitions in tight spots. Sprayers speed up application on large-scale projects with vertical walls. It's worth mentioning that elastomeric coatings behave differently from regular paint when spraying.

How many coats are enough?

Basement moisture protection typically needs at least two coats. High-risk areas might need extra layers. Manufacturer's warranties usually specify two coats. The surface needs inspection after the second coat to find pinholes that may need touch-ups.

Drying and curing: timing for best results

Paint formulation and environment affect drying times. Acrylic waterproofing paint dries in 2-4 hours and fully cures within 24 hours. Elastomeric paints need 4-8 hours between coats and take 24-48 hours to cure completely. Good ventilation helps speed up drying - you should open windows or run fans, especially in closed spaces. Waterproofing paints dry best between 10°C and 29°C.

Choosing the Right Product for Your Home and Climate

The perfect waterproof paint choice depends on your climate's challenges and your home's building materials. Saskatoon's dramatic temperature changes make this choice a vital part of protecting your home.

Top brands for waterproof exterior paint

Benjamin Moore's Aura Exterior line gives exceptional coverage that holds its color well in our harsh prairie climate. Sherwin-Williams SuperPaint and Duration Exterior Acrylic Latex are prominent choices that stick well and flex with extreme weather. Behr Premium Plus protects against weather and covers well with lower VOC content. Dulux Weathershield makes products that handle Canadian climate shifts and shield against UV rays and temperature swings.

Matching paint to surface: wood, brick, stucco, and more

Elastomeric coatings work best on masonry because they bridge cracks effectively. Oil-based paints create harder, longer-lasting finishes on wooden trim that sees heavy use. Stucco needs paint that's both breathable and waterproof. Never cover an entire stucco wall with elastomeric paint - it stops the wall from breathing properly. Our team at Revive Paint and Wallpaper assesses your home's materials to suggest the right waterproof solutions for each surface.

Eco-friendly and low-VOC options

People want more eco-friendly paint options these days. Low-VOC paints release fewer harmful chemicals, which makes them better for your family's health and the environment. The EPA limits VOC content in "low-VOC" latex paints to 250 grams per liter. Some great eco-friendly choices include ECOS Paint with zero VOCs and no smell, Benjamin Moore's Green Seal certified Eco Spec line, and the budget-friendly Behr Premium Plus with minimal VOCs.

Cost vs. longevity: what really saves money

Quality waterproof exterior paints last 8-12 years before they need a fresh coat. Basic options cost between CAD 34.83–CAD 55.73 per gallon. Premium elastomeric paints run from CAD 69.67–CAD 111.47 per gallon. Premium products cost more upfront but save money over time. Light-colored paints might even cut your summer cooling costs by reflecting more sunlight.

When to call a professional painting contractor

You might just need professional help with high spots, historic surfaces, or damaged areas that need fixing. Multi-unit buildings and commercial properties work better with professional painters because of their complexity. Professional painters also ensure proper application of specialty coatings and maintain color consistency across large areas to maximize durability and looks.

Conclusion

Your home's protection against Saskatoon's extreme weather needs more than regular paint—you just need specialized waterproof formulations that work with our unique climate challenges. Standard paints typically fail after just 3-5 years. High-quality waterproof alternatives can shield your home for a decade or more. The real difference shows up in water resistance, breathability, UV protection, and temperature adaptability. These qualities determine whether your exterior surfaces will stand strong against our harsh prairie conditions or break down too soon.

Quality waterproof paint creates a vital shield between your home and the elements. Acrylic latex works well for general use with its flexibility and breathability. Elastomeric coatings excel on masonry surfaces because they can bridge cracks effectively. Silicone-based formulas give superior water repellency and let trapped moisture escape. Each type has its specific purpose, and matching the right paint to your home's surfaces substantially extends your protection's lifespan. This careful selection process paired with proper prep and application will give your investment maximum value over time.

Professional expertise often marks the difference between okay results and exceptional protection when painting exteriors. Note that we at Revive Paint and Wallpaper, Saskatoon painting company, know our local climate's specific challenges and can suggest the best waterproof solutions for your situation. Premium waterproof paints might get pricey upfront, but they without doubt save money long-term by cutting down maintenance needs and preventing expensive structural damage.

Waterproof paint is your home's primary defense against our extreme weather. Your property represents a major investment, so choosing the right protective coating deserves careful attention. The peace of mind you get from knowing your home stands protected against all weather—driving rain, heavy snow, or intense summer heat—definitely makes quality products and proper application worth it. Your home deserves the best protection against Saskatoon's challenging climate.

FAQs

Q1. How long does waterproof exterior paint typically last? High-quality waterproof exterior paint can last 8-12 years before requiring repainting, with some premium products maintaining effectiveness for up to a decade or more.

Q2. What's the difference between water-resistant and waterproof paint? Water-resistant paint repels water to some extent but remains permeable, while waterproof paint forms a complete seal that prevents any moisture penetration, making it ideal for areas with constant moisture exposure.

Q3. Is waterproof paint suitable for all exterior surfaces? Different surfaces require specific types of waterproof paint. For example, elastomeric coatings are ideal for masonry, while specialized formulations are needed for wood. It's important to match the paint to the surface material for optimal protection.

Q4. Are there eco-friendly options for waterproof exterior paint? Yes, there are low-VOC and eco-friendly waterproof paint options available. These paints emit fewer harmful chemicals, making them healthier choices for both your family and the environment.

Q5. How many coats of waterproof paint are typically needed for effective protection? For optimal protection, a minimum of two coats is typically required. Some high-risk areas might need additional layers, and most manufacturers specify two coats for warranty purposes.


water proof paint for smart meter
masking door of home for painting
By Revive Painting January 9, 2026
You might wonder why bathroom ceiling paint keeps peeling. Our team at Revive Painting and Wallpaper sees this frustrating problem in Saskatoon homes quite often. Your bathroom creates unique challenges that other rooms don't face. The ongoing battle between moisture and ceiling paint explains why bathrooms can show signs of paint failure within months, even after a fresh coat. How steam and condensation weaken paint Your relaxing morning shower might be your bathroom ceiling's worst enemy. Hot water creates steam that rises and settles on the cooler ceiling surface. This isn't just a temporary fog – it starts breaking down your paint. Many homeowners don't realize this damage isn't visible right away. Steam quietly softens the paint film and makes it lose elasticity and strength over time. The science behind bathroom ceiling paint peeling makes sense – moisture gets between paint layers and breaks the bond between paint and ceiling. This wet-dry cycle makes paint expand and contract until it loses its grip. The situation gets worse when steam cools into tiny droplets that either evaporate or seep behind the paint layer. Since this happens every day, sometimes multiple times, damage builds up until the paint finally gives way. Water doesn't just affect the surface – it makes paint flake, especially on bathroom ceilings. Moisture that seeps through paint coats causes layers to separate from the surface, which leads to bulging, cracking, and peeling. The role of poor ventilation in paint failure Our team at Revive Painting has found that many ceiling problems come from poor ventilation. People often think having an exhaust fan solves moisture problems. Reality proves this wrong. A weak fan, dusty fan, or one that runs only during showers can't remove moisture effectively. Bad ventilation traps humidity that slowly damages visible surfaces and hidden materials. Mirrors that stay foggy long after your shower signal that humid air remains trapped instead of being pulled out. Bathrooms without windows must rely on extractor fans to clear damp air. Underpowered or inconsistent fan use lets moisture settle on walls and ceilings, which damages paintwork. Paint lasts longer when rooms dry fully between showers, but many bathrooms can't achieve this naturally. Without good airflow, even high-quality paint will peel, grow mildew, or become discolored. Common paint types that don't hold up in bathrooms Using the wrong paint spells trouble in bathroom environments. Our experience at Revive Painting shows certain finishes fail no matter how well they work elsewhere in homes. Flat or matte finishes cause the biggest problems – they soak up moisture like a sponge and let mildew grow. Their porous surface lets moisture seep in, which causes swelling, mildew, and stains. Never use regular flat white paint on bathroom ceilings. These formulas pack more pigment particles but fewer resins and binders. This gives rich colors and low shine but makes them vulnerable to moisture damage. They also can't handle cleaning well – hard scrubbing leaves shiny or silvery marks. Regular ceiling paint doesn't last in steamy bathrooms because it lacks special properties needed for these tough conditions. Standard interior paints without moisture resistance break down quickly. Bathroom ceilings need high-performance solutions built to handle daily moisture and humidity. How to Prepare the Ceiling Before Any Fix A solid prep job is the foundation for fixing bathroom ceiling paint peeling . Our team at Revive Painting and Wallpaper has seen many Saskatoon homeowners try quick fixes that don't last more than a few months. Take it from us - good preparation makes the difference between a patch job and a permanent solution. Scraping off all loose and flaking paint The bathroom ceiling restoration starts with removing every bit of loose paint. We use paint scrapers at a 30-degree angle to lift away all the loose material. A wire brush helps tackle stubborn spots that won't budge with the scraper alone. Note that covering peeling paint never works - it's just a band-aid solution that won't stop the spread. Years of working on Saskatoon homes have taught us to be meticulous during this stage. Safety comes first when scraping your bathroom ceiling. You'll need goggles and a dust mask to protect yourself from falling debris and paint particles. The ceiling should be checked again a day after the first scraping since more areas tend to loosen up. Sanding the surface to smooth out edges Sanding turns those rough, uneven edges into a smooth surface after scraping. We begin with 150-grit sandpaper for the first pass. This medium grit effectively blends the areas between scraped and unscraped parts of the ceiling. A final pass with 220-240 grit sandpaper creates that perfectly smooth finish. Simple bathroom ceilings might only need a sanding block. Surfaces with extensive damage call for a palm sander that's light enough to use overhead without tiring your arms. The key is gentle sanding that creates an even surface for the new paint to stick. Cleaning the ceiling with sugar soap or mild detergent The prep work ends with a deep clean. Sugar soap works best for bathroom ceiling preparation because it removes grease, dirt, and residue effectively. We mix one part sugar soap with ten parts warm water to create the perfect cleaning solution. Our team works in methodical sections from top to bottom while cleaning bathroom ceilings. Clean water removes any leftover sugar soap residue. Some products claim you can skip rinsing before painting, but an extra rinse creates the best surface for paint adhesion . A proper cleaning job eliminates hidden barriers between your ceiling and new paint, like bathroom grime and sanding dust. These three steps set the stage for lasting repairs that actually work. Steps to Fix Peeling Bathroom Ceiling Paint Permanently Your bathroom ceiling is ready for its permanent fix! At Revive Painting and Wallpaper, we have mastered our bathroom ceiling restoration process by working on countless Saskatoon homes. Let's take a closer look at the steps that will transform your peeling ceiling into a beautiful, lasting finish. Filling cracks and holes with patching compound The first step to fix bathroom ceiling paint peeling requires proper attention to cracks and holes. We start by slightly widening straight cracks with a utility knife to help the filler stick better. Next, we smooth out patching compound with a putty knife until the surface becomes even. The compound needs to dry overnight before moving forward. Deep cracks might need a second layer to create a perfectly level surface. Applying a finishing skim for a level surface A thin, uniform coat of all-purpose joint compound goes on the entire ceiling surface after filling the cracks. This vital step creates a level base for your new paint. We recommend using a setting-type compound like Durabond 90 or Easy Sand in bathrooms because it resists bubbling when exposed to moisture. The first coat must dry completely before we check for spots that need more attention. Sanding again for a smooth finish The ceiling needs sanding with 220-grit sandpaper once the skim coating dries. This step creates that perfectly smooth surface you want. Your finished ceiling's quality depends on proper sanding - rough spots or visible lines will show through the final paint coat. Need help? Let us (Revive Wallpaper and Painting) take care of it! Priming with a moisture-resistant bonding primer The right primer plays a vital role in long-term success when combined with proper preparation. Our team only uses moisture-resistant bonding primers like KILZ Kitchen & Bath in bathrooms. This special primer creates a mildew-resistant film that guards against future moisture issues. Regular primers just don't handle bathroom conditions well. We apply primer evenly across the ceiling to ensure the topcoat sticks properly and looks uniform. Painting with anti-mold, humidity-resistant paint Anti-mold, humidity-resistant paint made specifically for bathrooms goes on last. Products like Zinsser PERMA-WHITE guarantee mold and mildew protection for 5 years with proper application. We apply two full coats of semi- gloss paint for best results. Flat or eggshell finishes absorb moisture, so we never use them. Semi-gloss creates a protective barrier that stops moisture from damaging the paint, which prevents future flaking, cracking, and peeling. The surface needs 24 hours without shower use after painting, and you should avoid scrubbing it for at least 7 days while it cures properly. How to Prevent Peeling Paint from Coming Back Fixing bathroom ceiling paint peeling properly the first time is just as important as preventing it. Our team at Revive Painting and Wallpaper has seen many Saskatoon homeowners who can't solve their recurring ceiling problems. Let us share what we've learned to help your ceiling stay fresh longer. Improving bathroom ventilation and airflow Good ventilation is the best way to prevent moisture damage. You should run your exhaust fan during showers and keep it running 10-15 minutes after to remove humid air. A portable dehumidifier can be a great solution for bathrooms that don't have enough ventilation. These devices pull moisture from the air and reduce paint damage risks significantly. Your bathroom mirrors staying foggy long after showering shows there's trapped humidity that will damage your paint job eventually. Choosing the right paint for high-moisture areas Bathroom conditions need special paint - that's just a fact. We only use moisture-resistant formulas that contain mildew-resistant additives made specifically for humid spaces. Products like Aura Bath & Spa or Tikkurila Luja Matt 7 Anti-Mold paint resist moisture exceptionally well. Bathroom-specific paints with Color Lock Technology and burnish resistance help maintain beauty even in steamy conditions. Inspecting caulk and sealing gaps regularly Caulking plays a vital role in stopping water infiltration. You should check your bathroom caulking every year for cracks, peeling, or discoloration. Silicone caulk works better than acrylic latex in bathrooms because it resists water and mold better. Quick action on caulking problems stops water from getting behind surfaces and ruining paint. Finding it tricky to handle yourself? Revive Wallpaper and Painting is here to help! Letting each coat dry fully before the next  Paint jobs fail when you rush between coats. Each paint type needs specific drying time - latex and acrylic paints usually need 1-2 hours between coats and take 2-3 weeks to cure completely. Good airflow helps optimal drying, so keep those fans running and windows open when possible. Too complicated for you? Let us help! Contact our painting team in Saskatoon today.
bathroom repaint in Saskatoon home
By Revive Painting December 18, 2025
Interior painting projects are a major investment when you want to refresh your home. You need to understand the actual costs to plan your budget and avoid surprises in your next painting project. What is the average cost per square foot? The cost of painting per square foot ranges between CAD 2.79 and CAD 8.36. These prices vary because many things affect the final cost beyond your wall size. Wall painting costs between CAD 1.39 and CAD 5.57 per square foot, while ceiling work runs from CAD 1.05 to CAD 3.48 per square foot. Trim and door painting needs more precision and time, so it costs about CAD 2.79 to CAD 6.97 per linear foot. A 1,000 square foot home costs between CAD 3,901.41 and CAD 4,458.75 to paint. Larger homes around 1,500 square feet need between CAD 5,573.44 and CAD 9,056.84. A 2,000 square foot home can cost between CAD 7,663.48 and CAD 11,843.56. Even a single room of about 150 square feet will cost between CAD 766.35 and CAD 1,393.36. How pricing has changed in recent years Paint prices have gone up steadily in the last few years. Raw material costs have risen for paint makers, leading to higher retail prices. Supply chain issues from the pandemic still affect material costs and availability. Labor costs have also increased as skilled workers are in high demand and wages keep rising. Better quality paints with improved durability, coverage, and environmental standards are now common. These premium products cost more upfront but offer better value because they last longer and need fewer touch-ups. Why square footage is only part of the story Square footage helps estimate costs, but it's just the beginning. Your wall's condition plays a big role in the final price. Walls with cracks, holes, water damage, or peeling paint need extra prep work, which adds time and materials. Room complexity matters as much as size. High ceilings, detailed trim work, built-in shelving, or decorative moldings need special attention and techniques that increase labor costs. The number of paint coats varies with colors too. Dark or bright colors usually need multiple coats, especially over lighter shades. Paint quality is a vital cost factor. Cheap paint might save money now but often needs more coats and frequent repainting. Premium paints from trusted brands give better coverage and last longer. Labor makes up the biggest part of interior painting costs —usually 60% to 90% of the total. This covers not just painting but all prep work: moving furniture, protecting floors, cleaning walls, scraping, sanding, and priming. This careful preparation takes time but gives you flawless, lasting results that stand out from DIY work. Breaking Down the Cost of Materials Material costs make up much of your interior painting budget and account for 15-25% of the total project expense. A detailed understanding of these costs helps you plan your next painting project better. Paint types and their price ranges Paint prices vary based on quality, brand, and formulation. You truly get what you pay for with interior paint. Budget latex paints cost around CAD 20.90 to CAD 34.83 per gallon. These paints need more coats and don't last as long. Quality options from Sherwin-Williams and Benjamin Moore range between CAD 69.67 and CAD 111.47 per gallon. They deliver excellent durability and coverage. High-end paints cost from CAD 125.40 to CAD 167.20 per gallon. To name just one example, see Benjamin Moore's Aura Interior Paint at CAD 157.44 per 3.79L can. This ultra-premium line offers unmatched color and longevity. Their Ben Interior Paint costs around CAD 105.88 per 3.79L and strikes a balance between quality and cost. Oil-based paints cost between CAD 34.83 and CAD 97.54 per gallon. These paints are less common now but work great in high-traffic areas and trim work despite their higher VOC content. How many coats are typically needed Paint coat numbers affect your material costs by a lot. Professional painters suggest two coats on most surfaces to get the best color and durability. This rule applies even with premium products because multiple thin coats work better than one thick layer. Some situations need different approaches. Quality paint might need just one coat when you're painting a wall the same color. New drywall needs one coat of primer plus two coats of paint. Dark to light color changes could need up to six coats without proper priming. Textured walls use the same number of coats as smooth ones but need more paint per square foot—sometimes double. Good surface preparation cuts down the coats you'll need, which saves time and money. Additional materials: primer, tape, drop cloths Your project needs several key materials beyond paint. Primer costs about CAD 13.93 per quart and covers around 100 square feet per coat. This investment reduces topcoat needs, especially with stains or big color changes. Painter's tape costs from CAD 11.13 for basic 3M ScotchBlue to CAD 18.10 for premium FrogTape Multi-Surface. Drop cloths protect floors and furniture well. Canvas options are best at CAD 32.03 to CAD 83.59. Plastic sheeting costs less at CAD 19.49 to CAD 32.03 for multi-packs. These extra materials usually cost between CAD 278.67 and CAD 418.01 for DIY projects. Professional painters include these costs in their estimates or add them separately at lower rates than retail. Estimating gallons based on surface area Accurate paint calculations prevent supply runs and waste. One gallon usually covers 300-400 square feet of smooth wall. Textured surfaces need more paint, often covering just 200-300 square feet per gallon. Major paint manufacturers offer online calculators that are a great way to get precise amounts. These tools consider wall size, doors, windows, and coat numbers. A quick method is to divide total square footage by 300-400 to find gallons needed, plus extra for touch-ups. A 1,500 square foot home needs about 8-12 gallons of paint. This amount assumes normal coverage rates and two coats. Note that trim and ceiling paint needs separate calculations because these surfaces have different coverage rates and often use different products. Labor Costs: The Largest Piece of the Puzzle Labor costs make up 75% to 95% of what you'll pay for any interior painting project. Knowing how painters price their work helps you plan your budget and value their expertise. Hourly rates for painters in Saskatoon Recent employment data shows professional painters in our area charge between CAD 18.00 and CAD 33.00 per hour. The typical rate sits at CAD 24.00. Independent surveys paint an even better picture - painters earn CAD 33.27 per hour on average. These rates show how much skill goes into professional painting. The rates keep going up as more people want quality work done. How experience and crew size affect pricing Experience changes labor costs a lot. New painters with 1-3 years of experience charge about CAD 59,233 yearly (around CAD 28.48 per hour). Seasoned painters with 8+ years under their belt earn up to CAD 97,310 yearly (about CAD 46.78 per hour). Yes, it is worth paying more for expertise. Experienced painters work faster and deliver better results with fewer mistakes that could get pricey to fix. The size of the painting crew affects both time and cost. A painter working alone takes 10-16 hours to finish a standard room because they must do each task one after another. A team can knock out the same job in 4-6 hours. Teams might charge more per hour, but they often cost the same or less overall because they finish faster. Time estimates for different room sizes A standard 12×12 bedroom with 8-foot ceilings takes pros 6-10 hours to paint. They spend 2-3 hours on prep work, 1-2 hours cutting in, 2-4 hours rolling, and 1-2 hours cleaning up. Bigger rooms or high ceilings need more time - sometimes 1-2 full days of work. Why prep and cleanup time matters Prep work takes time but it's crucial. Good prep work accounts for about 80% of what makes a paint job great. Painters must move furniture, protect surfaces, clean walls, fix flaws, and tape trim before they open a paint can. Pro painters know that rushing prep work leads to poor results. Paint itself only costs about 20% of your total project - labor makes up the other 80%. The time spent on proper preparation will give a paint job that lasts and looks great, making every dollar spent on labor worth it. Overhead, Profit, and Business Costs Running a successful painting business needs more than just materials and labor. You must understand the financial framework that supports your operations. Many business owners overlook overhead costs, yet these significant expenses affect every square foot price calculation. What overhead includes for painting contractors A painting business has many hidden costs that go far beyond brushes and paint. Monthly overhead makes up about 10% of your total costs. Everything you need to run the business has costs - insurance premiums average CAD 696.68 monthly, office space or storage facilities run about CAD 2,438.38 monthly. Vehicle maintenance and fuel costs typically reach 20% of revenue. Marketing expenses can hit 30% of revenue. Business software subscriptions and administrative staff wages add to these costs. Even small operations need simple overhead like tools, utilities (around CAD 100 monthly), and marketing expenses (about CAD 139.34 weekly). These costs help create accurate estimates that keep your business profitable. Factoring in your own salary as a business owner Many painting contractors make one big mistake - they don't include their compensation in overhead calculations. As owner and operator, you should receive 15% to 18% of your business's total revenue. You likely handle multiple roles - business owner (15% share), salesperson (7-8%), production manager (5-7%), and administrative tasks (3-5%). Each role deserves separate pay. Your business sustainability suffers when you leave out your salary from estimates - you end up working for free. Calculate a company labor rate that covers all costs, including fair compensation. Setting a sustainable profit margin Net profit margins in painting businesses range between 13% and 27%. Poorly managed operations can drop below 13%. A gross profit margin above 45% helps maintain good profitability. The most successful contractors keep labor costs around 40% of revenue with materials at about 15%. Industry experts suggest adding a 15% profit buffer to estimates. This buffer isn't extra - it's vital for your business to last and grow. Your estimates should target at least 15% cash flow as the business owner. This ensures each project properly contributes to overhead costs and reasonable profit. Creating Accurate Estimates for Clients The success of painting businesses depends on creating accurate estimates. Your profits rely on precise quotes. Clients need to trust your painting cost per square foot calculations. Why site visits are essential On-site assessments eliminate guesswork that comes with phone or email estimates. A walkthrough helps you spot vital details like wall damage, complex trim work, and moisture problems that affect your pricing. You can take exact measurements instead of depending on numbers from clients. The difference between 8-foot and 12-foot ceilings adds hundreds more square feet per room. This oversight can get pricey if missed. Site visits build trust with potential clients and show your professionalism right from the start. Using digital tools and calculators New estimating software makes calculations more accurate and cuts down office work. Painters can calculate material quantities, labor needs, and project schedules with these digital solutions. Specialized software makes the job easier than using rulers and calculators. It automatically factors in doors, windows, and multiple coats. These tools boost accuracy by using databases and ground costs, which prevents expensive estimation mistakes. How to present a professional quote A professional estimate should spell out everything in the job: preparation, materials, labor, and cleanup. Your quote must include branding, contact details, and clear terms. This builds credibility with clients looking for interior painting services. Digital tools create polished, consistent documents that showcase your company's professionalism. We are Revive Painting & Wallpaper, Saskatoon's local painters, get a quote from us today. Avoiding underbidding and scope creep Underbidding starts a harmful cycle. Winning jobs but losing money leads to cutting corners and damages your reputation. The solution is to add a 5-15% buffer in estimates for unexpected issues. Clear documentation of included and excluded items helps manage scope creep. A well-laid-out change management process helps evaluate and implement adjustments when needed. Well-documented scope statements with pre-approved clauses protect everyone from misunderstandings. Find the Cost of Your Home Want to know the real cost of refreshing your home's interior? A proper budget calculation based on your space will help you plan your painting project better. Room size and complexity play a key role in determining costs. A standard bedroom (12' x 12') costs CAD 557.34 for walls, CAD 139.34 for ceilings, and CAD 222.94 for baseboards. Larger primary bedrooms (16' x 14') cost more at CAD 696.68 for walls. Kitchen and dining area walls average CAD 766.35, while living rooms (18' x 22') run about CAD 919.62. Your home's condition affects the final price significantly. Wall repairs add CAD 55.73 per hour to your estimate. Crown moldings cost an extra CAD 0.91 per linear foot. Sherwin-Williams and Benjamin Moore's online calculators are a great way to get quick estimates. These tools help you figure out material quantities and professional costs based on your measurements. The full picture depends on preparation needs. Quick identification of wall damage, repairs, and space complexity leads to more accurate pricing. We are Revive Painting & Wallpaper, Saskatoon's local painters. Let us give you a quote today. Our detailed assessment looks at all these factors to give you exact pricing without surprises—making sure your interior painting investment brings both beauty and value.